Instructions (Continued)
Other Uses & Add-ons:
1. Add the Wimberley M-4 Macro Arm Module™ by attaching it to, or substituting it for, the M-3 Tilt Arm. This allows you to add
more flash positioning versatility to your telephoto photography (Fig. 6).
2. You can also make a Macro Bracket by removing the M-3 Tilt Arm and adding the M-4 Macro Arm to the M-9 quick-release
module (Fig. 7). Note: the quick-release knob on the M-9 is larger than that of the M-1; this may cause clearance issues in certain configurations.
3. The Wimberley M-6 Extension Post Module™ is a simple post that allows you to extend the height of your flash. The M-
6 Module attaches to the vertical arm of your flash bracket using the same captive fastener system found on several other mod-
ules in the system. The M-6 gives you up to 5” of extension to help you reduce red eye or “steel eye” in your subjects. It can also
help you elevate and extend a flash unit outside a window or blind. If you desire more extension, you can stack extension posts
to get the height you need, and pairs fit together for compact storage.
Positioning your Flash:
The Modular Flash Bracket System design allows you to easily disassemble brackets for convenient storage. It also allows you to
adjust the size of the bracket to fit different sized lenses. The M-3 Tilt Arm module can be adjusted in the keyed slots of the M-9
Module to increase or decrease the height of the flash unit. Adjust the vertical position of the Tilt Arm on the M-9 for telephoto
lenses of different sizes. Flip the Tilt Arm upside down to lower the flash even further (if you do this, you must remove the silver
thumbscrew that holds the flash in place and reinstall it from the opposite side).
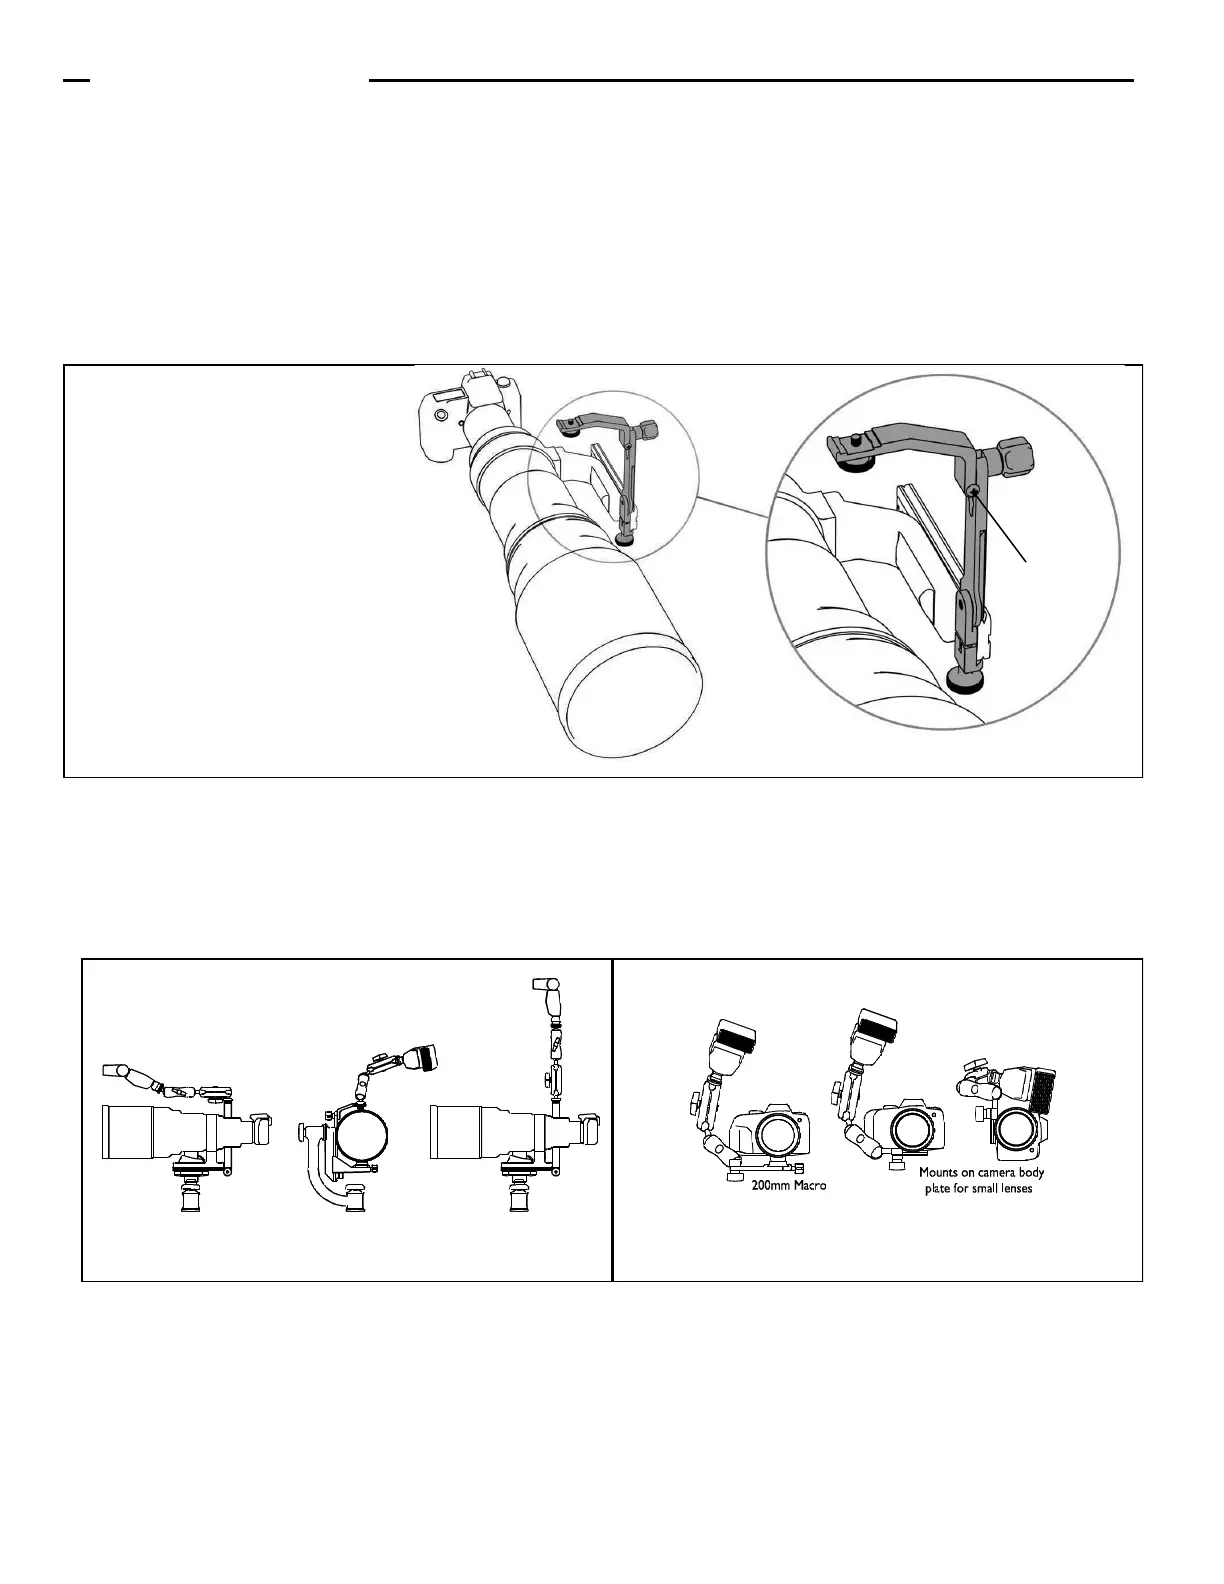
You can also attach the Tilt Arm so that it positions the flash off-center. The Tilt Arm is fitted with two stop screws that keep the
flash from tilting forward or backward (Fig. 5). If you wish to tilt the flash forward, simply unscrew the appropriate screw enough to
give you the desired amount of forward rotation. If you are using a collared macro lens, flip the Tilt Arm upside-down. In this
orientation, the stop screws do not engage, and the arm is completely free to tilt forward and backward.
Thank you for your interest in Wimberley products. If you have any questions or comments please feel free to con-
tact us (our contact information is located in the black box on the first page).
Side-mount Configuration:
The F-9 bracket can also be
used on side-mount heads such
as the Wimberley Sidekick.
Swivel the quick-release arm on
the bottom of the bracket to the
straight position and attach the
bracket to the dovetail on your
lens plate.
Figure 5
Stop screw
Figure 7 (M-1 shown, M-9 will work too) Figure 6
Wimberley, Inc. ©2015, All Rights Reserved Rev. 111213
 Loading...