This document provides installation instructions and troubleshooting solutions for the WBCF-BS88~BS95 ceiling fan.
Function Description
The WBCF-BS88~BS95 is a ceiling fan designed for both cooling and lighting purposes, with models available with and without a light kit. It features a reversible motor for year-round use, allowing it to circulate cool air in summer and warm air in winter. The fan is controlled via a remote, offering convenience in adjusting fan speed and light settings. The light kit models provide adjustable color temperatures, catering to different ambiance needs.
Important Technical Specifications
- Voltage: 120V/60Hz
- Power:
- Motor power: 30W
- LED power (for models with light kit): 24W
- Speed + Color Change:
- 6 speed settings
- 3 color temperatures: Cool white light (6500K), Warm light (3000K), Neutral light (4500K)
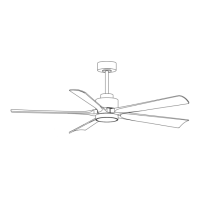
- Number of Rotating Leaves: 5 blades
- Fan Blade Material: Solid Wood
- Motor Material: Pure copper wire winding and high-quality silicon steel stator, ensuring high efficiency, super quiet operation, and energy saving.
- Control Method: Remote control
- Diameter: 60 inch
- Reversible: YES
- Mounting Requirements: Must be installed on a solid ceiling capable of withstanding a gravity greater than 60 KG. Not suitable for gypsum ceilings. Outlet box must be marked "Acceptable for Fan Support."
- Downrod Options: Includes two downrods (4.5 inch and 12 inch) for varying ceiling heights.
- Minimum Blade Height: Fan blades must be at least 7 feet above the floor.
- Inclination Angle (for inclined ceilings): Not exceeding 30 degrees.
Usage Features
Installation:
The installation process involves several key steps:
- Mounting Bracket Fastening: Secure the mounting bracket to the ceiling. For wood ceilings, use wood screws; for concrete ceilings, use expansion screws after drilling 8mm holes. Ensure the bracket is firmly fixed and can support over 60 kg.
- Suspension Installation: Select the appropriate downrod (4.5 inch or 12 inch) based on ceiling height. The downrod is then connected to the fan body, ensuring the holes align and the pin is secured with an R clip. Set screws are tightened to secure the downrod.
- Hanging the Fan: The fan is hung on the hanger, aligning the lugs on the hanger with the groove of the hanging ball on the downrod.
- Wiring: Connect the ceiling wires (live, neutral) to the receiver, and then connect the motor wires (Grey, Red, Yellow) and light wires (Blue, White) from the motor to the receiver. An all-pole disconnect circuit breaker with a contact distance of 3mm must be connected to the fixed wiring.
- Canopy Installation: After wiring, the canopy is installed by aligning its holes with the pre-installed screws on the mounting bracket.
- Blade Installation: The 5 solid wood blades are attached to the motor using screws and washers, ensuring all screws are properly tightened.
- Lamp Installation (for models with light kit): The lamp plate is secured to the holder base, and the light kit wires are plugged into the LED module power socket. The lampshade is then installed and tightened by turning it clockwise.
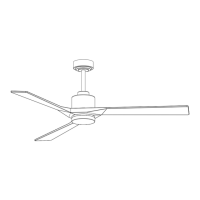
- Decorative Ring Installation (for models without light kit): A decorative ring is installed to the blade assembly.
Control:
The fan and light (if applicable) are controlled by a remote. If a regular single pole switch is connected, it can only control the light's on/off function, not the fan. The fan must be turned on/off and adjusted via the remote. If no single pole switch is connected, the remote directly controls both lights and fans. The light is programmed to turn on when power is restored after an outage, while the fan remains off until activated by the remote.
Troubleshooting:
The manual provides solutions for common issues:
- Can't Start: Check fuse, circuit breaker, voltage, and internal wiring/contacts.
- Noise: Ensure proper installation, correct hanging pipe bolt and solenoid lock. A 24-hour "trial period" is expected for new fans to settle. Avoid installation on wooden ceilings, steel structures, or prefabricated panels as they can amplify sound.
- Defective Lamp: Check connection wire, light switch, and light source for burnout.
- Fan Wobble: Check if mounting bracket, lock blade screw, and blade screws to the motor are locked. If installed on an inclined ceiling, ensure the angle does not exceed 30 degrees and the drop ball does not press the fan control.
Balance Adjustment (for fan wobble):
If wobble persists after ensuring all screws are locked, adjust as follows:
- Change Blade Position: Swap positions of fan blades 2 and 3 and re-lock to observe the effect.
- Use Balance Kit:
- Clamp a balance clamp on the edge of the tail end of a fan blade.
- Turn on the fan to check for reduced wobble. Repeat with other blades to find the weakest clamping balance.
- Once the weakest blade is identified, move the clamp in or out on its edge while the fan is running to find the optimal position for wobble control.
- Finally, stick a balance sticker (with double-sided tape) on the center of the blade at the identified position.
Maintenance Features
- Annual Inspection: It is recommended to check connecting parts (hanger, hanging pipe fastening screw, fan blade) at least once a year to ensure their safety and reliability.
- Regular Cleaning: Clean the ceiling fan regularly to maintain its appearance.
- For surface dust, use a soft brush or cloth.
- For oil or laminate, wipe with a slightly wet cloth.
- Do not rinse directly with water.
- Motor Lubrication: The motor bearing is pre-greased, so no additional lubricating oil is needed. Avoid scratching the surface during cleaning.
Precautions
- Electrical Safety: Turn off power before installation or disassembly. Installation must follow the sequence of ground wire, live wire, and neutral wire. Disassembly should be in the reverse order to avoid electric shock.
- Qualified Electrician: If you lack sufficient electrical knowledge, hire an experienced expert for installation.
- Blade Integrity: The angle and elevation of the leaf frame are precisely determined and should not be changed. Avoid forcing collisions during blade installation, as deformation can cause fan wobble.
- Safety Switch: To prevent fire and electric shock, only use an electric switch specifically equipped for this ceiling fan.