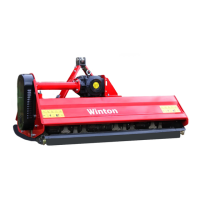
The Winton Flail Mower WFL & WHF Series is a robust agricultural implement designed for efficient mowing and land management. This manual provides comprehensive details for its safe operation and maintenance.
Function Description:
The Winton Flail Mower is primarily used for cutting and mulching vegetation, making it suitable for various tasks such as maintaining pastures, orchards, vineyards, and general land clearance. It attaches to a tractor via a PTO (Power Take-Off) shaft and a three-point linkage system. The flail mower utilizes a series of hammers or blades attached to a rotating drum to cut and shred material, leaving a fine mulch that decomposes quickly. The WFL series is designed for smaller tractors, while the WHF series caters to more powerful tractors and heavier-duty applications, offering a hydraulic shift distance for greater versatility.
Important Technical Specifications:
WFL Series:
- Models: WFL105, WFL125, WFL145, WFL175
- Weight:
- WFL105: 210kg
- WFL125: 244kg
- WFL145: 284kg
- WFL175: 309kg
- Working Width:
- WFL105: 100cm
- WFL125: 120cm
- WFL145: 140cm
- WFL175: 170cm
- Hammer Flail Type: (Image of hammer flail)
- Number Of Flails:
- WFL105: 16
- WFL125: 20
- WFL145: 24
- WFL175: 28
- Recommended Tractor HP:
- WFL105: 18-30hp
- WFL125: 20-40hp
- WFL145: 25-50hp
- WFL175: 30-55hp
- Width:
- WFL105: 120cm
- WFL125: 140cm
- WFL145: 160cm
- WFL175: 190cm
- Depth: 85cm (all models)
- Height: 95cm (all models)
- PTO Shaft Size: 70-100cm (all models)
- Cutting Height: 3-8cm (all models)
- Linkage Size: Category 1 (all models)
- Number Of Drive Belts: 3 (all models)
- Hydraulics Required: N/A (all models)
WHF Series:
- Models: WHF145, WHF175, WHF200
- Weight:
- WHF145: 322kg
- WHF175: 350kg
- WHF200: 451kg
- Working Width:
- WHF145: 140cm
- WHF175: 170cm
- WHF200: 195cm
- Hammer Flail Type: (Image of hammer flail)
- Number Of Flails:
- WHF145: 24
- WHF175: 28
- WHF200: 32
- Recommended Tractor HP:
- WHF145: 25-50hp
- WHF175: 30-55hp
- WHF200: 35-60hp
- Width:
- WHF145: 160cm
- WHF175: 190cm
- WHF200: 215cm
- Depth: 95cm (all models)
- Height: 95cm (all models)
- PTO Shaft Size: 70-100cm (all models)
- Cutting Height: 3-8cm (all models)
- Linkage Size: Category 1 (all models)
- Number Of Drive Belts:
- WHF145: 3
- WHF175: 3
- WHF200: 4
- Hydraulics Required: 1x Double acting spool (all models)
- Hydraulic Shift Distance: 32cm (all models)
Usage Features:
- Installation & Set Up:
- Ensure tractor and machine ignition is stopped and keys are out before set-up/maintenance.
- Verify the hydraulic lift system is in a neutral position before attaching/detaching machinery.
- Confirm the PTO drive isn't connected until instructed.
- Attach the mower to the tractor using the three-point linkage pins and linch pins.
- Adjust the top link arm, linkage pins, PTO shaft, and elbow grease for proper connection.
- The rear roller on the mower should be adjusted to the ground level, with the flail mower parallel to the ground horizontally.
- The cutting height can be set by adjusting the hydraulic lift arms on the tractor or by adjusting the rear roller and skids.
- The working speed should be approximately 2 to 5 mph depending on working conditions.
- Ensure the PTO shaft's grease points and apply grease if needed.
- The flail mower operates in low range gear and the PTO delivering 540 RPM.
- Cutting Height Adjustment:
- The cutting height is adjusted by loosening bolts on the roller support bracket and adjusting the roller to the desired height.
- For WFL models, loosen bolt 1 and remove bolt 2 on both sides of the machine. Adjust roller by aligning the selected hole in the roller support bracket at position 1. Put bolt 1 into the selected hole and re-tighten bolts 1 and 2.
- For WHF models, the process is similar, ensuring the machine is level and the cutting height is between 3-8cm.
- Skid Adjustment:
- Skids can be adjusted by removing bolts and nuts on the front and back of both sides of the machine.
- Move the skids up or down to the desired bolt hole height and re-insert bolts and nuts.
- Hydraulic Fitting & Operation (WHF Model Only):
- Always check the tractor's operating manual for the recommended type of hydraulic fluid.
- Ensure the tractor's hydraulic reservoir is topped up.
- Connect hydraulic hoses from the machine to the tractor using quick release couplings.
- Before disconnecting, always stop the engine and move the hydraulic control levers backwards to release any pressure.
- Always make sure the protective caps remain on the ends of the hoses when not in use.
- Avoid sudden changes in hydraulic flow/direction to prevent excessive pressure and damage.
Maintenance Features:
- General Safety Information:
- Always ensure all potential operators read this manual.
- Ensure tractor and machine is stopped and keys out of ignition before set-up/maintenance.
- Follow good safety standards and repair any injury or damage immediately.
- Do not modify equipment in any way.
- Use only with compact tractors within power range specified.
- Do not use machinery to transport personnel or livestock.
- Always check the condition of the machine and tractor before starting.
- Always check the operating area is safe before starting machinery.
- The operator should not wear loose clothing.
- Always use appropriate ear protection when running a tractor and machinery.
- Ensure you are wearing protective gloves when servicing and using machinery.
- Ensure bystanders keep away from the machine when it is in use.
- When travelling on the road/public places, always keep the PTO turned off.
- Keep the machine maintained and in good state.
- Pay attention to the sharp/pointed parts while servicing.
- All protective parts should be in good condition.
- Keep all safety signs clean and legible.
- Machinery and PTO should be operated at the recommended speed.
- Good safety requires that you familiarise yourself with various safety signs.
- Never consume alcohol or drugs.
- Machinery Pre-Use Checks:
- Check all bolts, nuts and screws are tight.
- Tighten/check any bolts and nuts securing blades.
- If your machine has belts, check the tension and adjust if required.
- Apply grease to grease points.
- Check gear oil level and top up if needed.
- Remove support/storage stands before operating.
- Tractor Pre-Use Checks:
- Check that the machine is properly attached to the tractor.
- Be sure to add extra weights to the front of the tractor or add wheel weights if required.
- Check that the tractor PTO shaft turns freely and that the machines PTO drive shaft can extend easily.
- The chain on the PTO shaft should be checked and in good condition.
- Before installing the PTO shaft, the tractor and machine should be stopped.
- Install and secure all safety guards, doors and covers before starting.
- Bystanders should leave the immediate area before connecting the drive from the tractor.
- Running/Operating Checks:
- Always keep the PTO output from the tractor at 540 RPM when running machinery.
- Post-Use Regular Checks:
- Check blades, belts and wearing parts.
- Clean machinery and check for any entangled material.
- Gear Oil Change & Check:
- Gear Oil Grade: 80w90 gear oil for all conditions (or equivalent)
- Gearbox Oil Level: Approx. 0.5 litres to level plug
- Level Plug Size: 8mm Allen key
- First Oil Change: 50 hours use
- Oil Change Frequency: 250 hours/yearly (whichever is first)
- Remove the PTO guard on the gearbox for best access.
- Remove filler/breather plug and level plug.
- Add oil through the filler/breather plug hole until it reaches/begins to weep from the level plug hole.
- Re-install both plugs and reattach the PTO guard.
- Draining oil: Plug underneath the gearbox PTO guard can be used when draining oil.
- Bolt tension: Always make sure bolts are tightened correctly.
- Adjusting Belt Tension:
- The correct belt tension is achieved when the belt can be deflected about 10mm at the centre point between the pulleys.
- A generic measure across machines is the belt should be able to twist a quarter turn by hand.
- Remove the belt cover.
- Loosen the four bolts securing the gear box to the mounting plate.
- Loosen bolts on the back of the belt guard housing, holding the support shaft.
- Loosen off the counter locking nuts.
- Adjust belt tension by adjusting the height of counter nuts.
- Align the gearbox ensuring the drive shaft is parallel with the body and re-tighten nuts.
- Re-tighten all bolts.
- Replace the belt cover.
- Ensure that the locking nuts are tightened to prevent the bolts working loose.
- Always use a straight edge to make sure the belt pulleys are in line.
- Greasing & Lubrication:
- Grease Type: Multi-purpose lithium based grease
- Grease Frequency: Check every 4-8 hours (top up if required)
- Wipe grease nipples with a clean cloth before greasing.
- Grease into each grease nipple three to five times.
- Grease the PTO shaft on either end of the PTO shaft and apply grease to the inner shaft.
- Grease both bearings on each end of the rotor.
- Apply grease to both of the rear roller bearings.
- There are two grease points underneath the side shift bracket on the frame and two on the top for WHF models.
- Other Maintenance:
- Blades: Check condition of the blades and replace if worn/broken.
- Belts: Check the condition of belts, if worn or frayed replace.
- Oils: Ensure oil levels are checked and topped up.
- PTO Shaft: Check the condition of your PTO shaft and replace if worn or damaged.
- Cleaning: Ensure the mower deck & blades are cleaned of mud/grass.
- Bearings: Check the bearings on the blade rotor and the rear roller.
- Paintwork: Re-coat any damaged paintwork to prevent corrosion.
- Storage: Store the machine in a dry, level area.
- Skids: Check the condition of the side skids and replace if worn.
- Hydraulics: Check hydraulic pipes, connectors and RAMs for signs of leaks.
- PTO Shaft Resizing:
- If the compressed (closed) PTO shaft length exceeds the one measured here, the driveline will need to be cut.
- Remove PTO shaft shielding.
- Shorten the driveline tubes to proper equal lengths.
- Tidy edges of the drive tube with a file and clean all fillings from the tubes.
- Shorten the equally long guard tubes to the same length as the driveline tubes.
- Grease the internal driveline tube.
- Fit the guard on the shaft.
- Make sure that the length allows for at least 16cm (6 inches) of overlap.
Troubleshooting:
- Belts Slipping: Clean the mower deck, adjust the belt tension, replace belts.
- Patches of uncut grass: Mow at 540 PTO rpm, check PTO speed & tractor power output, change into a lower gear on the tractor, tighten belts, replace any missing/damaged blades.
- Excessive vibration: Check and replace blades, replace or tension belts, align/replace belt pulleys, remove belt guard and clean debris, check PTO shaft for damage and replace.
- Gearbox noisy: Check oil level and top up, extract any oil/debris and replace with new oil.
- Blades scalping: Raise cutting height, change mowing pattern/route, reduce speed when turning.
- Uneven cut: Change into a lower gear on the tractor, level the mower using tractor linkage, replace any missing/damaged blades.
- Tractor loaded down by mower: Mow at 540 PTO rpm, change into a lower gear on the tractor, clean off the mower, check power output on your tractor.
- Hydraulics leaking: Tighten hydraulic fittings & connectors.
- Hydraulic connectors don't fit: Visit a tractor dealer for hydraulic converters (1/2" BSP).