EasyManuals Logo

Wintriss SmartPAC 2 Instruction Sheet

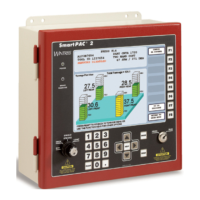
Wintriss SmartPAC 2
28 pages
To Next Page IconTo Next Page
To Previous Page IconTo Previous Page
Page #8 background imageLoading...
Page #8 background image
1145200 Upgrading from Original SmartPAC or SmartPAC 2 to SmartPAC PRO
8 Instruction Sheet
Original SmartPAC
SmartPAC PRO RTS
Signal Type
Connector
Pin
number
Connector
Pin number
Done
PACNet (Optional)
GRD.
TB103
229
TB7
229
+RXD4
TB103
230
TB7
230
-RXD4
TB103
231
TB7
231
TXD4
TB103
232
TB7
232
+TXD4
TB103
233
TB7
233
-TXD4
TB103
234
TB7
234
NOTE: Connect all shields / ground wires to chassis ground
Table 2. SmartPAC 2 to SmartPAC PRO Conversion Wiring
SmartPAC 2
SmartPAC PRO RTS
Signal Type
Connector
Pin
number
Connector
Pin
number
Done
Main Power ** PS Module Plug
L1
Grey Plug
201
Line
L1
L2
Grey Plug
202
Neu
L2
Grd
Chas
Grd
Chas
Grd
Zero Cam
ZCam
TB107
248
TB5
248
Input Check / Stop Circuit
A (input ck.)
TB102
205
TB4
205
B (input ck.)
TB102
206
TB4
206
E-STOP
TB102
207
TB4
207
E-STOP
TB102
208
TB4
208
T-STOP
TB102
209
TB4
209
T-STOP
TB102
210
TB4
210

Other manuals for Wintriss SmartPAC 2

Questions and Answers:

Question and Answer IconNeed help?

Do you have a question about the Wintriss SmartPAC 2 and is the answer not in the manual?

Wintriss SmartPAC 2 Specifications

General IconGeneral
BrandWintriss
ModelSmartPAC 2
CategoryControl Systems
LanguageEnglish