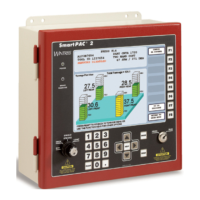
1145200 Upgrading from Original SmartPAC or SmartPAC 2 to SmartPAC PRO
4 Instruction Sheet
Mounting Your SmartPAC PRO
Mounting Your Control Enclosure SmartPAC PRO
Follow the instructions in your SmartPAC PRO Installation Manual for mounting the SmartPAC
PRO control enclosure.
Mounting Your Panel Mount SmartPAC PRO
Referring to your SmartPAC PRO Installation Manual, enlarge the cutout in your panel or console to
fit the SmartPAC PRO, making sure 6 in. (152 mm) clearance exists behind the panel.
Follow the instructions in your installation manual for mounting SmartPAC PRO panel mount.
Terminating Cable Shields
NOTICE
TERMINATE CABLE SHIELDS CORRECTLY TO MINIMIZE ELECTROMAGNETIC
INTERFERENCE (EMI)
Shielded cables are used with the SmartPAC PRO Servo. For effective shielding, terminate the
cable shields as near as possible to the terminal block you are wiring to.
NOTICE
TERMINATE BOTH ENDS OF SHIELD
Be sure to terminate cable shields at both ends (for example, at SmartPAC PRO Servo and DSI 2).
For each shielded cable, perform the following steps.
1. Strip the cable jacket back about 3 inches.
2. You can terminate the shield braid or drain wire to either a chassis ground stud or under the screw
on a PC board standoff. Find one of these as close as possible to the terminal block you are
wiring.
3. Connect the shield drain wire or braid to the chassis ground stud or beneath the screw in the PC
board standoff.
4. Connect the insulated wires to their designated positions on the terminal block.
Wiring Your SmartPAC PRO
Connect the wires you removed from your existing SmartPAC according to the appropriate wiring
table. Refer to the wiring diagrams at the end of your SmartPAC PRO Installation Manual.
• Table 1. Original SmartPAC to SmartPAC PRO Conversion Wiring, below
• Table 2. SmartPAC 2 to SmartPAC PRO Conversion Wiring, page 8
Refer to the wiring diagrams at the end of your SmartPAC PRO Installation Manual.

 Loading...