LAN
USB
TRIGGER
RGB
DVI
IR-EXTERN
POWER
RS-232
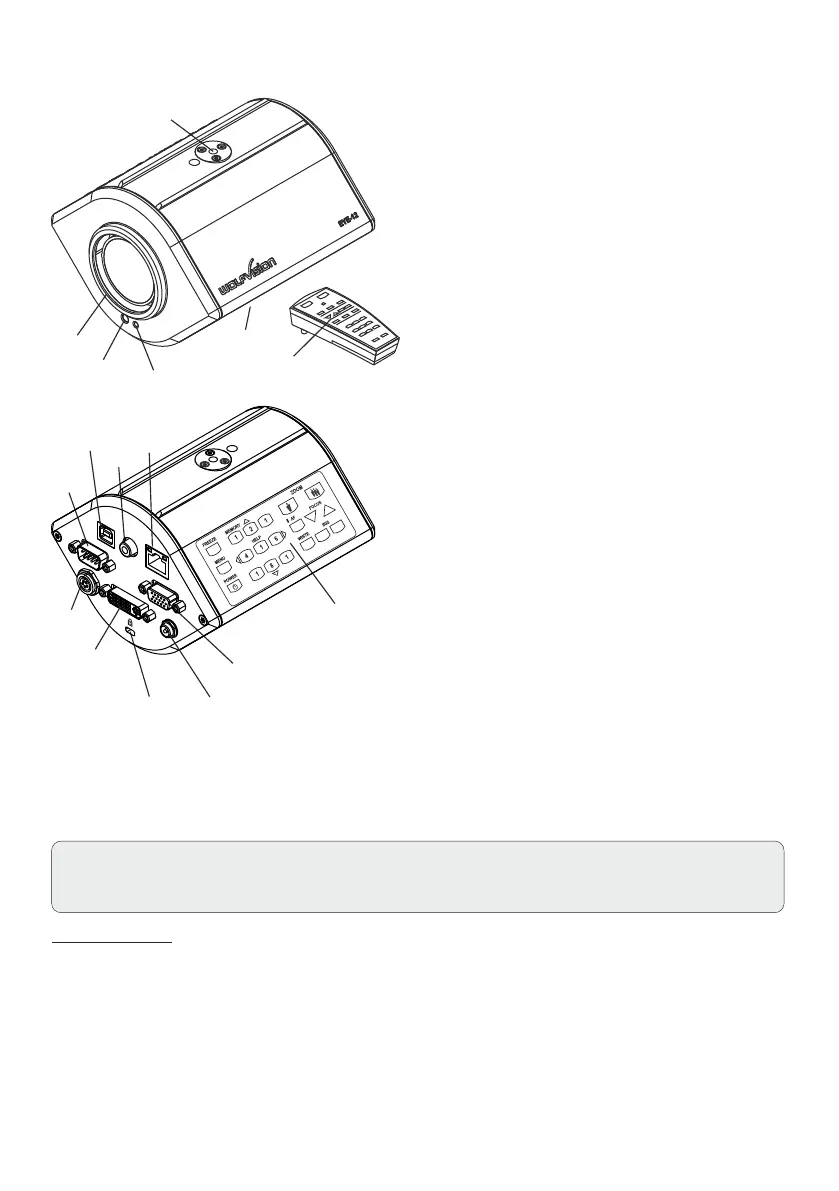
#1 IR-remote control
#2 Power LED
#3 IR-receiver (built-in)
#4 Close up lens attachment
(M46x0,75)
#5 Tripod thread (1/4” UNC-20)
(on top and bottom side)
#6 Key panel
#7 USB port (see page 12)
#8 TRIGGER port (see page 13)
#9 ETHERNET/LAN port
(see page 12)
#10 Serial control input RS232
(see page 11)
#11 RGB output
#12 External IR-sensor (see page 11)
#13 DVI-I output (digital and analog)
#14 T-Lock slot Kensington®
(see page 16)
#15 Power connection
12V DC (see page 11)
#1
#6
#2
#3
#4
#11
#5
#14
#8
#12
#10
Power-on preset:
Th e po we r-on preset is au to matically a ctivated when s witching on t he un it .
The settings are: standard zoom size, auto focus on, auto iris on.
1. Connect the power pack to the power-input (#15).
2. Connect your display device (projector, monitor, video conferencing unit etc.) to the
RGB-output (#11) or DVI-output (#13) of the camera.
IMPORTANT:
For choosing the correct output resolution and refresh rate, please read the detailed description on
page 9!
#5
#15
#9
#7
#13
SETTING UP
3
When the EYE-12 is switched on the first time, the Quick Setup Guide will be started automatically on-screen
(visible on RGB and DVI output). Use the arrow icons on the remote control to navigate through the menu.