R
WOODBRIDGE
WOODBRIDGE
WOODBRIDGE
WOODBRIDGE
R
WOODBRIDGE
WOODBRIDGE
WOODBRIDGE
WOODBRIDGE
R
WOODBRIDGE
WOODBRIDGE
WOODBRIDGE
WOODBRIDGE
R
WOODBRIDGE
WOODBRIDGE
WOODBRIDGE
WOODBRIDGE
R
WOODBRIDGE
WOODBRIDGE
WOODBRIDGE
WOODBRIDGE
R
WOODBRIDGE
WOODBRIDGE
WOODBRIDGE
WOODBRIDGE
R
WOODBRIDGE
WOODBRIDGE
WOODBRIDGE
WOODBRIDGE
R
WOODBRIDGE
WOODBRIDGE
WOODBRIDGE
WOODBRIDGE
2
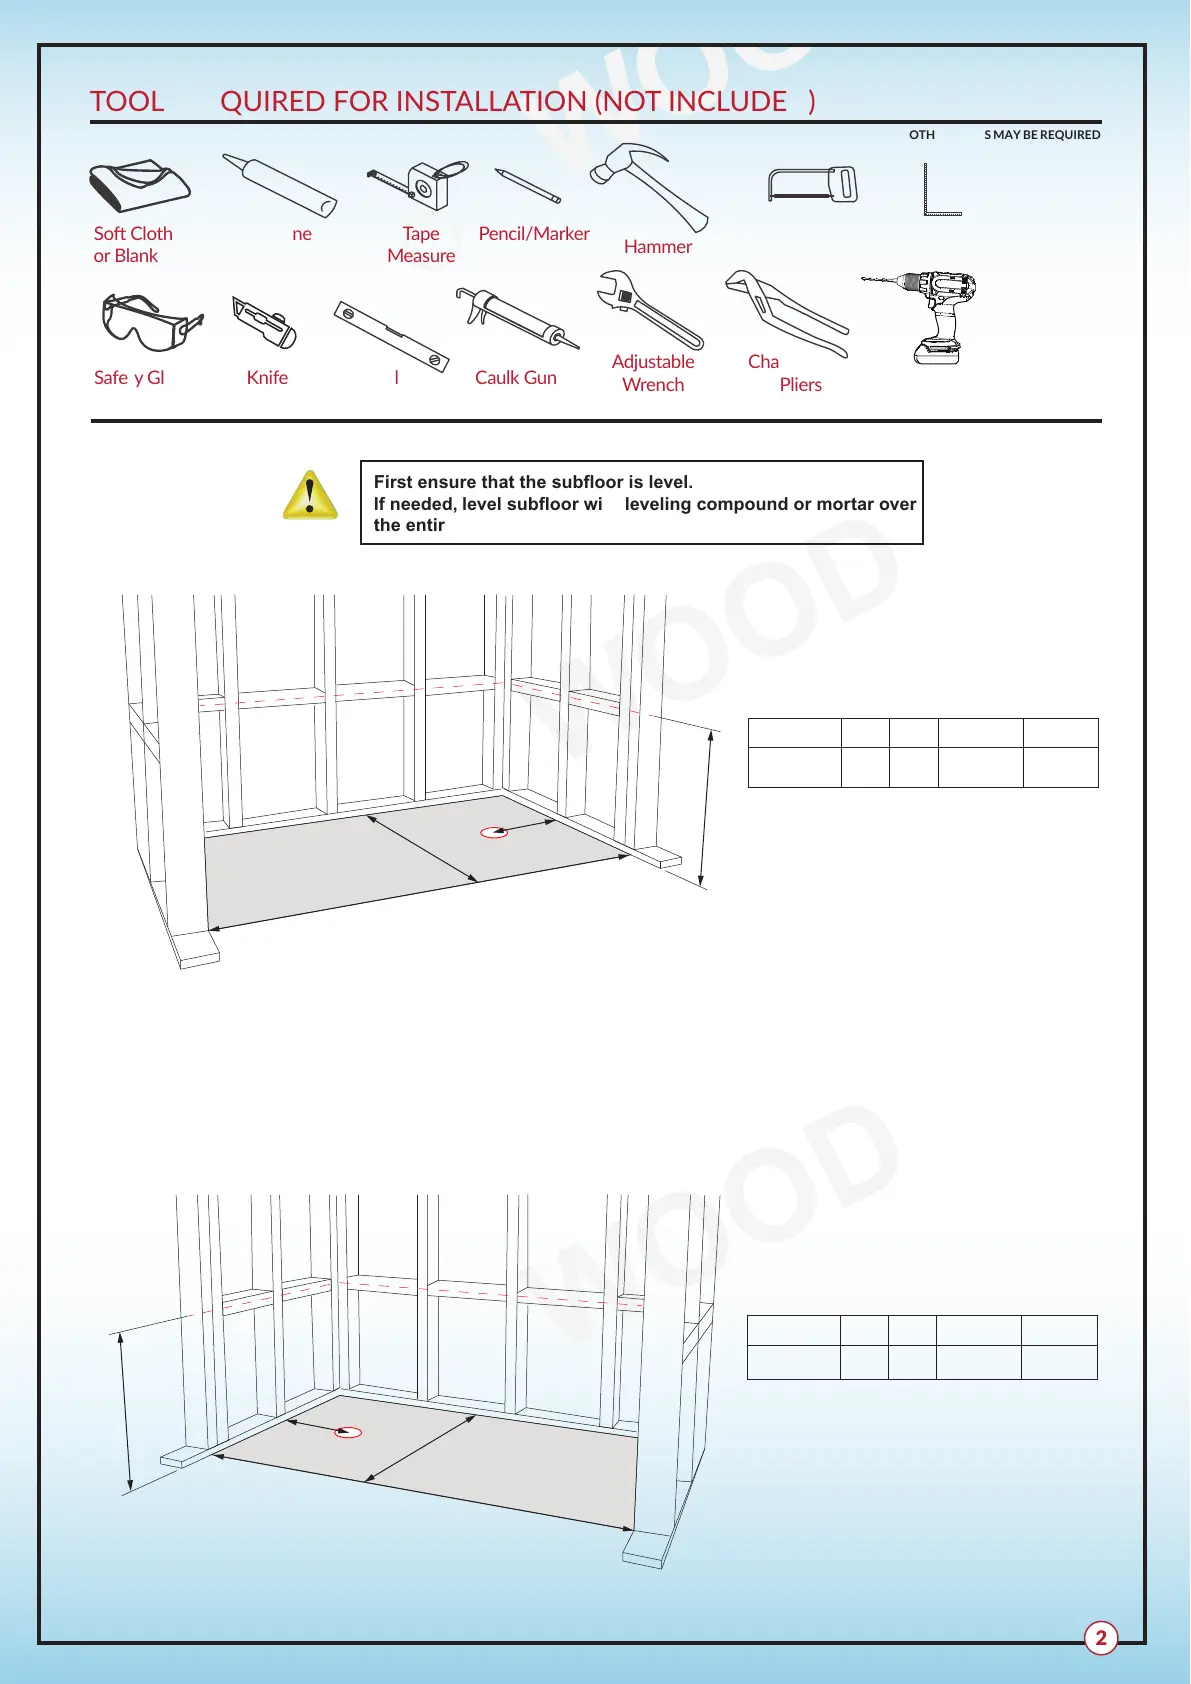
TOOLS REQUIRED FOR INSTALLATION (NOT INCLUDED)
OTHER TOOLS MAY BE REQUIRED
So Cloth
or Blanket
Silicone Tape
Measure
Pencil/Marker
Hammer
Safety Glass LevelKnife Caulk Gun
Adjustable
Wrench
Channel
Lock Pliers
First ensure that the subfloor is level.
If needed, level subfloor with leveling compound or mortar over
the entire area of installation.
Cut subfloor to accommodate plumbing in compliance with local plumbing and building code.
Verify your bathtub for final dimensions.
B
A
C
Position bathtub.Verify that the draining pipe location matches the actual location of the bathtub
drain.Remove the bathtub.
Hacksaw
Drill
B
A
C
Framing Square
Model
A B
C
LB666-R
30''
21-5/8''60''
10-1/4"
D
D
D
Model
A B
C
LB428-L
60''
30''
21-5/8''
D
10-1/4"