Do you have a question about the Woood CONNECT and is the answer not in the manual?
Connect the base panels BB-B using screws and dowels.
Install the TP-K panel with the provided hardware.
Secure the TP-M panel to the assembly.
Connect the TS-O and TP-O panels using dowels.
Connect the BB-O panels to the main structure.
Mount screws, dowels, and cam locks onto TS-G panels.
Connect TS-G panels with ZL and ZR sections using hardware.
Assemble TS-O, TP-O, TP-M, TP-K, and TS-G panels.
Assemble BB-O, TP-K, TP-M, TS-G, and BB-B panels.
Connect ZL, TP-M, TP-O, BB-O, TP-K, TS-G, BB-B, and ZR panels.
Mount the PL sliding rails onto the cabinet frame.
Attach A and H components to ZL, TS, BB-B, and ZR panels.
Mount the BB-O drawer base onto the ZR panel using hardware.
Mount shelves (E) and drawer runners (LP) in the cabinet.
Install drawer slides (P) onto TS-O and TS-G components.
Construct the LL, LA, LB, LR, and LF drawer parts.
Install hinges (F, H, L) and screws on DS and LD-RM panels.
Mount doors (SD-RM, SD-LM) to the cabinet using hinges.
| Brand | Woood |
|---|---|
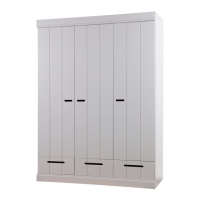
| Model | CONNECT |
| Category | Indoor Furnishing |
| Language | English |