Do you have a question about the Workhorse Freedom 6/8 and is the answer not in the manual?
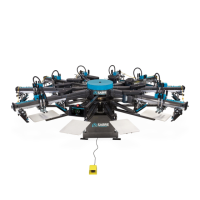
Lists key features of the printing press, including registration, construction, clamps, and warranty.
Details the press model, footprint, compressor requirements, CFM, voltage, and amperage.
Lists specifications for accessories like FlashBack and Radiant In-Head, including wattage, voltage, amperage, and phase.
Explains the purpose and function of the lockout valve for servicing the printer.
Describes the safety cables around the printer and their function to cut power.
Emphasizes safe operation, avoiding hazards, and keeping untrained personnel away.
Guides on pre-registering screens and taping them correctly for optimal print results.
Explains switches for selecting print heads and manual printing operations.
Describes the emergency stop button and the 'in position' indicator for safe operation.
Covers controls for table movement, print on/off, and running sample prints.
Details buttons for starting/ending production runs and auto/manual modes.
Explains fuse, power indicator, main power switch, counter, and foot pedal functions.
Describes the function and adjustment of print, delay, and flood timers for cycle control.
Explains how to loosen handles for micro adjustment of screen registration.
Details how to adjust the image position up or down on the shirt using specific knobs.
Describes how to adjust the image position left or right on the shirt.
Provides a step-by-step procedure and tips for accurate micro registration setup.
Guides on how to properly insert the squeegee tab into the flipper block and secure it.
Explains how to adjust squeegee angle and pressure for optimal printing. Includes notes on blade durometer.
Details the procedure for leveling pallets, required tools, and key considerations for alignment.
Explains how to adjust the index shock for smooth table stops without shaking and the impact on registration.
Presents the primary wiring diagram for the press controls and components.
Details specific wire connections and their corresponding components and functions.
Illustrates the layout and unused wires for the 50-wire control cable.
Shows the wiring connections specifically for the flip cylinder.
Details the pneumatic plumbing for the head valves, including tubing types and lengths.
Illustrates the pneumatic connections for the screen clamps.
Shows the pneumatic plumbing for the flip cylinder and associated valves.
Provides essential guidance on lubricating, air supply care, and filter maintenance to ensure longevity.
Outlines the warranty terms, return procedures, and provides a form for product registration.
| Type | 3D Printer |
|---|---|
| Print Speed | Up to 150 mm/s |
| Filament Diameter | 1.75 mm |
| Print Technology | FDM |
| Printhead | Single |
| Number of Printheads | 1 |
| Nozzle Diameter | 0.4 mm (standard) |
| Supported Materials | PLA, ABS, PETG, TPU, Nylon |
| Connectivity | USB |
| Display | LCD Touchscreen |
| Power Requirements | 110-240V, 50/60Hz |
| Maximum Print Area | 6" x 6" x 6" (Freedom 6) or 8" x 8" x 8" (Freedom 8) |