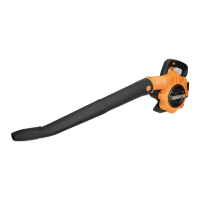
Cordless Li-Ion Blower/Sweeper EN
1312
ASSEMBLY
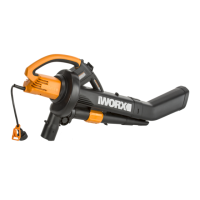
ASSEMBLING THE BLOWER TUBE (See
Fig. A & B)
ALWAYS REMOVE THE BATTERY PACK
BEFORE ASSEMBLING THE BLOWER
TUBE
Fit the Blower Tube to the motor housing as
shown in Fig. A. Check the Blower Tube is
firmly secured.
NOTE: Before disassembling the Blower Tube,
be sure the variable speed trigger is on off
position. Press the Release Button (7), so that
you can separate the tube (See Fig. B). Do not
try to separate the tubes by force or by using
tools.
OPERATION
INTENDED USE:
The blower is intended for blow debris.
It’s not intended for use indoors and animal
grooming.
WARNING! The charger and battery
pack are specially designed to work
together so do not attempt to use any
other devices. Never insert or allow
metallic objects into your charger or
battery pack connections because of an
electrical failure and hazard will occur.
1. BEFORE USING YOUR CORDLESS
BLOWER
Your battery pack is UNCHARGED and you
must charge once before use.
The battery charger supplied is matched to the
Li-ion battery installed in the machine. Do not
use another battery charger.
2. CHARGING YOUR BATTERY PACK
The Li-Ion battery is protected against deep
discharging. When the battery is empty,
the machine is switched off by means of a
protective circuit.
In a warm environment or after heavy use, the
battery pack may become too hot to permit
charging. Allow time for the battery to cool
down before recharging.
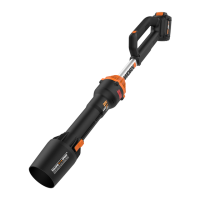
3. TO REMOVE OR INSTALL BATTERY
PACK (See Fig. C)
Depress the Battery Release Button (9) to
release battery pack from your tool. After
recharging, insert the battery pack into
tool’s battery port. A simple push and slight
pressure will be sufficient.
4. BATTERY STATU S LED’S (See Fig. D)
NOTE: The Status LED’s will indicate the
battery condition when the button on the
battery is pressed.
The LED’s constantly senses and displays the
battery condition as follows:
Press the button “POWERTEST”, the light
button is illuminated.
When the three green lights are illuminated,
the battery is in a highly charged condition.
When two lights (
) are illuminated, the
battery is in a moderately charged condition.
When only one green light ( ) is illuminated,
the battery charge is depleted.
IMPORTANT:
When only one light is illuminated,
your battery is overly discharged, even
though the blower may still be capable
of blowing debris. Continuing to operate
your blower with the battery in this
discharged condition may reduce the life
and performance of your battery.
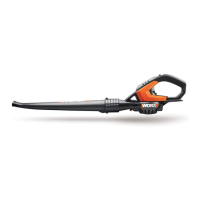
5. STARTING/STOPPING (See Fig. E)
Your blower is fitted with a variable speed
control through the trigger. Depress the Lock
OFF switch and the variable speed trigger to
start your blower. To switch off, just release the
variable speed trigger.
WARNING! The tool runs for a few
seconds after it has been switched off.
Let the motor come to a complete standstill
before setting the tool down.
6. USING THE BLOWER (See Fig. F)
The blower is intended for residential use
only. It is fitted with a high velocity nozzle. For
wet sticky leaves, use the high velocity nozzle
for ideal clean during operating the blower.
 Loading...