6
20V Vacuum Cleaner EN
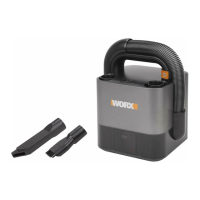
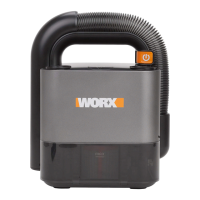
COMPONENT LIST
1. VACUUM TUBE
2. ON-OFF SWITCH
3. BRUSH STORAGE PORT
4. DEBRIS EMPTYING BUTTON
5. CREVICE TOOL STORAGE PORT
6. BATTERY PACK
7. DEBRIS CONTAINER COVER
8. CREVICE TOOL ACCESSORY
9. BRUSH ACCESSORY
Some of the accessories mentioned in
illustrations or texts are not included in the
scope of supply.
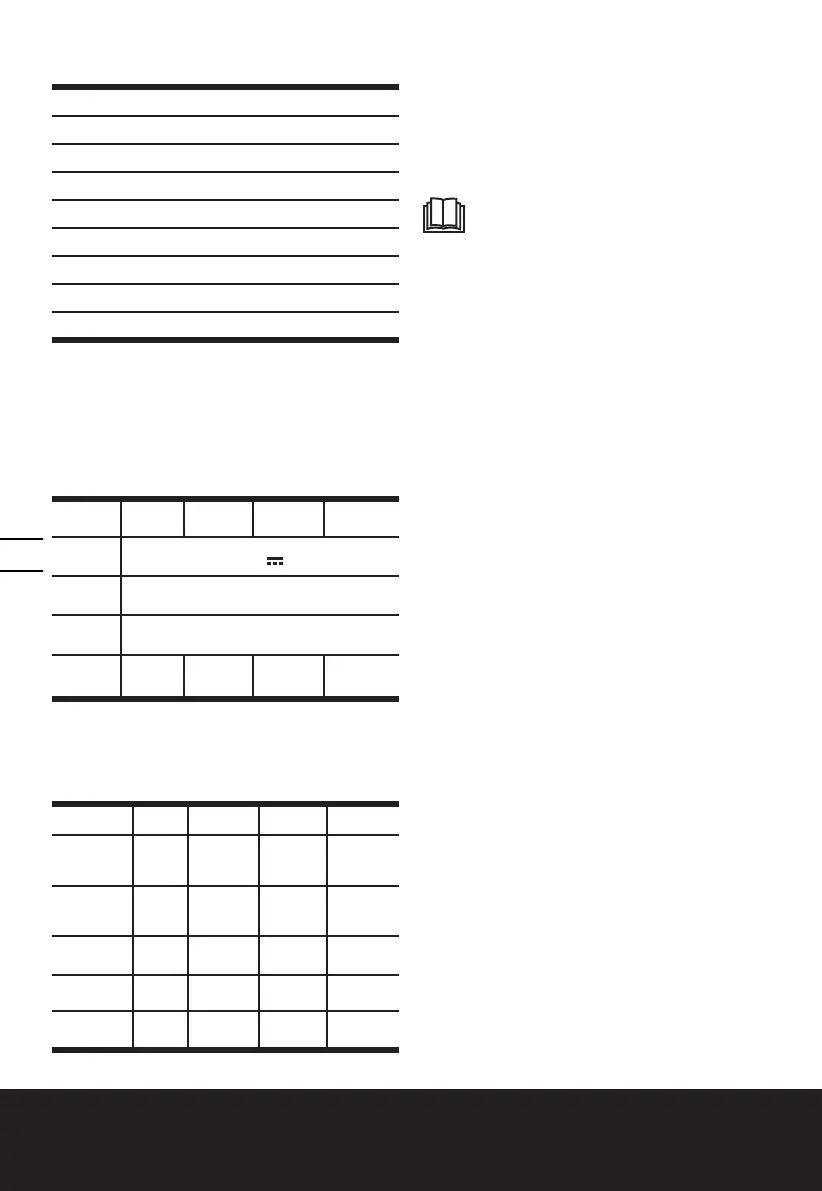
TECHNICAL DATA
WX030 WX030.1 WX030.9 WX030.91
Rated
Voltage
20V
Maximum
idle speed
34000r/min
Charge
time
1hr
Machine
weight
1.8kg 1.8kg 1.4kg 1.4kg
ACCESSORIES
WX030 WX030.1 WX030.9 WX030.91
Battery pack
(WA3551)
1 / / /
Battery pack
(WA3551.1)
/ 1 / /
Charger
(WA3880)
1 1 / /
Brush
accessory
1 1 1 1
Crevice Tool
accessory
1 1 1 1
We recommend that you purchase your accessories
listed in the above list from the same store that sold
you the tool. Refer to the accessory packaging for
further details. Store personnel can assist you and
offer advice.
OPERATION INSTRUCTION
Note: Please read the instructions
carefully before use.
INSTALLATION AND OPERATION
1. Installation of the Brush/Crevice Tool
Remove accessory from the storage port, connect to
the vacuum tube by pushing into place (See figure
A1)
NOTE: Crevice tool accessory can be stretched out
for usage (See figure A2)
2. Start/stop(See figure B)
Press the on-off switch to start the vacuum operation.
When the switch is pressed for the first time, the
machine starts and works at low speed.
When the switch is pressed again, the machine works
at high speed.
When the switch is pressed for the third time, the
machine stops.
WARNING: Please keep the air intake
unobstructed, otherwise it may cause motor
overheating and may damage the machine.
3. Debris Emptying Cleaning( See figure C1,C2)
Press the debris emptying button to open the dust
cup. Rotate the filter counter-clockwise to remove
and rinse in clean water when needed. To reinsert the
filter, rotate clockwise and lock filter element in place.
Warning: Do not use the vacuum without installing
the filter element. If the suction becomes decreased,
it is necessary to clean out the debris in the debris
collection container
4. Filter Cleaning
The filter is composed of the filter net cylinder and
the HEPA filter. Remove both and discard debris (see
figure D1). Both filters can be rinsed in clean water
and air dried. Replace HEPA filter inside Net cylinder
filter, rotate clockwise until locked. Locate three long
slots on HEPA filter and match those in the debris
collection container. Rotate clockwise to secure
connection prior to using. ( See figure D2)
Note: In order to maintain excellent suction, it is
recommended to change HEPA every three months
MAINTENANCE
WARNING: Remove the battery before carrying out
any servicing or maintenance.
Never use water or chemical cleaners to clean your
power tool. Wipe clean with a dry cloth. Always
 Loading...