14
Start-up
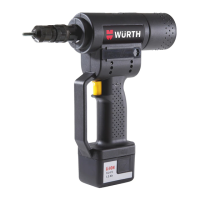
Battery
Only use genuine Würth Li-ion
batteries.
Note
Charge the battery before putting it
into operation for the rst time.
Note
Make sure the battery is properly
seated in the device before use.
■ If used properly, the battery can be recharged
up to 1,000 times.
■ Five charging/ discharging cycles are required
for the battery to reach its full performance po-
tential. This also applies to batteries which have
not been used for an extended period of time.
■ Never discharge the battery completely.
■ Service life can be extended by regularly using
and subsequently recharging the battery.
■ If the battery is not inserted into the charger
during storage, do not forget to recharge the
battery from time to time.
■ If, despite recharging, the battery life is getting
signicantly shorter, the battery is exhausted
and needs to be replaced.
Indicator lights:
Steady green: Battery is charged/conserva-
tion charging mode
Blinking green: Battery is being charged
Steady red: Charging temperature not
admissible
Blinking red: Defective battery
Adjusting the length x of the threaded
mandrel (fig. I)
■ Adjust the length x of the threaded mandrel to
the rivet nut length by turning the mouthpiece
[2].
■ In case of closed end rivet nuts use full length of
thread.
■ Lock mouthpiece [2] with lock nut [3] against
shifting.
Adjusting the stroke y (fig. I)
■ The stroke y depends on the blind rivet unit size
(M3 – M10) and the grip range z.
Recommended values for stroke y
Thread size Stroke y
min
(in mm)
max
M3 1 2
M4 1 2
M5 1.5 2.5
M6
2.5 3.5
M8 2.5
3.5
M10
3 4
■ The stroke y is adjusted by screwing in or out
the adjustment nut[4].
Note
Set the stroke y to min at the begin-
ning, then set a rivet nut.
■ If the blind rivet nut does not form a distinctive
head, the stroke y is to be enlarged step by
step.
■ Lock adjustment nut [4] with lock nut [5]
against shifting.
Screwing in a rivet nut
■ Place the rivet nut without tilting on the end of
the threaded mandrel [1].
■ Keep trigger [11] pressed until the tool comes
to a stop, then release it.
■ Hold the rivet nut tight during the entire proce-
dure.
■ If the rivet nut is not in tight contact with the
mouthpiece [2], repeat this procedure. For this
purpose hold the blind rivet nut tight, and a
short quick touch of the trigger [11] will induce
the threading out procedure.
■ Start again!