8
Operation
en
GB
F
I
E
P
NL
DK
S
N
FIN
J
CN
ROK
PL
HR
H
RUS
CZ
GR
LT
LV
EST
SLO
SK
M
TR
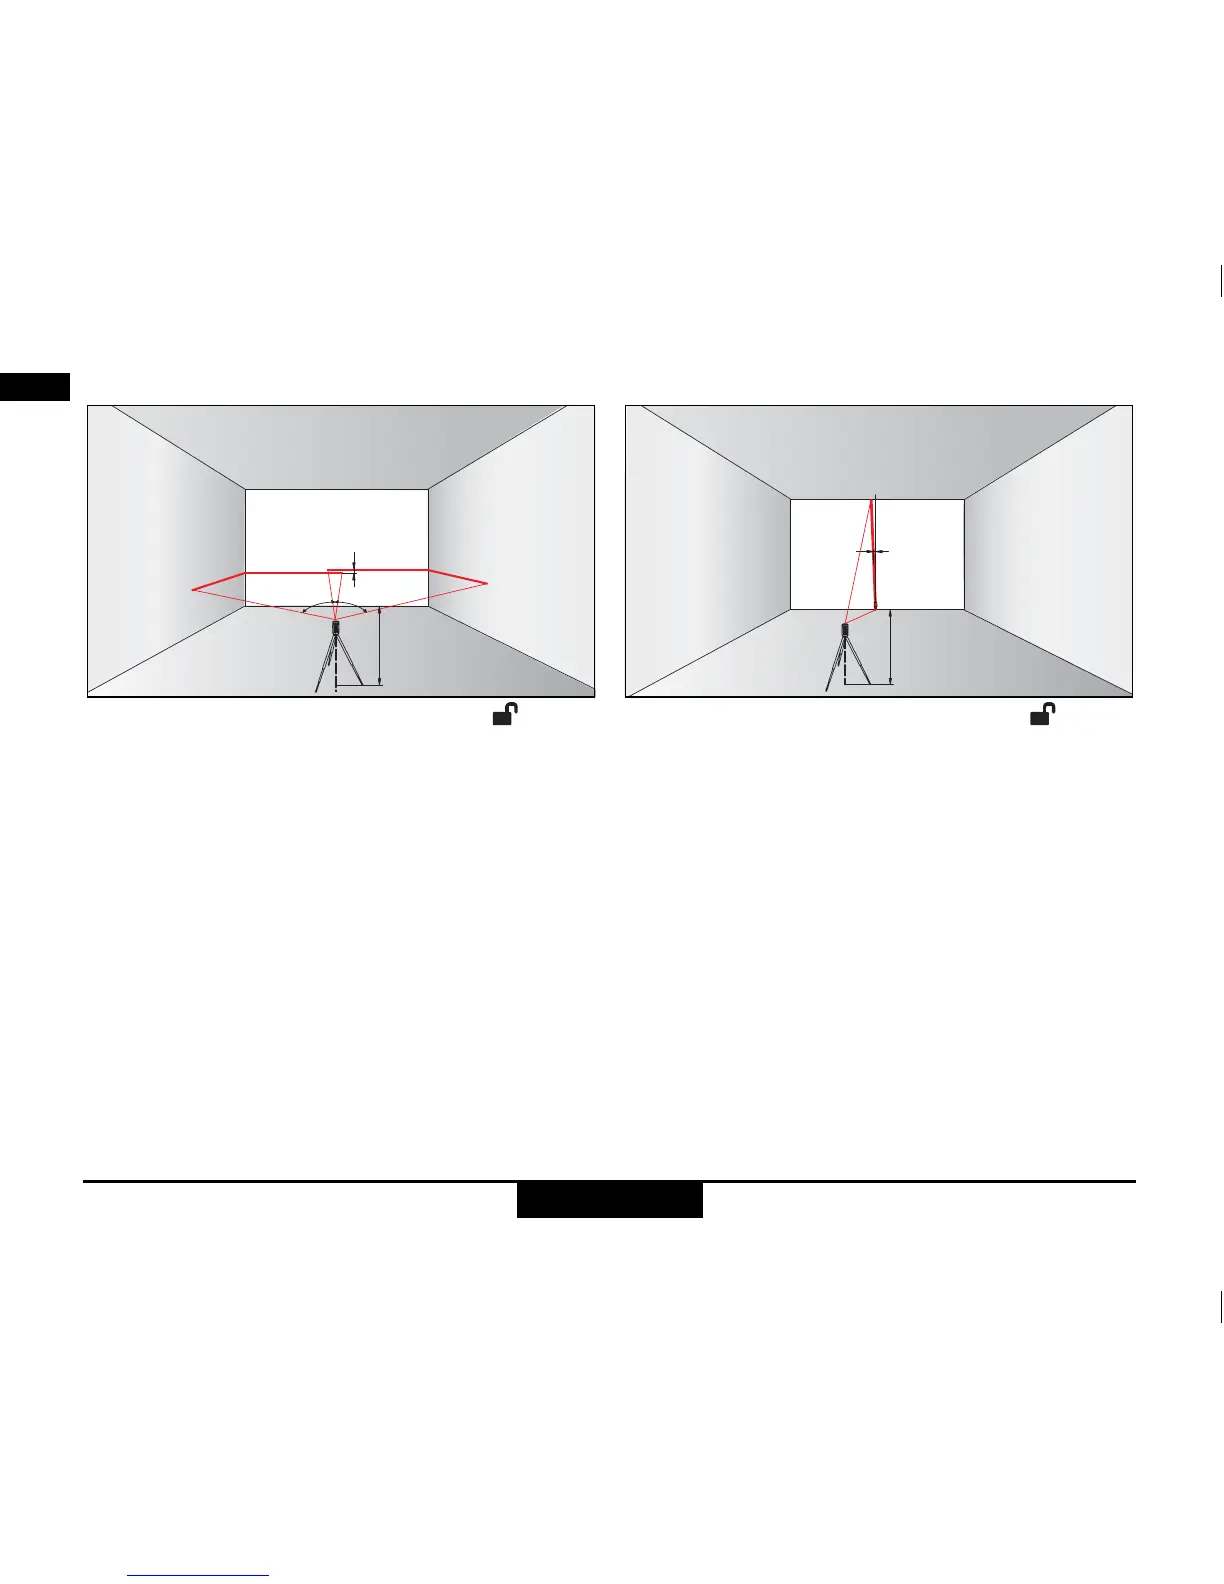
Checking the accuracy of the horizontal line:
Place the Lock switch 3 in the "Unlocked" ( )
position.
Position the instrument approx. 5 m away from the wall.
Direct the instrument at the wall and switch on with the
On/Set key 1. Activate the laser line with the On/Set key
1 and mark the intersection point of laser crosshairs on
the wall.
Swivel the instrument to the right and then to the left.
Observe the vertical deviation of the horizontal line from
the marking. If the difference does not exceed 3 mm,
then the CLL 11/PLL 11 is within tolerance.
Checking the accuracy of the vertical line:
Place the Lock switch 3 in the "Unlocked" ( )
position.
As reference, use a plumb-bob and attach it as close as
possible to an approx. 3 m high wall.
Position the instrument at a distance of approx. 1.5 m
from the wall at an elevation of approx. 1.5 m. Direct the
instrument at the wall and switch on with the On/Set key
1. Activate the laser line with the On/Set key 1. Rotate
the instrument and align it with the bottom of the plumb
line. Now read off the maximum deviation of the laser
line from the top of the plumb line. If the difference does
not exceed 2 mm, then the CLL 11/PLL 11 is within tole-
rance.
 Loading...