9
Operation
en
GB
F
I
E
P
NL
DK
S
N
FIN
J
CN
ROK
PL
HR
H
RUS
CZ
GR
LT
LV
EST
SLO
SK
M
TR
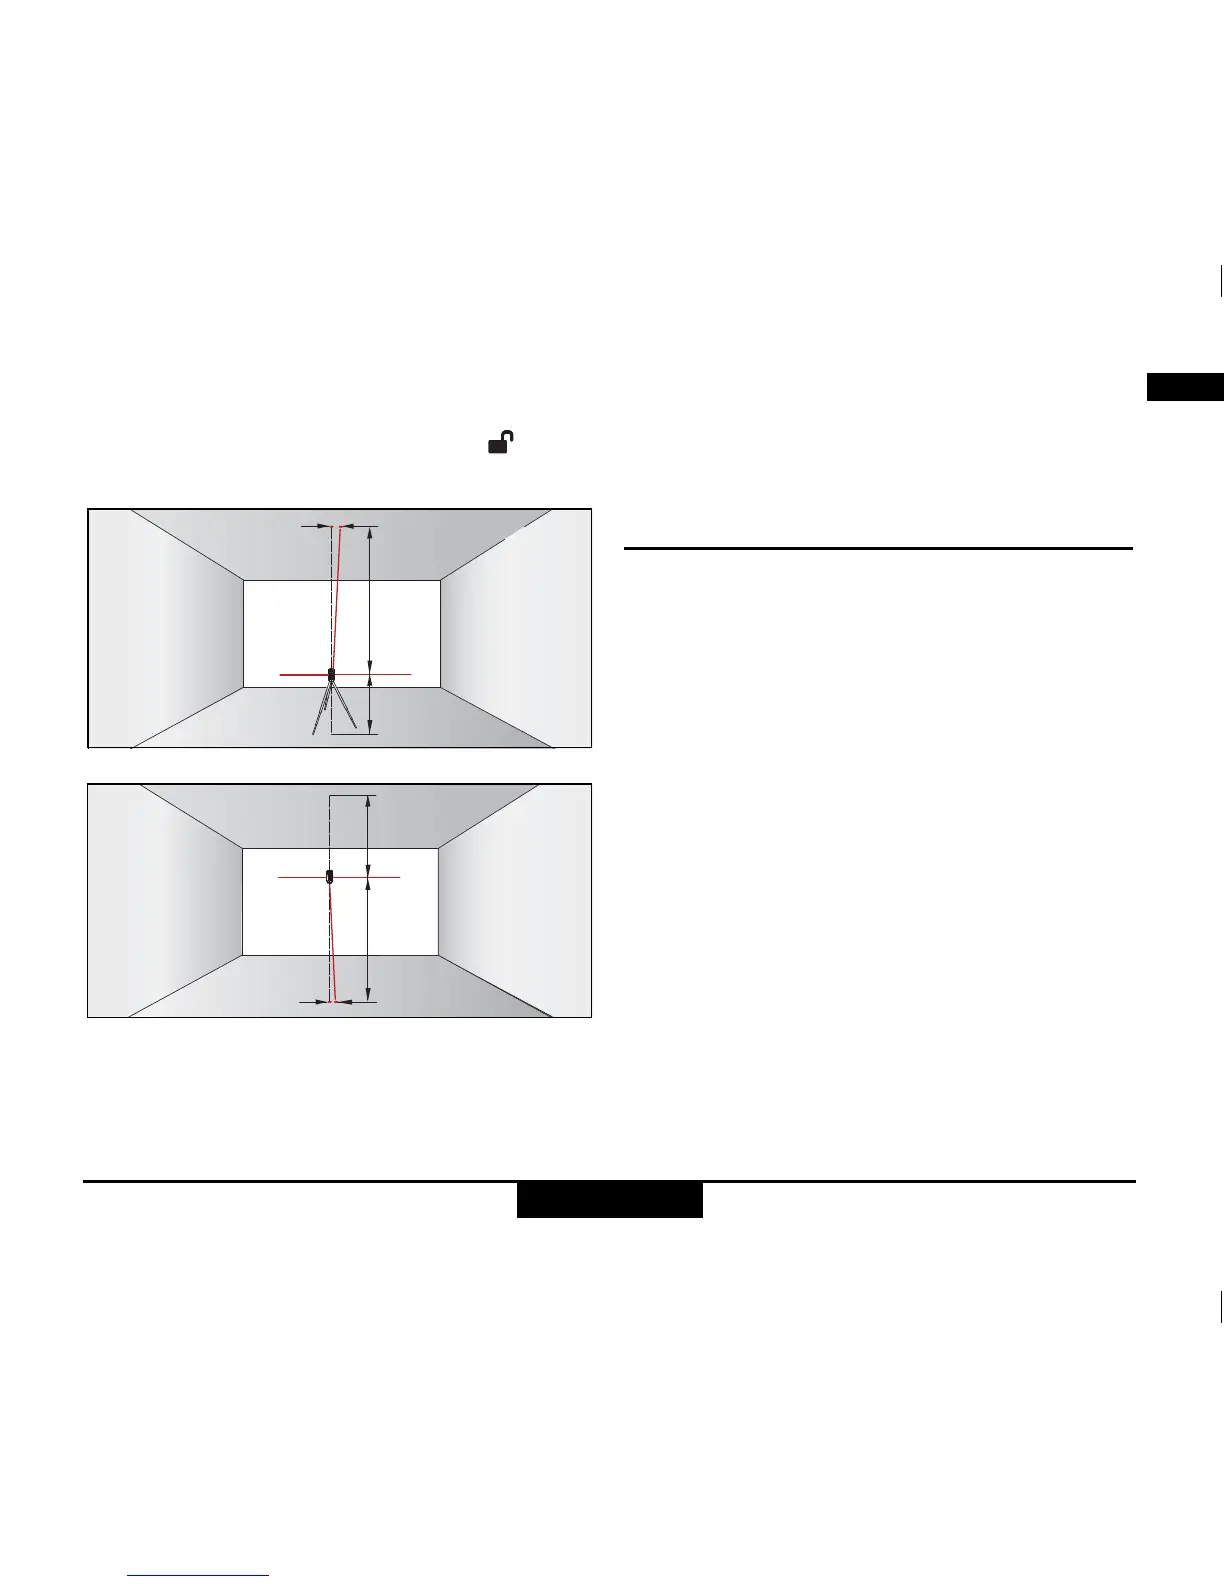
Checking the accuracy of the vertical
plumbing of the PLL11:
Place the Lock switch 3 in the "Unlocked" ( )
position.
Checking the upper plumbing point:
Checking the lower plumbing point:
Set up the laser on its tripod or wall mount bracket near
point A1 at a minimum distance of 1.5 m from point B1.
The horizontal laser is aligned in direction 1. Mark the
laser dots A1 and B1 with a pin.
Rotate the instrument by 180° so that it points in the
opposite direction 2 to direction 1. Adjust the instrument
so that the laser beam hits point A1 exactly. If point B2 is
no further than 2 mm away from point B1, then the PLL
11 is within tolerance.
)
Should your CLL 11/PLL 11 be outside of the
specified tolerance, please contact an authorised
dealership of Würth Electronics.
Display notices
Falling below or exceeding the permissible
temperature range:
The laser switches off and all symbols flash.
Outside of the self-levelling range:
The laser switches off and the symbol of the function
used starts to flash.
Pendulum locked:
The laser beam is not levelled and the Lock symbol 4
lights up.
 Loading...