This document is a user manual for an LED Smart Projector from WZATCO.
Function Description
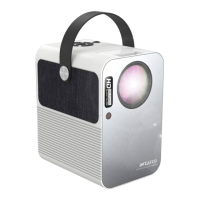
The WZATCO LED Smart Projector is a versatile device designed for various projection needs. It functions as a smart projector with an integrated Android TV OS, allowing for direct access to apps, streaming services, and internet connectivity. It supports multiple projection modes (front on desk, front on ceiling, rear on desk, rear on ceiling) and offers advanced image correction features. The projector also includes Bluetooth audio input and output, making it capable of connecting to external speakers or acting as a Bluetooth soundbar itself. It supports screen mirroring functions like Miracast, AirPlay, and DLNA, enabling seamless content sharing from Android phones, iOS Apple phones, iPads, and Windows 10 devices.
Important Technical Specifications
- Projection System: LED+LCD
- Native Resolution: 1280*720P Physical
- OS System: Google Android TV
- Android Version: 9.0
- CPU: Quad Core A55
- GPU: G31 Mali
- Memory: 2G+16G/32G eMMC
- Contrast Ratio: 2000:1 with 8-digits IPS Panel
- Sound System: 10W*2 Stereo Speakers with 300CC Sound Chamber
- Colors: 16.77 Million
- Throw Ratio: 1.66:1
- Lifespan: >20,000 Hours
- Power: 90~240V Ac
- Inputs/Outputs: HDMI x 2, USB x 2, Audio Out, Composite Video, WiFi, Bluetooth
- Keystone Correction: 4D Digital Keystone Correction (four points trapezoidal adjustment)
- Wireless Connectivity: WiFi+Bluetooth
- Screen Mirroring: Eshare (Miracast+AirPlay), DLNA Function
Usage Features
- Installation and Projection Modes: The projector can be installed in four ways: Front on desk, Front on ceiling, Rear on desk, and Rear on ceiling. A "Setting" menu allows users to select the desired projection mode. Ceiling mount installation instructions are provided, emphasizing the use of appropriate screws.
- Power On/Off: The projector can be turned on/off by pressing the power button on the unit or the remote control. It takes approximately 8 seconds to start up.
- Focus Adjustment: The lens features a "Focus Ring" for manual adjustment to achieve a clear picture. If clarity is not achieved, repositioning the projector closer or further from the screen is recommended.
- Bluetooth Remote Control: The projector comes with a Bluetooth remote control, which may also have voice control capabilities depending on the version. Pairing the Bluetooth remote involves entering the homepage, pressing the "Voice Key," and following the on-screen prompts to match the device.
- First-Time Setup (Google Android TV): For initial use, the projector requires a detailed sign-in process for Google Android TV. This includes linking to a Wi-Fi network and signing into a Google account to access apps, recommendations, movies, and games from Google Play.
- Homepage Navigation: The homepage features a voice and keyboard input for search, a section for frequently used apps (with shortcuts and options to add/cancel apps), a "Push Area" for consultation information, and "Custom channels" for adding/removing content from the home screen.
- Settings: Users can modify projector parameters through the "Settings" menu, including "General setting," "Video Audio and Display," and "System and Accessories."
- App Management: Apps can be downloaded from the Google Play Store for TV or installed via USB. To install from USB, copy the APK file to the root directory of a U disk, then use the "Filemanager" through the "Apps" menu to install.
- Bluetooth Device Pairing: The projector supports pairing with Bluetooth speakers and other devices. This is done via the "Settings" > "Bluetooth & Remotes" menu, where users can add accessories.
- Internet Connectivity: Wi-Fi settings are configured through "Settings" > "General Settings" > "Network & Internet" > "WiFi." Users select an available network and input the password.
- Screen Mirroring (Eshare): The Eshare App is pre-installed for mirroring content from Android phones, iOS Apple phones, iPads, and Windows 10. To use, ensure the phone/pad and projector are on the same network. The Eshare app can be downloaded by scanning a QR code on the projection screen or from a website. Eshare offers functions like mirroring, TV mirroring, and remote control.
- 4D Digital Keystone and Zoom: Beyond standard horizontal and vertical keystone correction, the projector supports four-point trapezoidal adjustment. This feature is accessed via "Settings" > "Keystone Correction." Users can select image corners and use direction keys to stretch or compress the image to achieve a regular rectangle. It's noted that excessive keystone correction (over 30 degrees) may cause image blur, and positioning the projector near the screen center is recommended for better image quality.
- Source Selection: When external devices are connected, the "source" interface in "Settings" or the "source" button on the remote control allows users to choose between HDMI 1, HDMI 2, and AV1 inputs.
- System Update: The system can be updated in two ways: "Online upgrade" for the latest system software or "UpdateLocale" by placing seller-provided software on a U disk and selecting it through the update menu.
Maintenance Features
- Safety Precautions: The manual emphasizes important safety precautions, including proper ventilation, avoiding hot, humid, or dusty places, not blocking ventilation holes, and keeping the projector away from high-temperature or smoke sensors and direct air conditioning.
- Installation Care: Users are advised to use the unit in a dark room for the best effect and handle it with care to prevent damage from dropping or bumping.
- Power Cord Care: The power cord should be handled carefully to avoid bending or damage, which could lead to electric shock or fire. The power cord should be unplugged after use.
- Cleaning: The cabinet should be periodically cleaned with a damp cloth and neutral detergent. Strong detergents or solvents should be avoided. The lens should be cleaned with an airbrush or lens paper, taking care not to scratch it. Vents and speakers should be regularly cleaned with a vacuum cleaner and a soft brush to prevent dust accumulation and overheating.
- Fire and Electric Shock Prevention: Ensure air vents are not blocked to prevent hot air accumulation. Prevent foreign objects like paper clips or dust from falling into the unit. Never insert metal objects. If an item falls into the projector, turn it off and consult the seller. Do not place liquids on top of the unit.
- Moving the Projector: When moving, use soft packaging material and avoid violent vibrations.
- High Temperature Attention: The area around the exhaust port becomes hot before and after projection; avoid touching it to prevent burns.
- Placement: To maintain performance and reliability, leave at least 30 CM between the projector and any wall.
- System Update Precautions: During system updates, users are advised not to perform other operations. For any update issues, contact the relevant seller for support.