EasyManua.ls Logo

X-media XM-WN3200 - User Manual

X-media XM-WN3200
23 pages
Print Icon
To Next Page IconTo Next Page
Loading...
User Guide
300Mbps Wireless-N USB Adapter
Model No.:
XM-WN3200 v2.0
Version 1.0
Question and Answer IconNeed help?

Do you have a question about the X-media XM-WN3200 and is the answer not in the manual?

Summary

Chapter 1 Product Overview

1.1 Introduction

Provides a general overview of the 802.11n client device for high-speed wireless performance.

1.2 Features

Lists the key specifications and capabilities of the wireless adapter.

1.3 Before Installation

Advises users to read the guide and uninstall other wireless adapter software.

1.4 Disable other manufacturers wireless network adapter

Instructions on how to disable conflicting wireless adapters in Windows.

1.5 Product Maintenance

Basic guidelines for maintaining the product's performance and longevity.

Chapter 2 Installation Guide

2.1 Installing Wireless USB Adapter

Step-by-step instructions for installing the wireless USB adapter and its software.

Chapter 3 How to use the Windows Built-in Utility

3.1 Connecting in Windows XP

Guide on connecting to wireless networks using Windows XP's built-in utility.

3.2 Connecting in Windows 7

Guide on connecting to wireless networks using Windows 7's built-in utility.

Chapter 4 Wireless LAN Utility

4.1 Station Mode

Explanation of the adapter's operation and configuration in Station mode.

4.2 Introduction of Main Windows

Overview of the main interface windows for the wireless LAN utility.

4.3 AP Mode

Explanation of the adapter's operation and configuration in Access Point (AP) mode.

Overview

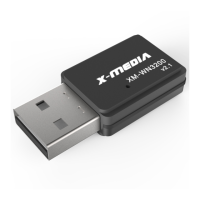
The X-MEDIA 300Mbps Wireless-N USB Adapter (Model No.: XM-WN3200 v2.0) is a client device designed to provide high-speed wireless connectivity for desktop and laptop computers. It aims to enhance the internet experience for users, facilitating activities such as downloading, gaming, and video streaming with improved performance.

Function Description

The adapter operates based on 802.11n technology, which incorporates MIMO (multiple input, multiple output) for higher throughput. This allows for faster packet transfer rates, maximizing the overall throughput of the wireless connection. The device features an auto-sensing capability, enabling it to automatically detect and adjust the network transmission rate for optimal performance.

It supports two primary work modes: Ad-hoc and Infrastructure. In Infrastructure mode, the adapter connects to an existing wireless network provided by an access point (AP) or router. In Ad-hoc mode, it can establish a direct peer-to-peer connection with another wireless device without the need for an intermediary access point. Additionally, the adapter supports a Soft AP function, allowing it to act as a virtual access point to establish a wireless LAN network, enabling other wireless devices to connect to it.

Security is a key aspect of the adapter's design. It supports various encryption methods, including 64/128-bit WEP, WPA, and WPA2, along with 802.1x security authentication standards. These features are intended to prevent unauthorized access to the network and protect personal information from being exposed. The adapter also includes a Wireless Roaming function, which allows connected devices to seamlessly switch between different access points within the same network without losing connectivity.

The device is designed to be compatible with a range of Windows operating systems, including Windows 2000, Windows XP, Windows Vista, Windows 7, and Windows 8/8.1, ensuring broad usability across different computer setups.

Usage Features

Before installation, users are advised to read the User Guide thoroughly. It is recommended to close or uninstall any existing configuration programs for other manufacturers' wireless adapters to prevent potential user interface conflicts during installation. To avoid network conflicts, any other Wi-Fi network adapters should be disabled before installing the driver for the X-MEDIA adapter.

Installation involves inserting the wireless USB adapter into a computer's USB port and then running the setup program from the provided software CD. The installation wizard guides the user through the process, automatically installing the necessary drivers and utility software. During installation, users may encounter a "Found New Hardware Wizard" dialog, which should be ignored by clicking "Cancel" as the setup program handles the driver installation. After the driver installation begins, users will click "Next" to proceed and "Finish" to complete the process, with an option to restart the computer.

For connecting to a wireless network, users can utilize either the Windows built-in wireless utility or the dedicated Wireless LAN Utility provided by REALTEK.

Using the Windows Built-in Wireless Utility (Windows XP):

  1. Right-click "My Network Places" on the desktop and select "Properties."
  2. Open the network connection, right-click "Wireless Network Connection," and select "View Available Wireless Networks."
  3. The screen will display scanned wireless networks. Users can click "Refresh Network List" to update the list if their desired network is not visible.
  4. Select the desired wireless network and click "Connect" or double-click it.
  5. If the network is encrypted, a key dialogue box will appear, prompting the user to input the network key (which is case-sensitive). After entering the key, click "Connect." If the network is unencrypted, this dialogue box will not appear.
  6. Once "Connected" is displayed, wireless internet access is available.

Using the Windows Built-in Wireless Utility (Windows 7):

  1. Click the wireless connection icon in the lower right corner of the desktop to view available networks.
  2. Select the desired wireless network and click "Connect" or double-click it. Use the refresh icon if the network isn't listed.
  3. If the network is encrypted, enter the key and click "Ok."
  4. A "Connected" status will appear upon successful connection. Users can then right-click the wireless network to disconnect, view its status, or modify properties. It is crucial to ensure that the authentication and security settings match those of the wireless router.

The REALTEK USB Wireless LAN Utility can be accessed via "Start" > "Programs" > "REALTEK USB Wireless LAN Utility" or by clicking its shortcut on the desktop.

The utility's main window includes several sections:

  • Main Menu: Offers "Refresh(R)" to update the adapter list, "Mode(M)" to switch between Station and Access Point modes, and "About(A)" to display application version and license information.
  • Adapter List Area: Displays all connected adapters, allowing users to select a specific adapter if multiple are installed.
  • Properties Area: Shows detailed information based on the current wireless configuration (Station or AP mode).

In Station Mode, the utility provides a "General Page" with information such as:

  • Status: Connection status to the AP.
  • Speed: Current transmission speed in Mbps (Tx and Rx).
  • Type: Wireless LAN configuration type (Infrastructure or Ad-hoc).
  • Encryption: Current encryption mode.
  • SSID: Name of the wireless network.
  • Signal Strength: Average signal quality, with a recommendation to connect to APs with over 70% strength.
  • Throughput Diagram: Visual representation of current throughput (transmission and total traffic).
  • Network Address: MAC Address of the adapter, IP Address (assigned by DHCP or self-defined), Subnet Mask (typically 255.255.255.0), and Gateway (from the connected AP).

The "Profile Page" in Station Mode allows for managing network profiles:

  • Add: Create a new profile for AP or IBSS (Ad-Hoc).
  • Remove: Delete a selected profile.
  • Edit: Modify a selected profile's contents.
  • Duplicate: Create a copy of a profile.
  • Set Default: Designate a profile as the default.
  • Available Network Page: Lists all available BSS (AP and IBSS) networks, allowing users to select and connect.

The "Available Networks" section lists surrounding network connections. The "Status Page" provides detailed technical information about the adapter and its connection, including NDIS Driver Version, Short Radio Header status, Encryption and Authentication types, Channel Set, MAC Address, Data Rate, Channel (Frequency), Status, SSID, Network Type, Power Save Mode, Associated AP MAC, Associated AP IP, and Up Time.

The "Global Control Bar" includes:

  • Show Tray Icon: Minimizes the utility to the system tray when "Close" is clicked. If unchecked, the utility shuts down.
  • Radio Off: Turns off the wireless radio to save power, disconnecting from wireless network nodes. This is important to note when in AP mode, as it will disconnect sub-networks.
  • Disable Adapter: Stops the wireless USB device.

In AP Mode, the adapter can function as an access point. To switch to AP mode, users select "Mode (M)" from the main menu and choose "Access Point." The "General Page" in AP mode displays:

  • SSID: Name of the AP.
  • BSSID: MAC address of the AP.
  • Association Table: A list of connected stations, including their AID (Association ID), MAC Address, and Life Time (a countdown timer for inactivity, after which a station may be disassociated).
  • Config: A dialog for modifying AP configuration, including:
    • Network Name (SSID): The name searchable by other wireless devices (max 32 characters).
    • Channel: Selection of the wireless channel.
    • Network Authentication & Data Encryption: Options include "Open System" (with WEP or disabled encryption), "Shared Key + WEP" (for both authentication and encryption), and "WPA-PSK + TKIP & WPA2-PSK + TKIP" for advanced security.
    • ASCII/PASSPHRASE: For WEP keys, users can input ASCII characters (15 or 13 for 64-bit and 128-bit WEP, respectively) or a passphrase. If neither is checked, hexadecimal numbers (10 digits for 64-bit, 26 for 128-bit) are used.
    • Key index (1~4): Up to four key indexes can be set for the network key.

The "Advanced Page" in AP mode allows users to configure advanced network packet characteristics:

  • Beacon Interval: The interval between beacon transmissions from the AP (in TU, 1024 micro-seconds).
  • DTIM Period: The number of Beacon intervals between successive DTIMs.
  • Preamble Mode: Options include "Long" (higher quality, lower performance), "Short" (normal quality, higher performance), and "Auto" (selects based on signal frame information).

The "Statistics Page" provides a real-time analysis of packet transition, showing Tx/Rx status, including counts for Tx OK, Tx Error, Rx OK, Rx Packet Count, Rx Retry, and Rx ICV Error.

Maintenance Features

To ensure the longevity and proper functioning of the adapter, several maintenance guidelines are provided:

  • Environmental Protection: Keep the product away from water and humid environments to maintain its normal performance.
  • Hazardous Substances: Protect the adapter from hazardous substances such as acids and alkalis.
  • Temperature and Sunlight: Avoid direct exposure of the adapter to sunlight or excessive heat.
  • Technical Support: In case of any problems or issues, users are advised to contact technical support.
  • Packaging Retention: Users should save the original packaging material for future reference, especially if any items are damaged or missing, to facilitate contact with the seller.

X-media XM-WN3200 Specifications

General IconGeneral
ModelXM-WN3200
CategoryAdapter
InterfaceUSB 2.0
Frequency Band2.4 GHz
Wireless StandardsIEEE 802.11n
SecurityWEP, WPA, WPA2
Operating System CompatibilityWindows XP/Vista/7/8/10

Related product manuals