EasyManua.ls Logo

X10 MS16A - User Manual

X10 MS16A
2 pages
Print Icon
To Next Page IconTo Next Page
Loading...
Description: The Outdoor Motion Sensor, MS16A, is a battery operated, RF Transmitter capable of sensing: Motion and Dusk/Dawn events. It transmits an X10
Command to an X10 RF Base Transceiver (TM751) which then passes the X10 Command onto the AC wiring of the structure. This can be used to control X10 Receiver
Modules, i.e. - Light and Appliance Modules, ON/OFF. The X10 Command can also be used, as a trigger, to initiate Macros in the CM15A, ActiveHome Two-Way Computer
Interface Module. This would allow for complex routines to be executed as soon as the MS16A detects motion. The MS16A can be used indoors as well.
Specific Requirements:
2 - AAA Batteries, TM751 - RF Base Transceiver Module
Optional / Supplementary Devices & Modules:
SC546A - Chime, WS467 -Wall Switch, LM465 - Lamp Module
X10 Protocol: House Code Dial - Letters A-P, Default "A" Unit Number Dial - Numbers 1-16, Default "1" Each X10 Receiver Module is set to a unique Unit Number or to
an identical Unit Number as desired. Each X10 Controller operating a specific set of Receiver Modules must be set to the same House Code as the Receivers they are
controlling.
Electrical Protocol:
Nearly all residential homes are wired SPLIT-PHASE. Each 120V Phase is NOT directly connected with the other 120V phase. If after installation, an X10 Receiver does not
respond to a remote Controller, then check to ensure that the breaker serving the X10 Receiver is on the same phase as the Controller. If not, the breaker can be changed to
the opposite phase. An alternative solution is recommended, to install a Phase Coupler for improving remote communications throughout the home.
Installation: Setting up the MS16A:
1. Remove the battery cover on the front of the MS16A and install two AAA alkaline batteries. Initially the MS16A defaults to House Code "A" and Unit Code "1" and
defaults to See Motion, all the time (24hrs).
2. Plug-in an X10 RF Base Transceiver (TM751 -sold separately), set the House Code to "A".
3. Install or plug-in an X10 Receiver Module, for Light Appliance control, and set the Receiver Module to House Code "A" / Unit Code "1".
Testing the MS16A:
1. Press the House button once, the MS16A will transmit an RF X10 ON Command and the Red LED will flash.
2. Press the Unit button once, the MS16A will transmit an RF X10 OFF Command and the Red LED will flash. (The default setting is "A1" ).
3. Place the Sensor on a shelf or mount it on a wall at least 6 feet above the ground and let it settle for at least 1 minute (default) with no motion before activation.
Changing the House and Unit Codes:
1. Press and hold the House Code button, the Red LED flashes first, goes off and then blinks the current setting.
2. Release and press the desired number of times for the House Code that you want (once for A, twice for B, etc.).
3. Hold the House Code button on the last press; after 3 seconds the Red LED will blink the amount of times to confirm your settings.
Note: For Unit Code changes, perform the same as above but using the Unit Code button.
Question and Answer IconNeed help?

Do you have a question about the X10 MS16A and is the answer not in the manual?

Summary

Outdoor Motion Sensor MS16 A Product Overview

Product Description and Requirements

Details the MS16A's functionality, specific requirements including batteries and base transceiver, and optional devices.

X10 and Electrical Protocols

Explains X10 protocol settings (House/Unit Codes) and residential electrical wiring considerations for X10 communication.

Installation and Basic Operation

Covers initial setup, testing the sensor's RF transmission, and procedures for changing House and Unit Codes.

Advanced Motion Detection Configuration

Motion Detection Modes Configuration

Sets the MS16A to detect motion only at dusk/dawn or at all times, and controls dusk/dawn event transmission.

Setting Delay After Motion

Configures the time delay before the OFF command is sent after motion stops, overriding the analog dial.

Sensor Performance and Defaults

Optimal Sensor Placement Guidelines

Provides advice on mounting the MS16A for best motion detection and avoiding false triggers.

Default Settings Summary

Lists the default House/Unit Codes for motion and dusk/dawn detection, and the default time-out period.

Overview

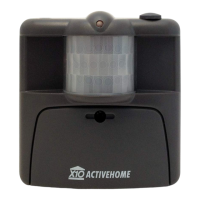
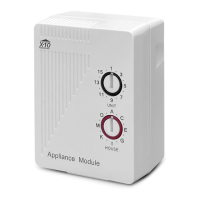
The X10 Outdoor Motion Sensor, MS16A, is a battery-operated RF Transmitter designed to detect both motion and dusk/dawn events. Upon detection, it transmits an X10 Command to an X10 RF Base Transceiver (TM751), which then relays the command onto the AC wiring of your home. This allows the MS16A to control various X10 Receiver Modules, such as Light and Appliance Modules, enabling them to be turned ON or OFF. Additionally, the X10 Command can act as a trigger for Macros within the CM15A ActiveHome Two-Way Computer Interface Module, facilitating complex automated routines. The MS16A is versatile and can be used in both outdoor and indoor settings.

Specific Requirements:

  • Requires 2 AAA Batteries.
  • Needs a TM751 RF Base Transceiver Module (sold separately) for operation.

Optional / Supplementary Devices & Modules:

  • SC546A - Chime
  • WS467 - Wall Switch
  • LM465 - Lamp Module

X10 Protocol:

The device utilizes a House Code Dial (Letters A-P, default "A") and a Unit Number Dial (Numbers 1-16, default "1"). Each X10 Receiver Module can be assigned a unique or identical Unit Number. All X10 Controllers operating a specific set of Receiver Modules must be set to the same House Code as the Receivers they control.

Electrical Protocol:

Most residential homes are wired with a SPLIT-PHASE system, meaning each 120V phase is not directly connected to the other. If an X10 Receiver doesn't respond to a remote Controller after installation, ensure that the breaker serving the X10 Receiver is on the same phase as the Controller. If not, the breaker can be changed to the opposite phase. Alternatively, installing a Phase Coupler is recommended to improve communications throughout the home.

Installation: Setting up the MS16A:

  1. Remove the battery cover on the front of the MS16A and insert two AAA alkaline batteries. The MS16A defaults to House Code "A" and Unit Code "1", and is set to detect motion all the time (24 hours).
  2. Plug in an X10 RF Base Transceiver (TM751 - sold separately) and set its House Code to "A".
  3. Install or plug in an X10 Receiver Module (e.g., for Light Appliance control) and set its House Code to "A" / Unit Code "1".

Testing the MS16A:

  1. Press the House button once: The MS16A will transmit an RF X10 ON Command, and the Red LED will flash.
  2. Press the Unit button once: The MS16A will transmit an RF X10 OFF Command, and the Red LED will flash (default setting is "A1").
  3. Place the sensor on a shelf or mount it on a wall at least 6 feet above the ground. Allow it to settle for at least 1 minute (default) with no motion before activation.

Changing the House and Unit Codes:

  1. Press and hold the House Code button. The Red LED will flash first, then go off, and then blink the current setting.
  2. Release and press the desired number of times for the House Code you want (e.g., once for A, twice for B).
  3. Hold the House Code button on the last press; after 3 seconds, the Red LED will blink the amount of times to confirm your settings. Note: For Unit Code changes, perform the same steps using the Unit Code button.

Motion Detection only after Dusk or 24 hours:

This feature configures the MS16A to send an ON Command at dusk (no light) and an OFF Command at dawn (any light) for the Unit Code one number higher than the current Unit Code setting (e.g., MS16A set to A1 will control A2 when dawn/dusk is detected). This feature is disabled when battery power is initially applied. This section also configures the MS16A to detect motion at all times or only at night. The default setting is to detect motion at all times.

  1. Press the UNIT/OFF button once.
  2. The red LED flashes.
  3. Press and hold the HOUSE/ON button.
  4. The green LED (behind the sensor window) turns on.
  5. A few seconds later, the MS16A reports its current setting. Release the button. The number of blinks represents the following:
    • 1 Blink: Dawn/Dusk Disabled, Motion Detection Day & Night
    • 2 Blinks: Dawn/Dusk Disabled, Motion Detection Night Only
    • 3 Blinks: Dawn/Dusk Enabled, Motion Detection Day & Night
    • 4 Blinks: Dawn/Dusk Enabled, Motion Detection Night Only
  6. If you don't want to change the current setting, take no further action. The MS16A will timeout, indicated by a sustained blink (slightly longer than the report blinks).
  7. To change the current setting, first select the desired Dawn/Dusk and Motion Detection settings from the chart and remember the blink value. Determine the setting before starting the programming procedure, as the MS16A will only wait a few seconds after reporting its current setting.
  8. Press the HOUSE/ON button the number of times equal to the blink value in the chart. Hold the button down on the last press.
  9. A few seconds later, the red LED will blink the new setting.
  10. If programming fails, the red LED will display a sustained blink. This can happen if you wait too long, press the button more than twice, or press the UNIT/OFF button. If programming fails, you must restart the procedure.

Delay after Motion before an OFF command is sent:

When no motion is detected, the default time before an OFF Command is transmitted is controlled by the Analog Top Dial (under the rubber plug on the top of the MS16A). The dial adjusts the delay range from 1 minute to 60 minutes. The following procedure allows you to alter this setting.

  1. Press the House button once. The Red LED flashes.
  2. Press and hold the Unit button. The Green LED turns ON. 3 seconds later, the Red LED will report the setting as follows:
    • 1 blink for Analog Dial 1-60 Mins.
    • 6 blinks for 32 minutes.
    • 2 blinks for 2 minutes.
    • 7 blinks for 64 minutes.
    • 3 blinks for 4 minutes.
    • 8 blinks for 128 minutes.
    • 4 blinks for 8 minutes.
    • 9 blinks for 256 minutes.
    • 5 blinks for 16 minutes. Note: When the setting is 2 blinks or higher, the dial on top of the MS16A is disabled.
  3. If you do not wish to change the current setting, take no further action. The MS16A will timeout, indicated by a sustained blink.
  4. To change the current setting, first select the delay time you wish to use from the chart above and remember the blink value. Determine the time before starting the programming procedure, as the MS16A will only wait a few seconds after reporting its current setting.
  5. Press the UNIT/OFF button the number of times equal to the blink value in the chart above. Hold the button down on the last press.
  6. A few seconds later, the red LED will blink the new setting.
  7. If programming fails, the red LED will display a sustained blink. This can happen if you wait too long, press the button more than twice, or press the HOUSE/ON button. If programming fails, you must restart the procedure.

Sensor Detection vs. Direction of Motion:

For best detection results, mount the MS16A so that a person entering the area will cut across the MS16A's field of view. Avoid mounting the PMS 03 near hot or cold sources (e.g., heat vents, air conditioners, direct or reflected sunlight) as this may cause false triggering. The sensor's fields of view are 90 degrees horizontally, 30 degrees vertically, and the detection range is approximately 20 feet.

DEFAULTS:

After replacing batteries, wait 30 seconds before the MS16A will see any motion. After transmission, you need to wait 10 seconds before the MS16A will see motion again.

  • The default House & Unit Codes for Motion Detection is: "A1" ON.
  • The default for Motion Detection is: detect at all times (24 HOUR).
  • The default for Time Out, that "A1" OFF is sent is: 1 minute.
  • The default House/Unit Codes for Dusk/Dawn, is: "A2" ON at Dusk, "A2" OFF at Dawn.

Note: Electrical fields, metal doors or door window frames, and appliances can cause interference that may decrease the strength of the transmitted signal. Re-locating the TM751 RF Base Transceiver may increase your ability to receive the necessary X10 Signals from the MS16A.

DAY LIMITED WARRANTY:

x10pro-usa.com (X10PRO-USA), a division of Authinx Inc., warrants this product to be free from defective material and workmanship for a period of 30 days from the original date of purchase at retail. X10PRO-USA agrees to repair or replace, at its sole discretion, a defective product if returned within the warranty period and with proof of purchase. If service is required under this warranty, contact 1-888-384-0969, visit www.x10pro-usa.com, or email support@x10pro-usa.com.

X10 MS16A Specifications

General IconGeneral
BrandX10
ModelMS16A
CategoryAccessories
LanguageEnglish

Related product manuals