LEH internal user selectable adjustments
To access the internal adjustments inside the LEH you first should remove it from the center post.
Remove the six 3/32” hex head screws holding the housing together. Lift up a few inches and turn it over.
There will be 6 to 8 wires and 1 or 2 connectors depending on your options connecting the top half to
bottom half - they do not have to be removed just be aware of them. You now have access to make the
following choice of adjustments.
1) Set the 12 and 24 volt low battery indicators SW1 & SW2
2) Move the battery plate designation order from standard wiring B1, B2, B3.
Setting the Low Battery Indicators
Factory preset: SW1- 24.2 volts, SW2- 13.4 volts
When setting your low battery indicator keep a few things in mind.
The chemistry, age and watt hr. of battery packs most commonly used.
The length of time I want to keep the system running after the “LO” battery indicator turns on
based the cameras current draw and camera shut down low battery voltage point.
Because battery types and wattages vary, we allow you to simply adjust the LO battery indicator
to fit your needs. There are two different settings. One for 12 volt mode camera systems SW2 and one for
24 volt mode camera systems SW1.
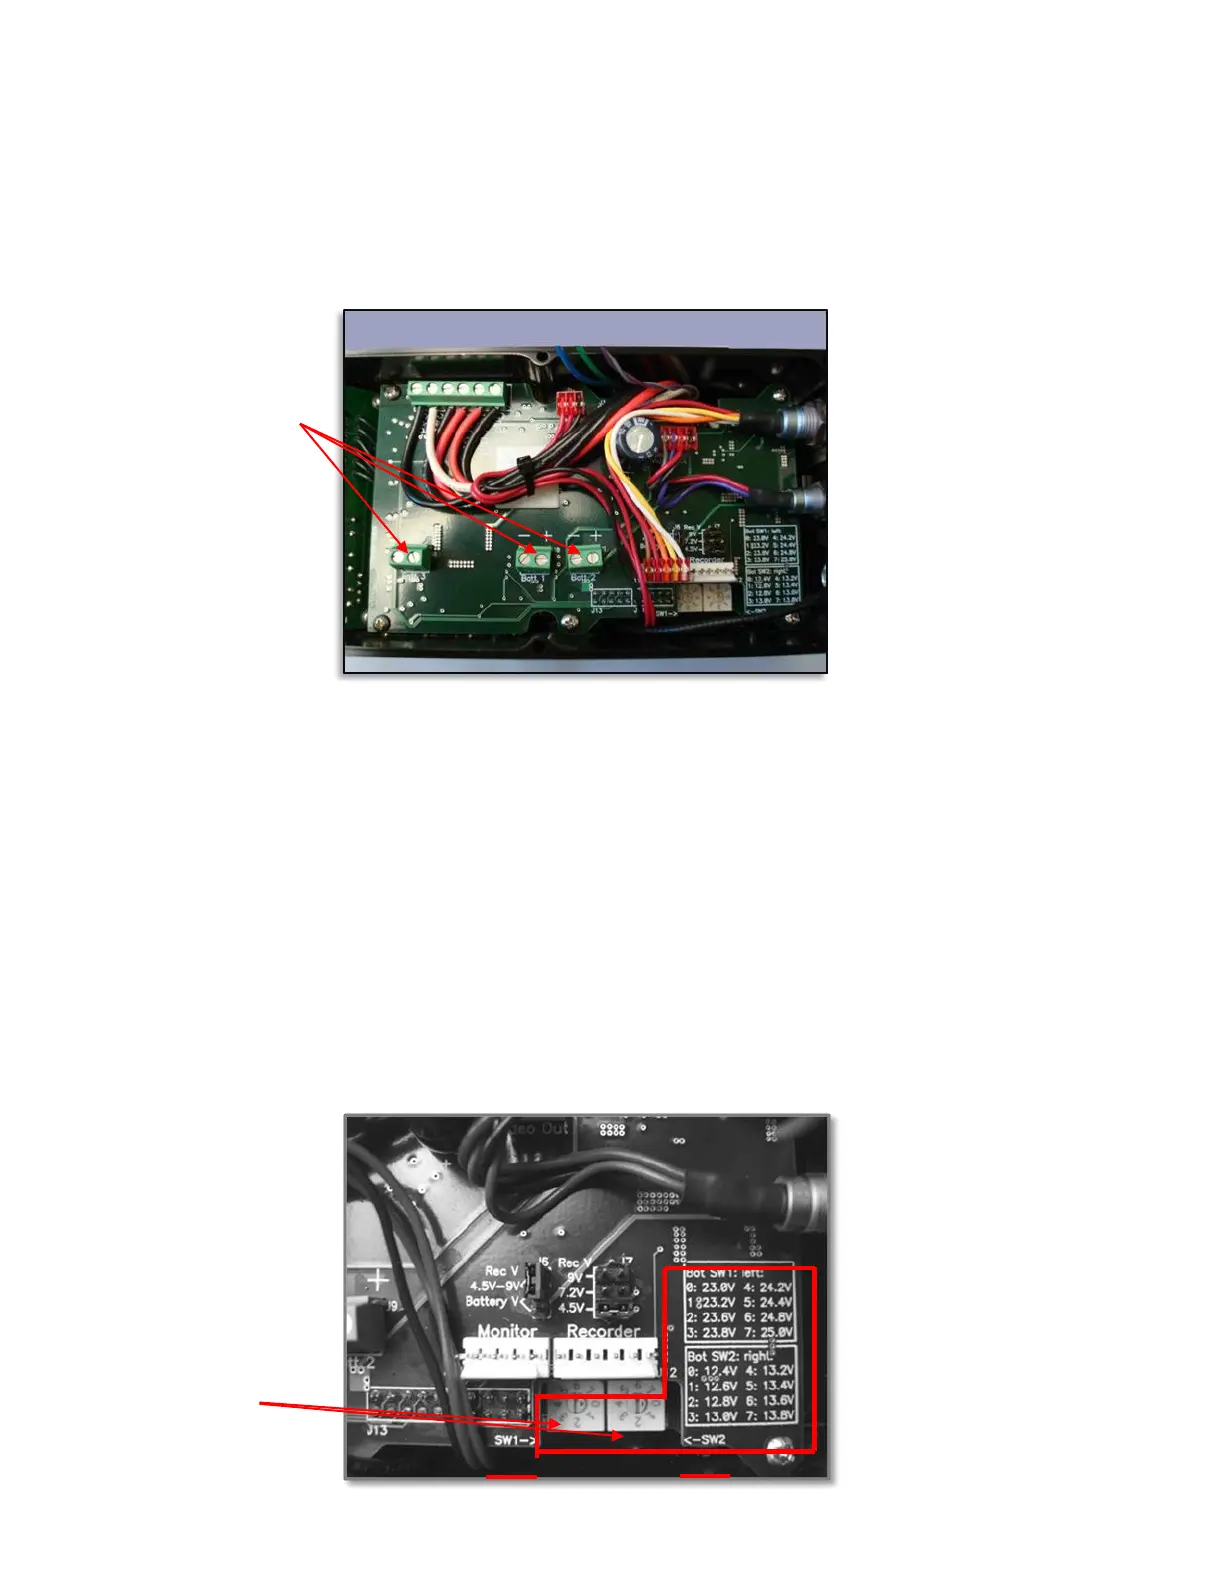
To set each LO battery indicator you simply need to turn the 8 position rotary switch label 0-8 that
corresponds to a specific voltage indicated. This setting indicates the voltage level the LED will turn on.
There are two rotary switches inside the housing and a voltage value key that shows the rotary switch
number and the voltage value it corresponds to (photo below).
Three battery
terminal blocks
Rotary switches to set
low battery indicators
 Loading...