7
8
CHAPTER 3 COMMISSIONING AND PROCESSING
3-1 COMMISSIONING
1. Select auto mode. If the system does not mechanically HOME, then click “HOME”.
2. Click the “LOAD” button, and find the nc. file to be milled on local computer folder or on
shared LAN folder. When the loading process is done, nc. file information, such as files
name, types of materials, etc. will display on the screen.
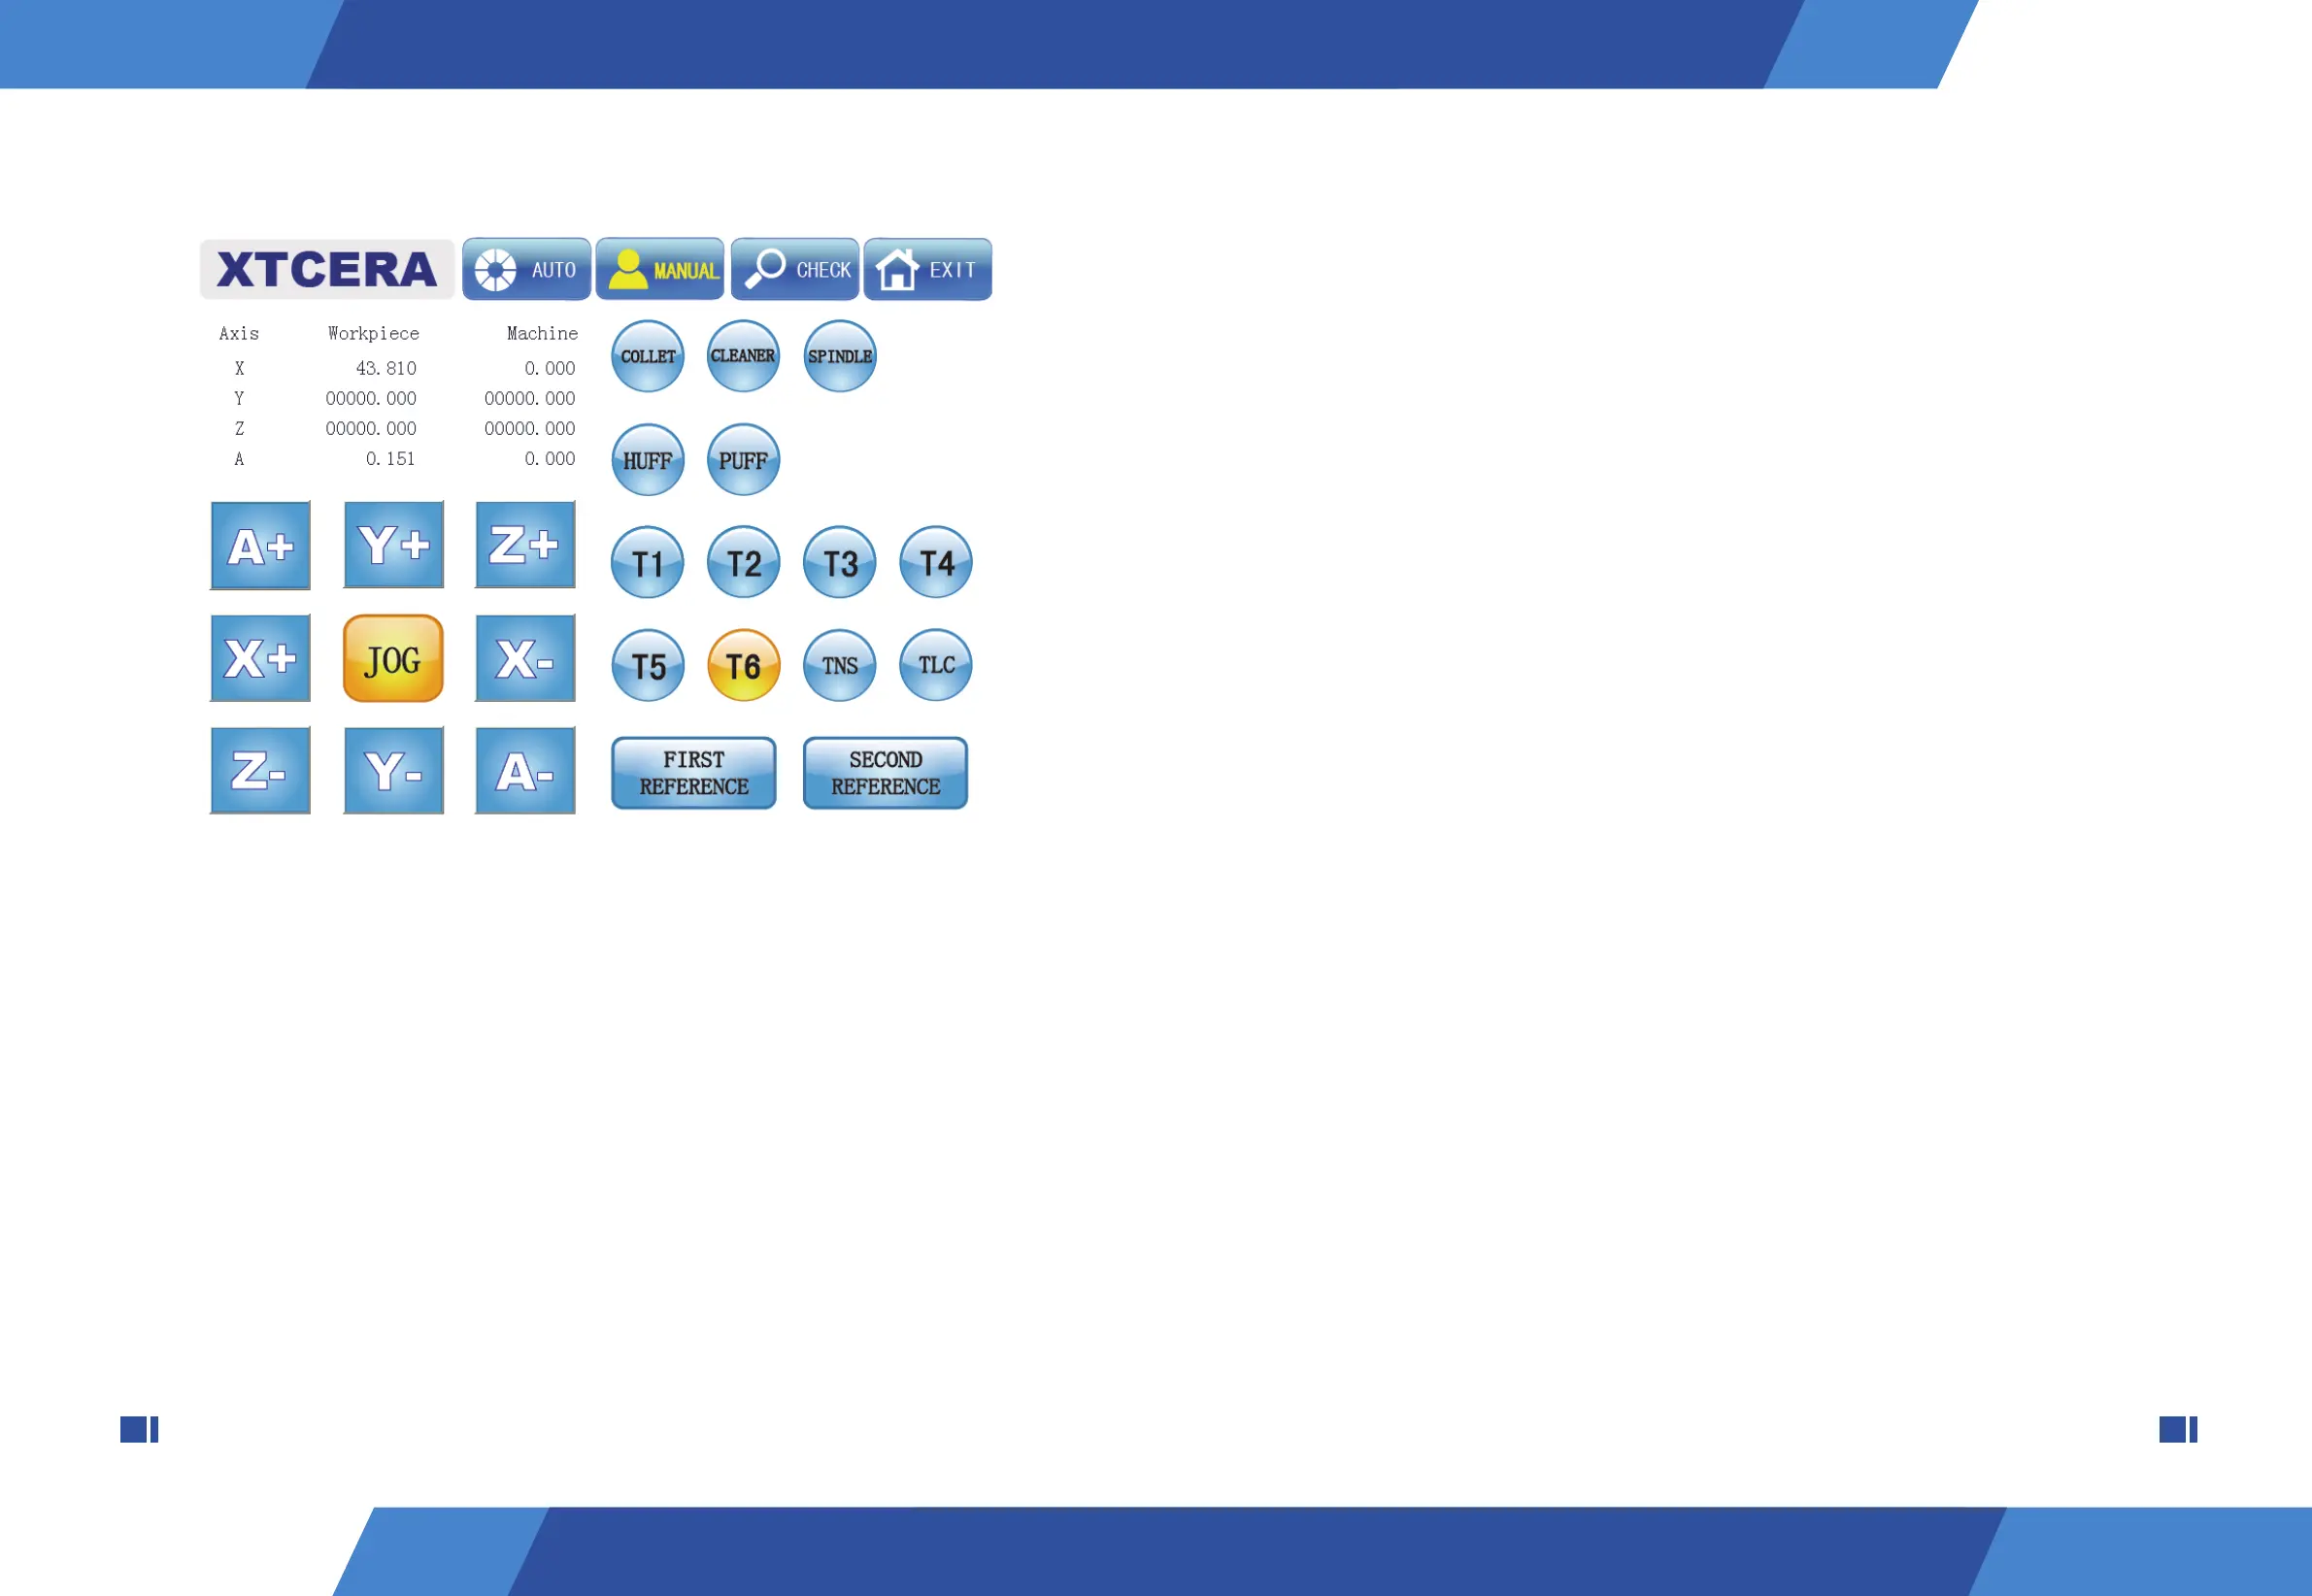
5. Check spindle and see if there is protection bar in it, use left hand to hold the protection
bar and click the "COLLET" button to loosen the spindle collet, take out the protection bar
and put milling bur into the collet one by one with your left hand, and meanwhile click the
“COLLET” with your right hand to tighten the bur.
6. Click the "CLEANER" button and observe if the vacuum cleaner starts and runs
normally. If there is no abnormality, then click the button again to shut off the vacuum clean-
er.
7. Click the "SPINDLE" button and observe if the spindle starts and runs normally. If there
is no abnormality, then click the button again to stop the spindle.
8. Click the “FIRST REFERENCE” button and the “SECOND REFERENCE” button suc-
cessively and observe if the equipment movement is normal and if the equipment stop posi-
tion is correct.
7. T1~T6 buttons highlight indicates current system bur number. Observe if the bur
number on the spindle collet is the same as that displays in the system; if they are different,
then click the “TNS” button. The “TNS” button highlight indicates that the bur number
setting function starts. Click T1~T6 to set the system bur number as the current bur; when
the step is done, click the button again to cancel the bur number setting function.
8. Click T1 ~ T6 successively, if the bur holder has not filled up with burs, then skip oper-
ating on corresponding burs and observe if the process of replacing burs is normal; please
stop operating immediately in case of abnormal situation.
9. When the bur changing process is done, click the “TLC” button to perform automatic
bur length checking and observe if this process is normal. At this point, the installation and
debugging work is completed.
Figure 2-2