PERIODIC MAINTENANCE AND ADJUSTMENT
7-31
7
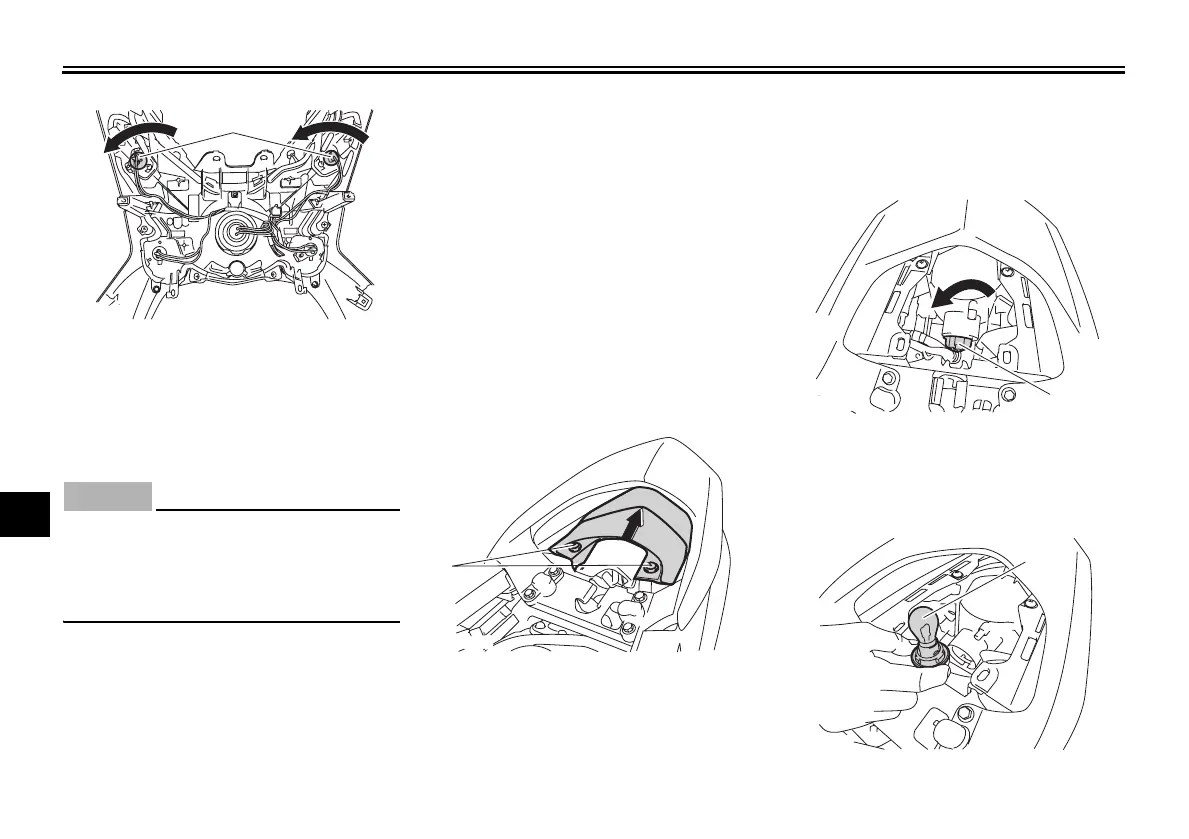
4. Remove the burnt-out bulb by
pulling it out.
5. Insert a new bulb into the socket
by pushing it in until it stops.
ECAU0080
NOTICE
_
If a turn signal light bulb of different
wattage than recommended is used,
the turn signal light flashing may be
affected.
_
6. Install the socket (together with
the bulb) by turning it clockwise.
7. Install the panel and cowling.
EAUU0881
Replacing a tail/brake light
bulb or a rear turn signal light
bulb
If a tail/brake light bulb or a rear turn
signal light bulb burns out, replace it as
follows.
Tail/brake light bulb
1. Open the seat. (See page 4-9.)
2. Remove the panel by removing
the screws, and then pulling the
panel outward.
3. Remove the bulb socket (together
with the bulb) by turning it coun-
terclockwise and pulling the tail-
light bulb socket up at an angle.
4. Remove the burnt-out bulb by
pushing it in and turning it coun-
terclockwise.
1. Turn signal light bulb socket (× 2)
1
ZAUU0951
1. Screw (× 2)
1
ZAUU0654
1. Tail/brake light bulb socket
1. Tail/brake light bulb
1
ZAUU0656
ZAUU0657
1
1PNF8199E0.book Page 31 Friday, August 24, 2012 2:00 PM
 Loading...