EasyManua.ls Logo

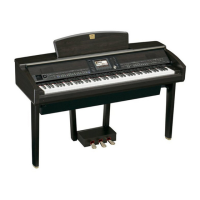
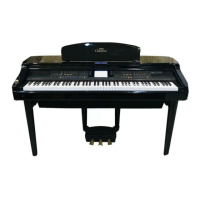
Yamaha Clavinova CVP-401 User Manual

Yamaha Clavinova CVP-401
226 pages
To Next Page IconTo Next Page
Page #1 background imageLoading...
Page #1 background image
CVP-405 / 403 /401
OWNER’S MANUAL
EN
For information on assembling the keyboard stand, refer to the instructions at the
end of this manual.
Make sure that your local AC mains voltage matches the voltage specified on the name plate on the bottom panel. In some areas
a voltage selector may be provided on the bottom panel of the main keyboard unit near the power cord. Make sure that the
voltage selector is set for the voltage in your area. The voltage selector is set at 240V when the unit is initially shipped. To change
the setting use a "minus" screwdriver to rotate the selector dial so that the correct voltage appears next to the pointer on the panel.

Table of Contents

Question and Answer IconNeed help?

Do you have a question about the Yamaha Clavinova CVP-401 and is the answer not in the manual?

Yamaha Clavinova CVP-401 Specifications

General IconGeneral
Number of Keys88
Polyphony128
EffectsReverb, Chorus, DSP, Master EQ
Recorder16-track
Internal Memory1.4 MB
Amplifiers20W x 2
Speakers16 cm x 2
Sound SourceAWM Dynamic Stereo Sampling
KeyboardGraded Hammer 3 (GH3) Keyboard
Display320 x 240 LCD
ConnectivityUSB, MIDI, Headphone, Audio In/Out
External DrivesUSB Flash Memory
Touch SensitivityHard2/Hard1/Medium/Soft1/Soft2

Summary

SPECIAL MESSAGE SECTION

PRODUCT SAFETY MARKINGS

Explains safety symbols and cautions regarding product markings and usage.

IMPORTANT NOTICE

Covers safety testing, authorized modifications, and warranty considerations for Yamaha products.

PRECAUTIONS

WARNING

Lists critical safety precautions to avoid electrical shock, fire, and other hazards.

CAUTION

Lists precautions to avoid physical injury or damage to the instrument or property.

Introduction

Panel Controls

Identifies and describes the function of each panel button and control on the instrument.

Playing the Keyboard

Covers basic setup, connecting power, opening cover, and turning the instrument on/off.

Practicing

Recording Your Performance

Guides on how to record your own performances and save them for practice.

Handling the Floppy Disk Drive (FDD) and Floppy Disks

Handling the USB Storage Device (USB Flash Memory/Floppy Disk, etc)

One-touch Piano Play

Playing Different Voices Simultaneously

Keyboard Parts (Right 1, Right 2, Left)

Explains how to assign voices to Right 1, Right 2, and Left parts for ensemble sounds.

Practicing with the Songs

Playing Back Songs Before Practicing

Provides basic information on playing back preset songs and songs from CD-ROMs.

One-handed Practice with the Guide Lamps

Recording Your Performance

Quick Recording

Details the convenient method for quickly recording performances and saving them.

Recording Methods

Outlines Quick Recording, Multi track Recording, and Step Recording methods.

Playing Accompaniment with the Auto Accompaniment Feature (Style Playback)

Learning How to Play (Indicate) Chords for Style Playback

Appropriate Panel Settings for the Selected Style (One Touch Setting)

Calling Up Ideal Setups for Each Song—Music Finder

Searching the records

Explains how to search Music Finder records by song title, genre, or keyword.

Connecting a Microphone (CVP-405/403)

Convenient Functions for Karaoke

Adding Harmony Vocals to Your Voice (CVP-405/403)

Convenient Functions for Singing Along with Your Own Performance

Recording Your Performance as Audio (USB Audio Recorder) (CVP-405/403)

Instant Selection of the Displays—Direct Access

Basic Displays (Main Display and File Selection Display)

Main Display

Explains the primary screen showing current instrument settings at a glance.

Saving Files

Restoring the Factory-programmed Settings

Restoring the Factory-programmed Settings Independently by Item

Data Backup

Data that can be saved

Lists the types of data that can be copied or saved to a USB storage device for backup.

Using, Creating and Editing Voices

Voice Characteristics

Describes the defining characteristics of various Preset Voices.

Playing Two Voices Simultaneously (Right 1 and 2 Parts)

Changing Pitch

Adding Effects to Voices Played on the Keyboard

Selecting the Harmony/Echo type

Editing the Volume and Tonal Balance (MIXING CONSOLE)

EQ (Equalizer)

Effect Type

Voice Creating (Sound Creator)

Creating Your Original Organ Flutes Voices

Using, Creating and Editing the Auto Accompaniment Styles

Style Playback-related Settings

Editing the Volume and Tonal Balance of the Style (MIXING CONSOLE)

Style Creator

Creating a Style

Step Recording (EDIT)

Style Assembly (ASSEMBLY)

Editing the Created Style

Changing the Rhythmic Feel (GROOVE)

Editing Data for Each Channel (CHANNEL)

Making Style File Format Settings (PARAMETER)

Registering and Recalling Custom Panel Setups—Registration Memory

Registering and Saving Custom Panel Setups

Explains how to save panel settings to Registration Memory buttons.

Calling Up Registration Memory Numbers in Order—Registration Sequence

Using, Creating and Editing Songs

Operations for Song Playback

Using the Auto Accompaniment Features with the Song Playback

Adjusting the Volume Balance and Voice Combination, etc. (MIXING CONSOLE)

Using the Practice Function (Guide)

Quick Recording

Multi Track Recording

About Song channels

Step Recording

Explains how to record music data like melodies and chords step-by-step.

Basic Operations for Step Recording

Recording Melodies

Editing a Recorded Song

Basic Editing Operation

Covers general methods for editing recorded songs, including Punch In/Out.

Re-Recording a Specific Section—Punch In/ Out (REC MODE)

Editing Channel Events (CHANNEL)

Editing Note or Chord Events (CHORD, 1–16)

Using a Microphone (CVP-405/403)

Editing Vocal Harmony Parameters

Guides on creating and editing Vocal Harmony types and detailed parameters.

Adjusting the Microphone and Harmony Sound

Adjustable Items (Parameters) in the OVERALL SETTING Tab Display

Talk Setting

Connecting the Clavinova Directly to the Internet

Connecting the Instrument to the Internet

Provides connection examples for accessing the internet via modem or router.

Accessing the Special Website

Purchasing and Downloading Data

About the Internet Settings Display

Initializing Internet Settings

Using the Footswitch or Foot Controller (6 [AUX PEDAL] jack)

Assigning Specific Functions to Each Foot Pedal

Explains how to assign functions to pedals, including piano pedals and AUX pedals.

Connecting External MIDI Devices (7 [MIDI] Terminals)

Connecting a Computer, USB Device, or Internet (789))

Covers connecting computers, USB devices, and accessing the internet.

Connecting to a USB-type LAN Adaptor and USB Storage Device (9 via the [USB TO DEVICE] Terminal)

Using USB Storage Devices

Explains connecting USB storage devices for saving and reading data.

Connect to the Internet (10 [LAN] Port)

What is MIDI?

Provides a basic explanation of MIDI data transfer for musical instruments.

MIDI Settings

Pre-Programmed MIDI Templates

MIDI System Settings

MIDI Receive Settings

Setting the Chord Type for Style Playback via MIDI Receive

Appendix

Troubleshooting

Provides solutions for common problems like power issues, sound, display, and pedal errors.

Specifications

Panel Button Chart

IMPORTANT SAFETY INSTRUCTIONS

Related product manuals