Do you have a question about the Yamaha Clavinova CVP-89 and is the answer not in the manual?
Explains safety graphics and cautions on the enclosure and in the manual.
Discusses Yamaha's safety testing and modification policy to ensure product safety.
Yamaha's commitment to user safety and environmental friendliness.
Information about the product's battery, lifespan, and replacement.
Guidelines for proper disposal of the product and its components.
Indicates where the name plate is located for recording serial numbers.
Precautions for handling the instrument, controls, and avoiding scratches.
Instructions for cleaning the Clavinova cabinet and keys with safe methods.
Precautions for handling floppy disks and the disk drive unit.
Explanation of the write protect tab function to prevent accidental data erasure.
Controls the main power supply for the instrument.
Adjusts the overall sound volume output.
Accesses utility functions for various settings and operations.
Activates demonstration playback tunes to showcase features.
Controls functions assigned to the left pedal.
Activates and adjusts reverb effects for sound depth.
Controls volume levels for different accompaniment parts.
Starts and stops accompaniment playback and other functions.
Engages the full-keyboard Auto Bass Chord accompaniment mode.
Controls intro and ending patterns for accompaniment.
Engages single-finger or fingered ABC accompaniment modes.
Selects accompaniment styles from the available presets.
Selects instrumental voices from the Clavinova's sound library.
Engages the split mode to divide the keyboard into sections.
Reads and writes data on floppy disks for styles and songs.
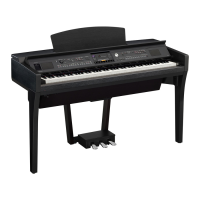
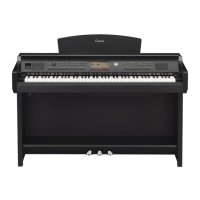
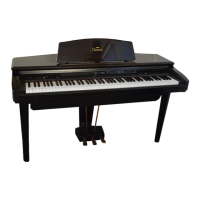
The primary interface for playing music.
Controls sustain and damping of notes.
Connects headphones for private practice.
Connects a microphone and adjusts its volume.
MIDI ports for connecting external MIDI devices.
Instructions for raising and lowering the music stand.
Instructions for opening and closing the keyboard cover.
How to turn the instrument on and off.
Connection and use of headphones for private practice.
Adjusts the overall sound volume of the Clavinova.
Controls volume for accompaniment parts like rhythm, bass, and chords.
Controls expression using an optional expression pedal.
Details the amplifier and speaker system features.
Method for choosing demo tunes using voice and style selectors.
How to stop demonstration playback and return to normal mode.
List of demo tunes with composer and song title information.
Overview of the methods for selecting the 60 available voices.
Direct selection of panel voices using dedicated selectors.
Buttons used for selecting voices numerically from 13 to 60.
Method for selecting voices by entering their specific numbers.
List of panel voices and their usable key ranges.
List of voices 13-60 and their corresponding usable key ranges.
How to use the keyboard for drum and percussion sounds.
How to activate and combine two voices simultaneously.
Adjusting the volume balance between the two voices in Dual Mode.
Splitting the keyboard into left and right sections for different voices.
How to change the voices assigned to the split keyboard sections.
Setting the key where the keyboard split occurs.
Adjusting the volume balance between the left-hand and right-hand split voices.
How the damper pedal functions when the keyboard is split.
Choosing from different types of digital reverb effects.
Adjusting the intensity or depth of the selected reverb effect.
Adjusting the stereo position (left/right) of voices.
Function and operation of the damper pedal for sustain.
Function and operation of the sostenuto pedal for sustaining specific notes.
Various functions that can be assigned to the left pedal.
Left pedal function for starting/stopping accompaniment.
Left pedal function for creating rhythm breaks.
Left pedal function for pitch bending notes.
Left pedal function for controlling Solo Styleplay.
How to raise the pitch of the keyboard in semitone or hertz increments.
How to lower the pitch of the keyboard in semitone or hertz increments.
Resetting the keyboard pitch to standard A440 Hz.
Shows the current pitch of A3 in Hertz.
How to choose an accompaniment style from the available presets.
Selecting styles directly from the panel buttons.
Selecting styles numerically from 13 to 50.
Adjusting the tempo of the accompaniment and styles.
Methods for starting the accompaniment playback.
Starting the accompaniment immediately without an intro.
Starting accompaniment with an intro pattern before the main rhythm.
Synchronizing the accompaniment start with playing a keyboard note or chord.
Setting the tempo by tapping the TAP button.
Using automatic fill-in patterns during accompaniment.
Using the left pedal to create breaks in the rhythm.
How to stop the accompaniment playback.
Using the built-in metronome for practice.
Creating accompaniment using single-finger or fingered chord input.
Activating the single-finger or fingered ABC mode.
Choosing an accompaniment style to use with ABC.
Adjusting the tempo for the ABC accompaniment.
Playing chords for single-finger accompaniment to generate backing.
Creating accompaniment using fingered chords for more complex input.
Using the full-keyboard ABC mode for automatic accompaniment anywhere on the keyboard.
Using the conventional full-keyboard ABC mode for chord detection.
Adjusting volumes for the ABC accompaniment parts.
Setting the split point for ABC accompaniment chord detection.
Mute and Minor Harmonization functions for ABC accompaniment.
Step-by-step guide for creating custom rhythm patterns.
Choosing a base rhythm for custom programming.
Engaging the program mode for custom rhythm creation.
Setting the timing resolution for note entry in custom rhythms.
Adding notes and instruments to the custom rhythm pattern.
Canceling instruments or correcting mistakes in custom rhythm patterns.
Saving the created custom rhythm pattern to a style memory location.
How to play back a previously created custom rhythm pattern.
Steps for selecting and loading styles from a floppy disk.
Inserting the style disk into the Clavinova's disk drive.
Ensuring the song select indicator is active before loading styles.
Choosing a style from the loaded disk.
Loading the selected disk style into memory.
Repeating the style selection and loading process for a second pattern.
Removing the style disk from the drive after use.
A comprehensive list of available disk styles.
How to use loaded disk styles for accompaniment with ABC.
Overview of the Solo Styleplay feature for adding harmony.
Activating the Solo Styleplay mode.
Choosing an accompaniment style to use with Solo Styleplay.
Adjusting the tempo for Solo Styleplay playback.
Playing with Solo Styleplay and accompaniment.
Stopping the accompaniment during Solo Styleplay.
Deactivating the Solo Styleplay mode.
Applying harmonization types and voices from different styles.
How the left pedal interacts with Solo Styleplay mode.
How to memorize desired control panel settings.
Setting up the Clavinova's controls to the desired state.
Storing the current panel settings into registration memory.
Recalling memorized registration settings to restore panel configurations.
Overview of automatic performance playback using Disk Orchestra disks.
Inserting the Disk Orchestra disk into the drive.
Choosing a song from the Disk Orchestra disk for playback.
Beginning playback of the selected Disk Orchestra song.
Removing the Disk Orchestra disk from the drive.
Selecting and playing back individual parts of a Disk Orchestra song.
Controlling specific orchestra tracks for playback.
Using keyboard keys to control track selection for parts.
Using panel buttons to control track selection for parts.
Adjusting volumes for individual parts during Disk Orchestra playback.
Feature for guided learning of songs using keyboard lights.
Selecting between Normal Wait and Delayed Wait modes for guided practice.
Functions for repeating song sections for practice.
Repeating specific phrases within a song.
Repeating a defined section (A-B) of a song.
Controls for pausing and navigating playback.
Temporarily stopping playback.
Navigating through the song during playback.
Using the left pedal for playback control.
Copying Disk Orchestra Collection data to another disk.
Playing back different music data formats like SMF.
Recording and playing back a single musical part.
Preparing a formatted disk for recording.
Choosing a song number for recording.
Choosing an instrumental voice for recording.
Preparing the instrument to record.
Beginning the recording process for a performance track.
Ending the recording process.
Playing back recorded performance material.
Stopping playback of recorded material.
Recording and playing back multiple musical parts.
Preparing a disk for multi-track recording.
Choosing a song number for multi-track recording.
Configuring performance settings before recording.
Preparing the instrument for multi-track recording.
Choosing which tracks to record on for multi-track performance.
Recording rhythm tracks as part of a performance.
Recording with Auto Bass Chord accompaniment.
Recording Solo Styleplay parts.
Beginning the multi-track recording process.
Ending the multi-track recording process.
Adding more tracks to an existing recorded song.
Choosing a voice for the new track.
Preparing to record a new track.
Choosing a track for the new recording.
Beginning the recording of the new track.
Ending the recording of the new track.
Modifying parameters for tracks and songs.
Deleting individual tracks from a recorded performance.
Recording over specific sections of a track to correct or add parts.
Playing the song to find the punch-in point.
Pausing playback before the punch-in point.
Preparing for punch-in recording.
Choosing the track for punch-in recording.
Starting playback and punch-in recording.
Ending punch-in recording.
Activating the chord sequence function for easy chord entry.
Inputting chords and style changes to create a sequence.
Ending chord sequence recording.
Recording chord sequences using the punch-in method.
General procedure for selecting and using the instrument's utility functions.
How to select a specific utility function from the menu.
Adjusting settings for the selected utility function.
Exiting the utility mode after making adjustments.
A list of all available utility functions.
Functions related to sound effects like transpose and chorus.
Shifting the keyboard pitch up or down.
Enabling or disabling the chorus effect for voices.
Adjusting the depth of the soundboard effect.
Setting the reverb depth for microphone input.
Functions related to disk operations like formatting and saving.
Saving registration memory settings to disk.
Reloading registration settings from disk.
Saving individual key tuning data to disk.
Reloading individual key tuning data from disk.
Saving custom rhythm data to disk.
Reloading custom rhythm data from disk.
Copying Performance Memory songs to a disk or new song number.
Copying specific parts of Disk Orchestra disks.
Copying data from the Style Disk to another disk.
Copying data not initially saved on a disk.
Deleting Performance Memory songs from a loaded disk.
Formatting floppy disks to make them usable by the Clavinova.
Setting playback mode for Standard MIDI Files.
Aligning recorded notes to a specified beat to improve timing.
Mixing data from two tracks into one for space saving or data management.
Adjusting playback volume for individual Performance Memory tracks.
Entering custom titles for Performance Memory songs.
Converting voice assignments to DOC format for compatibility.
Converting data to Standard MIDI File format for external playback.
Explains common disk error messages and their solutions.
Functions for controlling MIDI instruments and communication.
Setting the MIDI transmit channel for outgoing data.
Setting the MIDI receive channel for incoming data.
Controlling the keyboard's local sound generation independently of MIDI.
Managing MIDI program change messages for voice selection.
Managing MIDI control change messages for effects and settings.
Controlling voices independently via MIDI channels.
Transmitting split keyboard sections on different MIDI channels.
Selecting internal or external MIDI clock source for timing.
Transmitting current panel settings via MIDI.
Transposing transmitted MIDI note data without affecting keyboard pitch.
Selecting General MIDI drum kits.
General utility functions for tuning and settings.
Tuning each key individually to match specific standards.
Adjusting keyboard touch sensitivity to match playing styles.
Assigning volume controls to other operations.
Determining how style tempos are selected when changing styles.
Automatically engaging Synchro Start mode with ABC.
Setting song playback order to random or sequential.
Setting the damper pedal operation mode.
Setting the maximum pitch bend range for individual voices.
Editing individual drum instrument parameters like kit, reverb, and pan.
Shifting the left-hand voice up one octave in split mode.
Determining if the tempo setting in registration memory is used.
Turning the Auto Accompaniment mute function on or off.
Turning Auto Accompaniment minor harmonization on or off.
Inputs for external synthesizers or tone generators.
Outputs for connecting to amplifiers or recording equipment.
MIDI ports for connecting external MIDI devices for communication.
Connecting an expression pedal for foot volume control.
Connecting a microphone and adjusting its volume.
Steps to resolve common operational problems and malfunctions.
A stable bench designed to match the Yamaha Clavinova.
High-performance headphones with extra-soft ear pads.
Step-by-step instructions for assembling the Clavinova.
General advice and important notes regarding the assembly process.
Opening the shipping carton and unpacking all the parts.
Leaning the main unit carefully against a wall for easier assembly.
Attaching the front legs to the main unit.
Attaching the rear leg and pedal box assembly.
MIDI data format for note on/off events.
MIDI data format for control change messages.
MIDI data format for mode messages received by the device.
MIDI data for registered and non-registered parameter numbers.
MIDI data for program change events and panel voices.
MIDI data for pitch bend events.
MIDI system realtime messages.
MIDI system exclusive messages.
Special MIDI messages and their corresponding data formats.
MIDI absolute tempo messages and data.
MIDI control for beat and tempo LEDs.
Other system exclusive MIDI messages.
Activating General MIDI mode via MIDI message.
MIDI master tuning messages.
MIDI master volume control messages.
Lists panel voices and voices 13-60 with MIDI and DOC data.
Lists GM Mode voices with MIDI program numbers.
Lists percussion kits and their key assignments for playing drums.
Fingering charts for major chords in root position.
Fingering charts for minor chords in root position.
Fingering charts for seventh chords in root position.
Fingering charts for minor seventh chords in root position.
Fingering charts for major seventh chords.
Fingering charts for minor major seventh chords.
Fingering charts for augmented chords.
Fingering charts for diminished chords.
Fingering charts for sixth chords.
Fingering charts for suspended fourth chords.
Fingering charts for minor seventh flatted fifth chords.
Fingering charts for major seventh flatted fifth chords.
Fingering charts for minor major seventh flatted fifth chords.
Fingering charts for minor sixth chords.
Fingering charts for seventh suspended fourth chords.
Fingering charts for flatted fifth chords.
Fingering charts for minor flatted fifth chords.
Fingering charts for seventh flatted fifth chords.
Fingering charts for seventh sharp fifth chords.
Fingering charts for major seventh sharp fifth chords.
Indicates that the MIDI Implementation Chart is not provided in this document.
Warning against modifying the unit, which could void FCC authorization.
Advice on using high-quality shielded cables for accessory connections.
FCC compliance statement for Class B digital devices regarding interference.
Important notice for UK users regarding plug and cord wiring.
Statement regarding digital apparatus noise emissions for Canada.
General safety precautions for electrical/electronic products.
Instruction to read all safety and installation documents before making connections.
Verification of power supply voltage for Yamaha products based on region.
Information about the polarized plug and outlet compatibility.
Warning about using only recommended power supplies or adapters.
Warning about placement of the product and power cord to prevent tripping hazards.
Importance of proper ventilation for electronic products to prevent overheating.
Advice on product placement relative to heat sources to maintain optimal temperature.
Warning against using the product near water or in damp locations to prevent electric shock.
Warning about potential hearing loss from prolonged exposure to high volume levels.
Instruction to retain the user manual for future reference.
| Type | Digital Piano |
|---|---|
| Effects | Reverb, Chorus, DSP |
| Display | LCD |
| Sequencer | 16-track |
| Connectivity | MIDI In/Out, Headphone Jack, Aux In/Out |
| Keyboard | 88 keys, GH3 (Graded Hammer 3) keyboard with synthetic ivory keytops |