CHASSIS
3-34
NOTE:
Place the vehicle on a suitable stand so that the
front wheel is elevated.
2. Check:
• Steering head
Grasp the bottom of the front fork legs and
gently rock the front fork.
Binding/looseness → Adjust the steering
head.
3. Remove:
• Upper bracket
Refer to “STEERING HEAD” on page 4-88.
4. Adjust:
• Steering head
▼▼▼▼▼▼▼▼▼ ▼ ▼▼▼▼▼▼▼▼▼ ▼ ▼▼▼▼ ▼ ▼▼▼▼ ▼▼▼
a. Remove the lock washer “1”, the upper ring
nut “2”, and the rubber washer “3”.
b. Tighten the lower ring nut “4” with a steering
nut wrench “5”.
NOTE:
Set a torque wrench at a right angle to the steer-
ing nut wrench.
c. Loosen the lower ring nut completely and
then tighten it to specification with a steering
nut wrench.
WARNING
EWA13140
Do not overtighten the lower ring nut.
d. Check the steering head for looseness or
binding by turning the front fork all the way in
both directions. If any binding is felt, remove
the lower bracket and check the upper and
lower bearings.
Refer to “STEERING HEAD” on page 4-88.
e. Install the rubber washer “3”.
f. Install the upper ring nut “2”.
g. Finger tighten the upper ring nut, then align
the slots of both ring nuts. If necessary, hold
the lower ring nut and tighten the upper ring
nut until their slots are aligned.
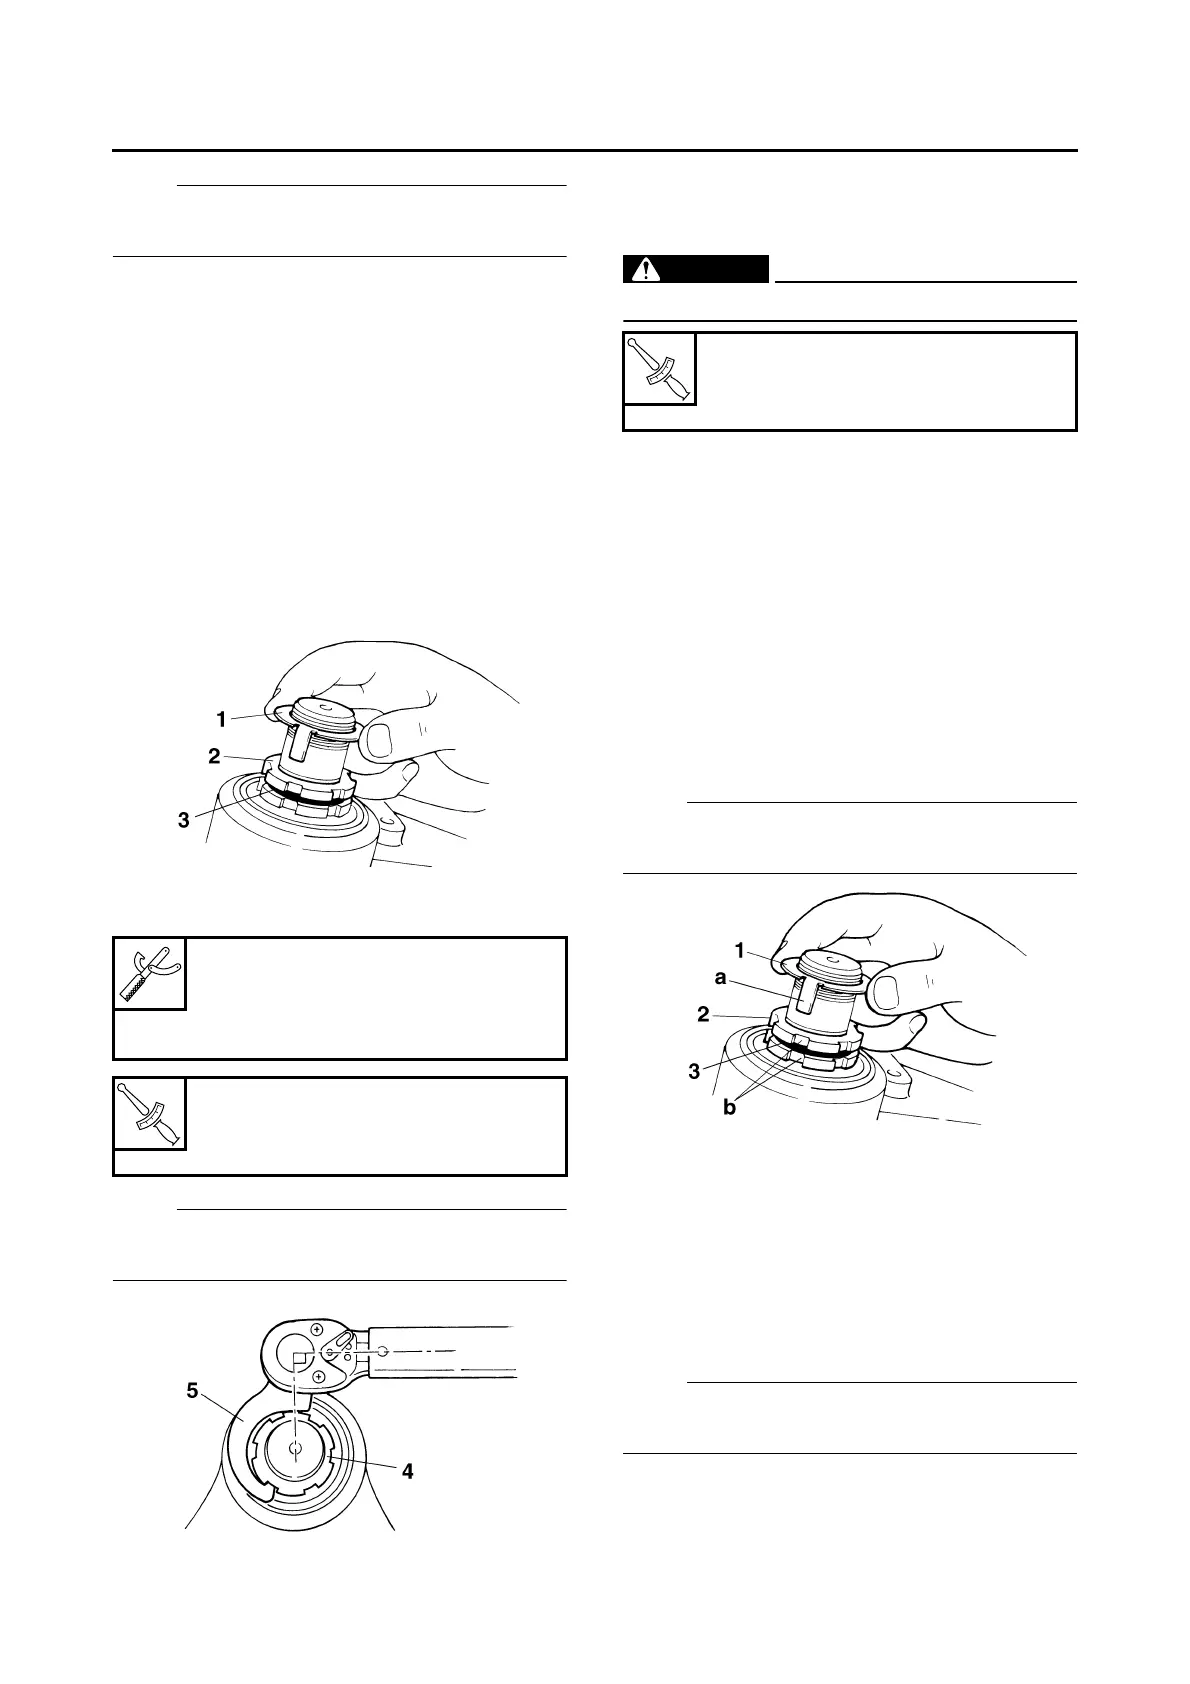
h. Install the lock washer “1”.
NOTE:
Make sure the lock washer tabs “a” sit correctly
in the ring nut slots “b”.
▲▲▲▲▲▲▲▲▲ ▲ ▲▲▲▲ ▲ ▲▲▲▲ ▲ ▲▲▲▲ ▲ ▲▲▲▲ ▲▲▲
5. Install:
• Upper bracket
Refer to “STEERING HEAD” on page 4-88.
ET3P61034
ADJUSTING THE HANDLEBAR POSITION
1. Check:
• Handlebar position
NOTE:
The handlebar position can be adjusted to one
of three positions to suit the rider’s preference.
Steering nut wrench
90890-01403
Spanner wrench
YU-33975
T
R
.
.
Lower ring nut (initial tightening
torque)
52 Nm (5.2 m·kg, 37 ft·lb)
T
R
.
.
Lower ring nut (final tightening
torque)
18 Nm (1.8 m·kg, 13 ft·lb)

 Loading...