Do you have a question about the Yamaha MTX Series and is the answer not in the manual?
Initial system design and basic settings to create a device setup.
Detailed MTX/MRX System configuration including input/output, matrix, zone, router, and DCP settings.
Rack-mount and physically connect MTX, amplifiers, and other devices, then power them on in the correct order.
Specify computer's IP address to enable communication between MTX and the control PC.
Establish communication between MTX-MRX Editor software and the MTX unit for project transfer.
Confirm that all configured settings have been applied correctly and the system operates as expected.
Initial system design and basic settings for MTX and XMV units connected via YDIF.
Configure MTX and XMV EXT. I/O, MAIN screen, MATRIX, ZONE, ROUTER, and DCP settings.
Connect MTX and XMV units, then power them on correctly for system operation.
Set the computer's IP address to ensure communication with the MTX and XMV.
Establish connection with MTX and XMV units to upload project settings.
Confirm that all settings are applied correctly and the system performs as intended.
Configure two MTX units and an XMV unit for cascade mode operation.
Set up EXT. I/O, MTX configuration, MAIN screen, MATRIX, ZONE, ROUTER, DCA, and MCP1 settings.
Connect MTX, XMV, and MCP1 units, and power them on in the correct sequence.
Set computer's IP address for communication with MTX, XMV, and MCP1.
Establish connection to send the project configuration to the MTX units.
Confirm correct operation of the cascaded system, including MCP1 functionality.
Initial system design and basic settings for MTX5-D, EXi8, EXo8, and XMV units with Dante connections.
Set up devices, UNIT IDs, and connections for System A.
Set up devices, UNIT IDs, and connections for System B.
Establish Dante network connections and patching between System A and System B for audio sharing.
Physically connect all devices for System A and System B, including network switches.
Set computer's IP address for communication with both systems.
Bring both System A and System B online to transfer configurations.
Confirm correct operation of the Dante system and cross-system audio routing.
Configure MTX5-D, PGM1, PGX1, and XMV units for a paging system.
Configure EXT. I/O, Dante, MTX configuration, and MAIN screen settings for the paging system.
Assign zones, zone groups, and messages to PGM1 and PGX1 buttons for paging control.
Connect MTX5-D, PGM1, and XMV units, and power them on correctly.
Set computer's IP address for communication with the paging system components.
Establish connection to upload paging system configuration to MTX and PGM1.
Confirm that all paging functions, zone assignments, and preset recalls work as expected.
| DSP | Yes |
|---|---|
| Sampling Frequency | 48kHz |
| DSP Cores | Varies by model |
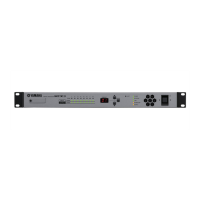
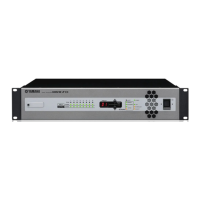
| Model | MTX Series |
| Input Channels | Varies by model |
| Output Channels | Varies by model |
| Remote Control | Yes |
| Network Audio Channels | Varies by model |
| Control Interfaces | Ethernet |
| Supported Protocols | Dante |
| Power Supply | 100-240V AC |
| Dimensions | Varies by model |
| Weight | Varies by model |
| Control | Ethernet |