Do you have a question about the Yamaha NSIC800WH and is the answer not in the manual?
Install speakers equidistant from the listener at ear level for optimal stereo performance.
Place front speakers flanking the TV at ear level; surrounds behind the listening area.
Step-by-step guide for connecting speaker wires to terminals and using banana plugs.
Details on ceiling board thickness, clearance space, and external dimensions for installation.
Detailed steps for connecting speaker wires, including preparation and post-connection advice.
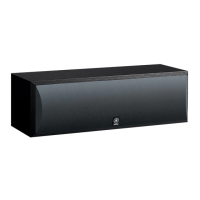
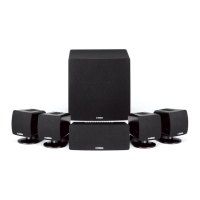
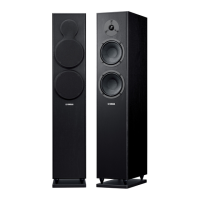
This document provides user manuals for two Yamaha speaker systems: the NS-IW960 2-Way Speaker (Each) White and the NSIC800WH 140-Watts 2-Way RMS Speaker -- White (2 Speakers). Both manuals offer comprehensive guidance on installation, connection, and maintenance, ensuring optimal performance and longevity of the speakers.
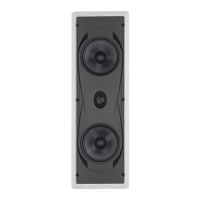
The Yamaha NS-IW960 is an in-wall speaker designed for home cinema applications, offering a discreet and integrated audio solution. The manual emphasizes the importance of careful installation, starting with a thorough reading of the owner's manual and consultation of local building codes. It recommends installation in two-by-four wood frame or similar constructions, providing specific instructions tailored to this type of wall. Users are cautioned about the product's weight and the sturdiness of the installation material, as well as the presence of concealed studs, electrical wiring, or plumbing. If any doubts arise, consulting a professional installer or building contractor is advised.
For optimal sound quality, users are warned against touching the woofer or tweeter units directly or exposing them to excessive physical shock, as this can lead to distortion. Before changing input sources or making any cable connections, the power amplifier/receiver volume control should be lowered, and the unit should be turned off. The manual also advises reducing the volume if distortion is noted to prevent the power amplifier from "clipping." Secure placement and installation are highlighted as the owner's responsibility, with Yamaha disclaiming liability for accidents caused by improper installation. Installation must comply with the National Electrical Code (ANSI/NFPA 70) and/or the National Fire Alarm Code (ANSI/NFPA 72), ensuring that wiring methods and compartments do not interfere with speaker operation.
The unpacking section lists the items included: the NS-IW960 speaker system, a speaker grill, a cutout template, a paint protective cover, and glue strips. Essential tools for installation include a pencil, drill, drywall saw, wire strippers, gloves, a small level, sturdy wire (like a coat hanger), a Philips screwdriver, and safety goggles.
Speaker placement guidelines are provided for both stereo and home theater setups. For stereo, the left and right speakers should be equidistant from the listening position, separated by 6-10 feet, with the center of the speaker at ear level. In a home theater configuration, front speakers should flank the TV with their centers at ear level, while the center channel speaker can be placed horizontally above or below the TV. Surround speakers are ideally positioned behind the listening area, at least as far apart as the front speakers and up to 2 additional feet per side, with a minimum height of ear level or preferably higher. Although the NS-IW960 is magnetically shielded, the manual notes that some TV picture influence may occur depending on the TV type or speaker placement, recommending separation if this happens.
The installation process begins with checking for wall studs using tapping or a stud finder. If the frame and grill are to be painted, users are directed to a later section. The first step involves positioning and tracing the cutout template on the wall, ensuring it is level. A pilot hole is then drilled in the center of the traced outline. A bent coat hanger wire is inserted into the hole and slowly rotated to check for obstructions; if any are found, the hole should be patched, and a new location selected. The traced outline is then cut out of the wall. High-quality speaker cable is run from the receiver to the speaker, leaving a few extra feet.
Connecting the speaker cable to the speaker and receiver is detailed, with instructions to refer to the "CONNECTIONS" section. The speaker is then placed into the wall. Six screws are tightened evenly until the clamps at the back of the frame grip the wall securely. A notable feature is the swivel tweeter, which allows users to direct high-frequency sounds precisely toward the listening position by gently pressing its outer edge. Finally, the grill is attached to the frame, with glue strips recommended for secure attachment.
The "CONNECTIONS" section provides specific instructions for wiring. Users should connect the push-type input terminals at the rear of the speakers to the speaker output terminals of the receiver, ensuring that the (+) terminals on both components are connected with one side of the cable and the (-) terminals with the other. Warnings are given to prevent bare wires from touching each other, which could damage the speaker and receiver. Correct polarity is crucial; reversed polarity can lead to unnatural sound and lack of bass. For connecting, approximately 10 mm (3/8") of insulation is removed from the speaker cable ends, twisted to prevent short circuits. The speaker terminal is pressed and held, the bare wire inserted, and the terminal released. The connection firmness is tested by lightly pulling the cable. For banana plugs, they are inserted into the top of the terminal.
Maintenance features include painting the speaker frame and grill to match room décor. This involves carefully removing the speaker from the wall (if installed), detaching the grill from the baffle, masking speaker components and the baffle with the supplied paint protective cover, and then applying paint to the frame. For the grill, it is carefully removed, and paint is applied, ensuring the grill holes remain free of paint to avoid diminishing sound quality.
The Yamaha NSIC800WH manual, covering NS-IC600/NS-IC800 in-ceiling speakers, provides similar comprehensive instructions. It begins with consumer precautions, emphasizing safety during mounting by recommending two or more persons. Users are warned against attaching speakers to thin plywood or soft ceiling materials, or using nails or adhesives, as this can lead to the speakers falling and causing damage or injury. Stable placement is also crucial for better sound performance. Modifying or fixing the speakers should only be done by qualified Yamaha service personnel. Chemical solvents should not be used for cleaning; a dry, soft cloth is recommended. As with the NS-IW960, secure placement and installation are the owner's responsibility, and Yamaha disclaims liability for accidents due to improper installation.
Information for users on collection and disposal of old equipment is provided, indicating that used electrical and electronic products should not be mixed with general household waste. Proper treatment, recovery, and recycling are encouraged, with guidance to consult local municipalities or waste disposal services.
The unpacking section for the NS-IC600/NS-IC800 lists the speaker (x2), speaker grille (x2), and cutout template (x1). Tools needed for installation are a pencil, drill, Philips screwdriver, wire strippers, safety goggles, keyhole saw, sturdy wire (like a coat hanger), and gloves.
Optimum installation layout for in-ceiling speakers notes that placing them too close to a CRT-type TV may impair picture color or cause buzzing, recommending separation. This is not an issue with LCD and plasma TVs. For stereo, left and right speakers should be equidistant from the listening position, separated by 1.8-3.0 m (6-10 ft). For home theater as surround speakers, they should be placed behind the listening area, at least as far apart as the front speakers and up to 60 additional centimeters (2 additional feet) per side.
The installation section outlines a recommended procedure for plasterboard ceilings. Before installation, users must read the manual, consult local building codes, and run speaker cables to the installation location. Checking ceiling board thickness and clearance space is vital, ensuring no joints, studs, ducts, or pipes obstruct the installation area. The required ceiling board thickness is 5-30 mm (1/4"-1-1/8"). Users are reminded of the product weight and the sturdiness of the ceiling material, and to be aware of concealed studs, wiring, or plumbing. Professional consultation is advised if unsure.
Cautions include not touching the woofer or tweeter units directly or exposing them to physical shock to prevent distortion. If the speaker grille is to be painted, users are directed to a later section.
The installation steps involve positioning and tracing the cutout template on the ceiling, including the center mark. A pilot hole is drilled, and a bent sturdy wire is used to check for obstructions. If found, the hole must be patched, and a new location selected. A keyhole saw is used to cut around the circular outline. The speaker cable is pulled out of the hole, leaving extra length.
Connecting the speaker cable to the speaker is detailed, referring to the "CONNECTING YOUR AMPLIFIER/RECEIVER" section. The speaker is then placed into the ceiling. Four screws are loosened counter-clockwise to allow clamps to open easily. The screws are then evenly tightened clockwise using a Philips screwdriver, which causes the mounting clamps to grip the ceiling board, securing the speaker. Caution is advised against over-tightening to prevent damage to clamps or wallboard, recommending hand tools or low torque settings for power screwdrivers. Tightening screws in an opposite sides pattern (right and left, then top and bottom) is suggested.
A usage feature is the adjustable tweeter angle, allowing users to gently press the outer edge of the tweeter housing toward the listening position to direct high-frequency sounds. The tweeter movable angle is about 15° in multiple directions. Caution is given not to rotate the tweeter when adjusting to prevent breakage. Finally, the speaker grille is attached to the speaker frame using magnets. Caution is advised when removing the grille to prevent it from falling or causing injury, recommending equal pressure around the circumference to avoid bending.
The "CONNECTING YOUR AMPLIFIER/RECEIVER" section reiterates the importance of turning off the amplifier/receiver before making connections and consulting its owner's manual. Connections involve connecting push input terminals to speaker output terminals, ensuring correct polarity (red for +, black for -) to avoid unnatural sound and lack of bass. The connection method is similar to the NS-IW960: remove insulation, twist wires, press terminal, insert wire, release, and test firmness.
After connecting, users are advised to lower the volume control before changing input sources or at high listening levels. The receiver/amplifier unit should be turned off when installing or removing cables. If distortion is noted, the volume should be reduced to prevent "clipping."
Maintenance features include painting the speaker grille. This involves carefully removing the grille, detaching the scrim cloth (which is reusable), applying paint (ensuring holes remain free of paint), and then re-attaching the scrim cloth and re-installing the grille once dry.
| Type | In-Ceiling Speaker |
|---|---|
| Impedance | 8 Ohms |
| Driver Size | 8 inches |
| Woofer Cone Material | Polypropylene |
| Tweeter Size | 1 inch |
| Color | White |
| Sensitivity | 89dB (2.83V, 1m) |
| Cutout Size | 8.66" (220mm) |