Do you have a question about the Yamaha RHINO YXR66FSEW and is the answer not in the manual?
| Brand | Yamaha |
|---|---|
| Model | RHINO YXR66FSEW |
| Category | Offroad Vehicle |
| Language | English |
Use proper tires and pressure. Check tire pressure when cold. Recommended pressures listed.
Vehicle is equipped with three-point seat belts for operator and passenger. Always wear seat belt properly fastened.
Important period for vehicle life (0-20 hours). Avoid excessive load, prolonged full throttle. Vary speed, allow cooling periods.
Spaces to record key, vehicle, and model label information for spare parts ordering or theft reference.
The key identification number is stamped on the key and used for ordering a new key.
The VIN is stamped into the frame. The year of manufacture is listed in the VIN. Used to identify your vehicle.
Affixed to the frame under the driver seat. Contains information needed to order spare parts.
Functions as OFF, ON, and START for electrical circuits and engine starting.
Explains the meaning and function of various indicator lights on the multi-function meter unit.
Equipped with speedometer, odometer, tripmeters, clock, hour meter, and fuel meter.
Controls headlights and taillights. Has OFF, low beam (L), and high beam (H) positions.
Locks the differential gear in 4WD. Indicator light ('DIFF.LOCK') comes on when engaged.
Loosen locknut, turn adjusting ring to increase/decrease preload. Setting determined by distance A.
Adjust screw in direction a to increase damping, b to decrease. Settings: Min (soft) 12 clicks, Std 10 clicks, Max (hard) 9 clicks in direction b.
Adjust screw in direction a to increase damping, b to decrease. Settings: Min (soft) 12 clicks, Std 10 clicks, Max (hard) 9 clicks in direction b.
Loosen locknut, turn adjusting ring to increase/decrease preload. Setting determined by distance A.
Adjust screw in direction a to increase damping, b to decrease. Settings: Min (soft) 20 clicks, Std 12 clicks, Max (hard) 3 clicks in direction b.
Adjust screw in direction a to increase damping, b to decrease. Settings: Min (soft) 12 clicks, Std 10 clicks, Max (hard) 7 clicks in direction b.
Check brake pedal free play and operation. Check brake fluid level and for leaks. Recommended fluid: DOT 4.
Check engine oil level. Change oil and filter at specified intervals. Use recommended oil type and quantity.
Check coolant level in reservoir when engine is cold. Add coolant or distilled water if low. Change coolant every two years.
Ensure control cables work smoothly in cold weather. Apply brake, shift to neutral. Check neutral indicator light.
Refer to cold start section. Do not use starter. Press accelerator pedal slightly.
Avoid jump-starting. Remove and charge battery instead. If necessary, connect cables correctly, positive to positive, negative to vehicle ground.
Warm up engine before starting off to maximize engine life. Avoid hard acceleration with cold engine.
Stop vehicle, apply brake, shift lever. Check for people/obstacles before backing. Press accelerator gradually.
Avoid continuous operation above half throttle. Allow 5-10 min cooling after each hour. Vary speed. Do not operate at fixed throttle.
Avoid prolonged operation above 3/4 throttle. Rev freely but do not use full throttle.
WARNING: Avoid parking on hills. If necessary, apply parking brake and block wheels. Do not park on very steep hills.
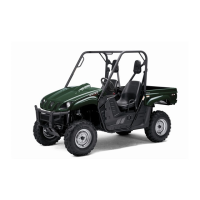
Familiarize with performance characteristics, controls, and safety info. Vehicle designed for operator and one passenger. Always wear seat belts. Never carry passengers in cargo bed.
Practice in a large, flat area. Practice controls: accelerator, brakes, steering, drive select lever. Drive slowly first.
Vehicle steers easier in 2WD than 4WD. Steering takes most effort in 4WD with diff. lock. Avoid sharp, high-speed turns; risk of rollover.
Braking ability affected by terrain. Gradual braking is more effective. Allow greater braking distance on rough/loose surfaces.
Check terrain carefully before descending. Drive straight downhill. Avoid sharp angles. Choose path carefully. Use engine braking.
Store manual in vinyl bag. Keep tool kit and tire pressure gauge near battery. Manual provides info for maintenance and minor repairs.
Important engine component. Inspect for ideal tan color. Periodically remove and inspect due to heat/deposits.
Clean intake duct filter element. Remove grill, then filter element. Tap to remove dust, blow with compressed air.
Check all chassis fittings and fasteners. Correct if necessary.
Lower hood slowly to original position, hook latches. Ensure cables/wires are clear. Do not drive with hood open.
Place vehicle on level surface, remove console, check oil level on cold engine. Add oil if low.
Remove console, place oil pan, remove filler cap, drain oil via drain bolt, replace oil filter cartridge if needed.
Place vehicle on level surface, collect used oil, remove filler and drain bolts. Install drain bolt, tighten. Add recommended oil to brim.
Place vehicle on level surface, collect used oil, remove filler and drain bolts. Install drain bolt, tighten. Fill with recommended oil.
Spark plug condition indicates engine condition. Ideal color is medium-to-light tan. Replace if worn or excessively dirty.
Measure electrode gap, adjust if necessary. Clean gasket surface and threads. Install and tighten spark plug to specified torque.
Check air filter case for obstructions. Check rubber joint for airtight seal. Tighten fittings securely.
Check wear indicator grooves. Replace pads if worn to the limit. May require wheel removal.
Check fluid level is above minimum mark. Add fluid if necessary. Low level may indicate worn pads or leaks.
Should be done by trained Yamaha personnel. Replace oil seals every two years, brake hoses every four years.
Lubricate the pivoting parts of the brake and accelerator pedals.
Lubricate knuckle upper and lower pivots with a grease gun.
Lubricate the pivot points of the steering shaft.
Install wheel and nuts. Arrow mark on tire must point to rotating direction. Tighten wheel nuts to specified torque.
For long-term storage, remove battery, store in cool, dark place. Recharge before reinstallation. Use special charger for sealed batteries.
Lists fuses for Main, Headlight, Ignition, Auxiliary DC Jack, 4WD motor, Carburetor warmer, Signaling system, and Backup.
Flowcharts for diagnosing starting problems or poor engine performance related to fuel, compression, ignition, and battery.
Check coolant level. If low, check for leaks or add coolant. If engine overheats again, consult dealer.
Enhances appearance, performance, and component life. Block exhaust pipe, ensure spark plug/caps installed. Wash with mild soap and water. Rinse and dry.
For long-term storage (60+ days), clean vehicle. Fill fuel tank with stabilizer. Drain carburetor float chamber.
Details engine type, displacement, bore x stroke, compression ratio, starting, and lubrication systems.
Type: Regular unleaded gasoline with 91+ octane. Fuel tank capacity: 30.0 L.
Type: Tubeless. Size: Front 25x8-12NHS, Rear 25x10-12NHS. Recommended pressures listed.
System: Front and rear unified. Type: Dual disc front, single disc rear. Operation: Foot.