Do you have a question about the Yamaha RAPTOR 700 and is the answer not in the manual?
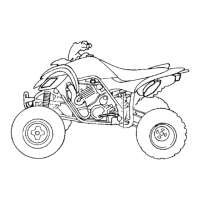
Record key identification numbers and model label information for spare parts ordering or vehicle reference.
The key identification number is stamped on the key and used for ordering a new key.
The vehicle identification number is stamped into the frame and used to identify the machine.
The model label is affixed to the location in the illustration and contains information for ordering spare parts.
Explains the neutral indicator light 'N' and reverse indicator light 'R'.
Warns when the coolant temperature is too hot. Stop the engine if the light comes on during operation.
Indicates a defective electrical circuit monitoring the engine. Consult dealer for diagnosis.
Comes on when fuel level drops below approximately 2.6 L. Refuel as soon as possible.
Describes the functions of the light switch (LO, HI, OFF) and cautions about battery discharge.
Controls ignition and can be used to stop the engine at any time. Ensure it's in 'RUN' before starting.
The starter motor cranks the engine when this switch is pushed.
Movement of the throttle lever increases engine speed. Regulate speed by varying throttle position.
Limits throttle opening to control maximum engine power and ATV speed. Adjusting screw limits power and decreases speed.
Located on the left handlebar. Pull to disengage, release to engage. Smooth operation requires rapid pull and slow release.
Located on the right handlebar. Pull toward the handlebar to apply the front brake.
Located on the right side of the machine. Push down on the pedal to apply the rear brake.
Use when starting engine or parking, especially on slopes. Move lever in direction 'a' to apply, 'b' to release.
Used with the clutch for shifting gears. Equipped with a 5-speed forward and 1-speed reverse transmission.
Used to shift into reverse gear. Refer to 'Reverse knob operation and reverse driving' section before operating in reverse.
Ensure control cables work smoothly in cold weather. Check warning lights, set parking brake, main switch, and engine stop switch.
Before shifting, stop the machine and return throttle to closed position. Apply clutch and shift into first gear, then reverse.
This model has a 5-speed forward and 1-speed reverse transmission. Learn to shift into neutral, apply clutch, and depress shift pedal.
Release throttle, pull clutch, shift to first gear, open throttle gradually, release clutch slowly.
Release throttle, apply brakes smoothly, shift to lower gear. Ensure engine has slowed sufficiently before downshifting.
The first 20 hours are crucial. Avoid excessive load, prolonged full throttle, or overheating. Follow specific operating guidelines.
When parking, stop the engine, shift into first gear, and then apply the parking brake.
Avoid parking on steep hills. If necessary, use low gear, parking brake, and block wheels with objects.
Choose genuine Yamaha or equivalent accessories designed for the ATV. Ensure accessories are rigidly mounted.
ATV not designed for cargo/towing. Use common sense. Keep load distributed, securely attached, and reduce speed.
ATV for experienced operators only. Requires practice. Read manual and understand controls.
Get training if inexperienced. Familiarize at slow speeds. Never operate without proper instruction.
Children under 16 should never operate ATVs over 90cc. Use by underage children can lead to severe injury or death.
ATV is designed for operator only. Never carry a passenger as it reduces balance and control, risking accident.
Always wear an approved helmet, eye protection, gloves, boots, and protective clothing.
Never consume alcohol or drugs before or while driving. Performance capability is reduced by these substances.
Check operation, free play, fluid level, and leakage. Fill with DOT 4 brake fluid if necessary.
Check operation, free play, fluid level, and leakage. Fill with DOT 4 brake fluid if necessary.
Check operation, condition, and lever free play.
Check operation, condition, and cable length.
Check fuel level. Fill with fuel if necessary.
Check oil level. Fill with oil if necessary.
Check coolant level in reservoir. Fill with coolant if necessary.
Check chain slack and condition. Adjust if necessary.
Check for proper throttle cable operation and free play.
Check tire pressure, wear, and damage.
Check all fittings and fasteners.
Check for proper operation.
Check brake fluid level and add fluid if necessary. Recommended fluid: DOT 4.
Set tires to recommended pressure when cold. Front/Rear: 27.5 kPa. Pressures must be equal on both sides.
Use a low-pressure tire gauge. Make two measurements and use the second reading. Set pressure with tires cold.
Replace the tire when the tire groove decreases to 3 mm (0.12 in) due to wear.
Check fuel hose for cracks or damage. Replace if necessary.
Check condition, adjust gap, clean, and replace if necessary.
Check valve clearance and adjust if necessary.
Check and adjust engine idle speed.
Check breather hose for cracks or damage. Replace if necessary.
Check for leakage. Tighten if necessary. Replace gasket if necessary.
Clean and replace if necessary. Clean more often in wet or dusty areas.
Check operation and adjust free play if necessary.
Check free play, operation, fluid leakage. Correct if necessary.
Check operation, fluid leakage. Correct if necessary.
Check balance, damage, and runout. Replace if necessary.
Check bearing assemblies for looseness/damage. Replace if damaged.
Lubricate with lithium-soap-based grease.
Lubricate with lithium-soap-based grease.
Check and adjust slack/alignment, clean, and lubricate.
Check all chassis fittings and fasteners. Correct if necessary.
Check operation. Adjust if necessary.
Check operation, repair if damaged, check toe-in, and adjust if necessary.
Replace engine oil. Warm engine before draining.
Replace engine oil filter element.
Check coolant leakage. Repair if necessary. Replace coolant every 24 months.
Check operation. Adjust headlight beams.
| Brand | Yamaha |
|---|---|
| Model | RAPTOR 700 |
| Category | Offroad Vehicle |
| Language | English |