INSP
ADJUS
6. Install:
• Reverse the removal steps
• Fuel tank
• Seat
See Section “SEAT, FUEL TANK AND
COVERS.”
************************************
3-35
STEERING COLUMN ADJUSTMENT
Nut (handle-bars board):
110 N.m (11.0 Kg.m; 79.7 ft.Ib)
Bolt (handle-bars):
23 N.m (2.3 Kg.m; 16.6 ft.Ib)
Bolt (suspension):
20 N.m (2.0 Kg.m; 14.7 ft.Ib)
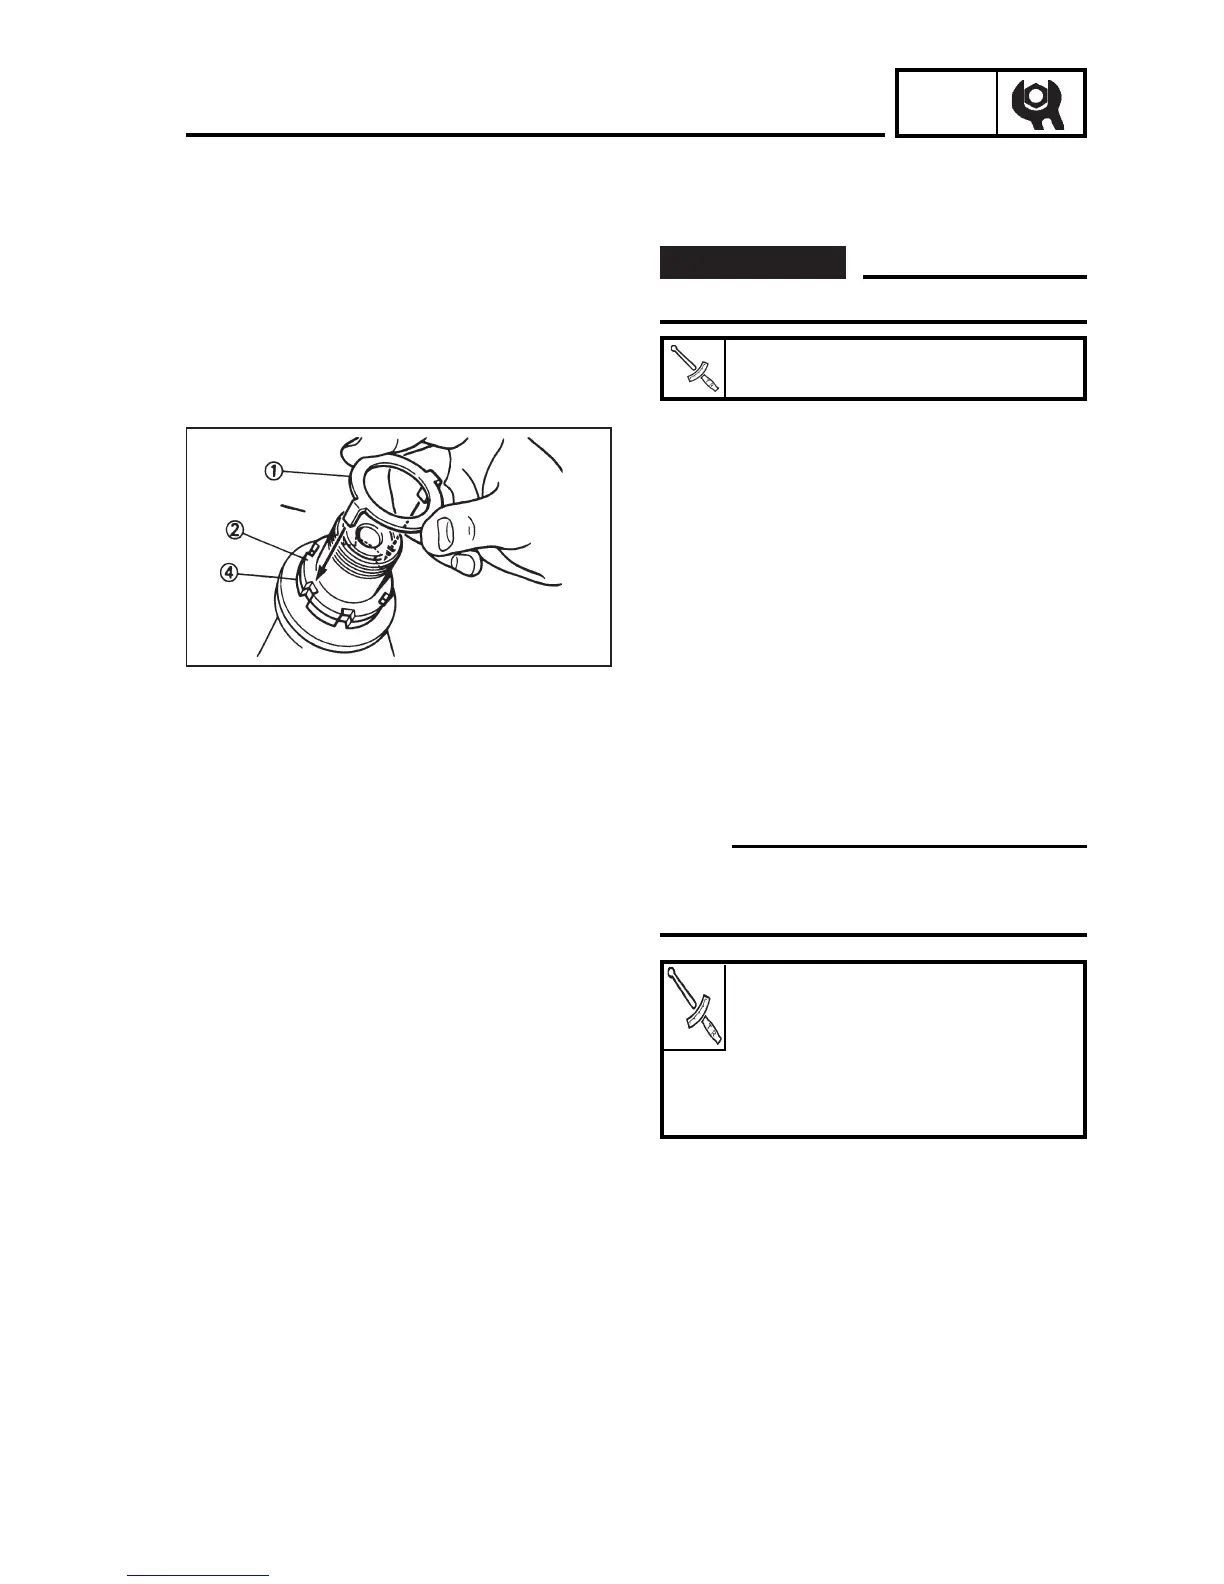
NOTE:
Make sure the lock washer flanges are
positioned in the slots of the ring nuts.
• Loosen the ring nut (lower) one turn.
• Tighten the ring nut (lower) again using
the special tool.
Avoid excessive torque.
V
WARNING
Ring nut (lower) (final torque):
6.5N.m (0.65 Kg.m; 4.7 ft.Ib)
• Check the steering column turning the
front tire from side to side, after the
adjustment above.
If the movement is difficult, dismount the
fastening assembly (upper and lower ring
nuts) and check roller bearings and tracks.
If the movement is too free, repeat the
adjustment steps.
• Install the spacer and upper ring nut 2.
• Tightening the lower ring nut 4, tighten
the upper ring nut 2 until they are fasten
and aligned.
• Install the lock washer 1.
 Loading...