48
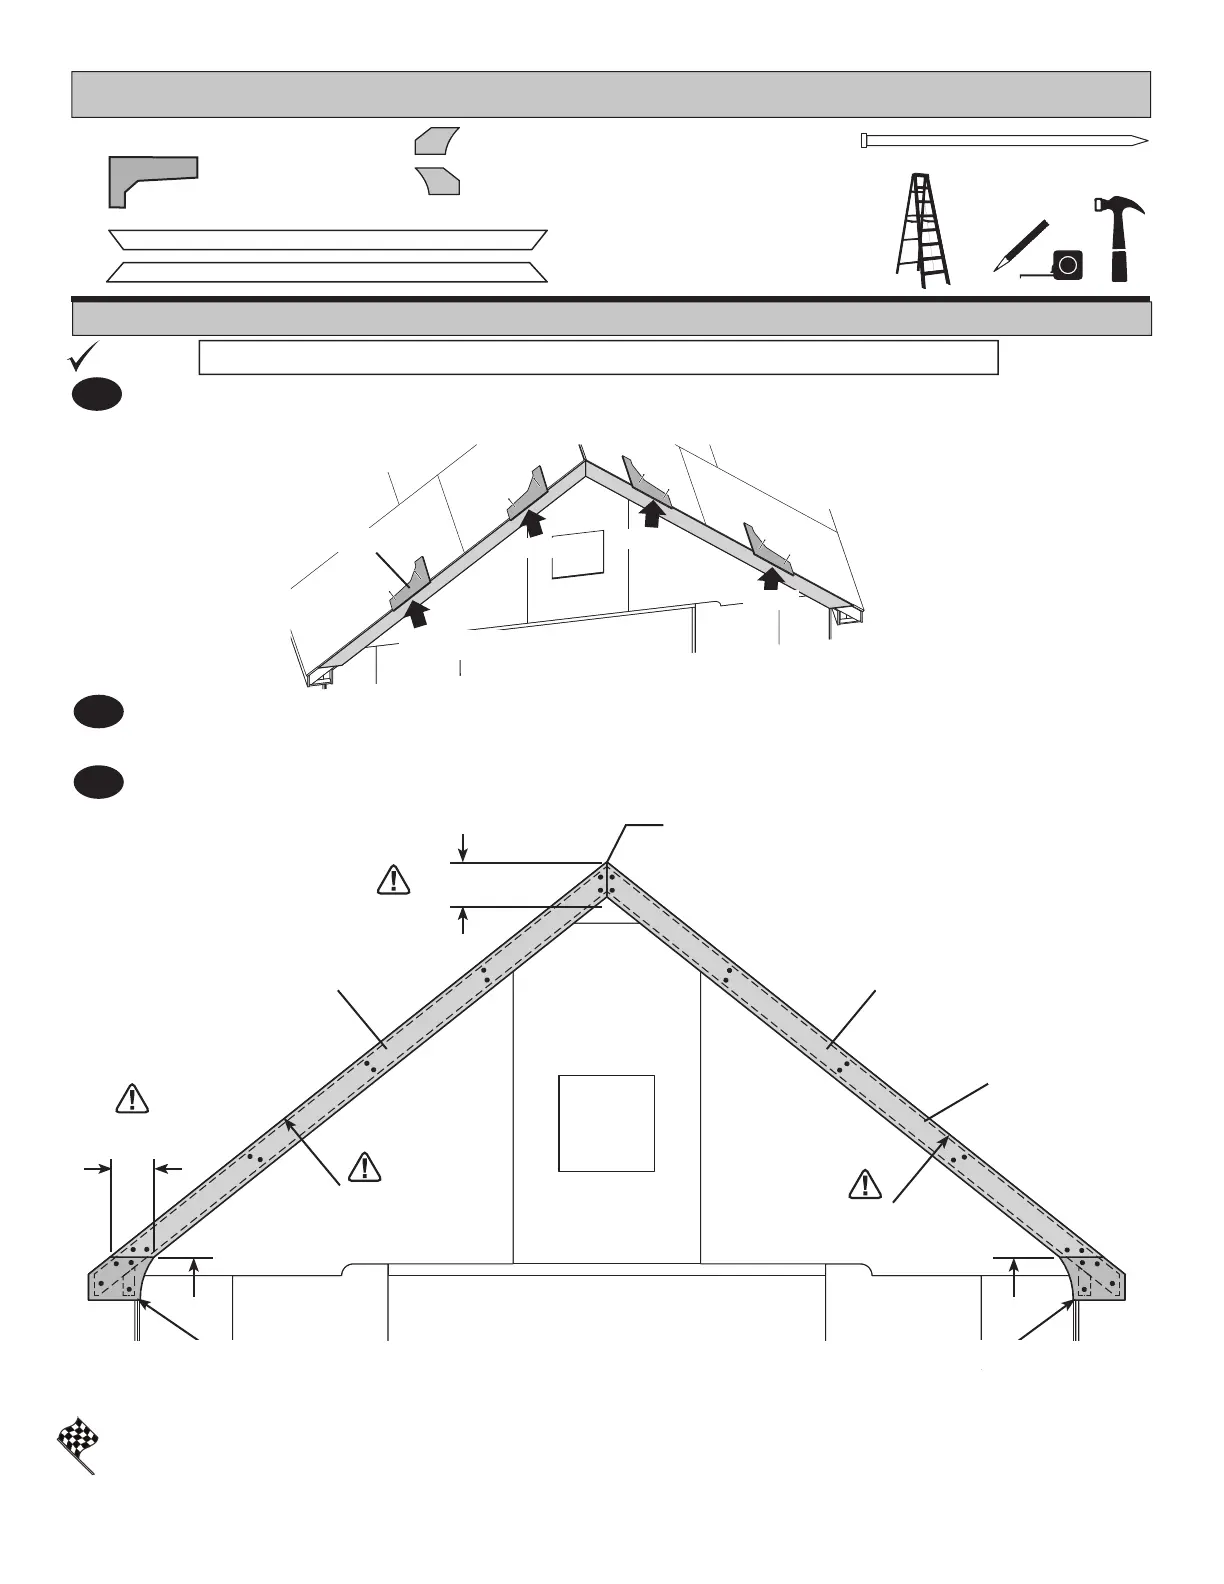
Flush at peak
Finish Nails
AOL AOR
Flush Flush
4-1/2"
(11,4 cm)
5-5/8"
(11,4 cm)
2
3
Install AOL and AOR primed side facing out, ush at rafter peak and ush to top of OSB roof panels.
Fasten trim with 2" nish nails in pattern shown.
Install (4) shelf brackets projecting out past edge of OSB roof panels, (2) on each side of roof, as shown.
Fasten each bracket to roof panels with 2" nish nails. Do not sink nails completely.
Install sof t caps with primed side facing out and ush to gable trim.
Fasten sof t caps with (4) 2" nish nails.
Your gable trim is installed.
Remove temporary roof ledger-boards.
Repeat steps to install fascia on the back side.
FINISH
1
Flush
Flush
Flush
Flush trim up to bottom
TEMPORARY
TEMPORARY
GABLE FASCIA
x72
2" (5,1 cm)
PARTS REQUIRED:
x2
19/32 x 3-1/2 x 81-1/4" (2,5 x 8,9 x 206,4 cm)
AOL
x2
19/32 x 3-1/2 x 81-1/4" (2,5 x 8,9 x 206,4 cm)
AOR
x2
19/32 x 5-1/2 x 6-5/8" (1,5 x 14 x 16,8 cm)
x2
19/32 x 5-1/2 x 6-5/8" (1,5 x 14 x 16,8 cm)
3/8 x 8 x 12-1/2"
(1 x 20,3 x 31,8 cm)
x4
Install all trim and soffi t parts with the primed side facing outward.
 Loading...