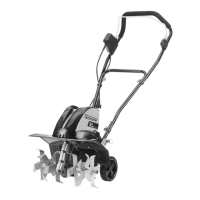
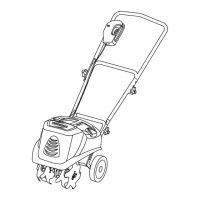
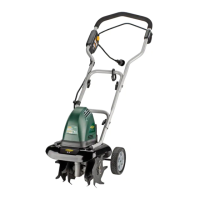
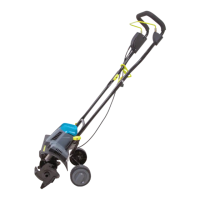
EasyManua.ls Logo

Yardworks TC70010-1 - User Manual

Yardworks TC70010-1
14 pages
Print Icon
To Next Page IconTo Next Page
Loading...
SAVE THIS MANUAL FOR FUTURE REFERENCE
WARNING: To reduce the risk of injury, the user must read and understand the owners manual before
using this product.
Thank you for your purchase.
DO NOT RETURN THIS PRODUCT TO THE STORE. OPERATING, ASSEMBLY, PART,
SERVICE QUESTIONS? GO TO AMERICANLAWNMOWER.COM OR CALL 1-800-633-1501.
BETWEEN 8 AM – 5 PM EST, MONDAY-FRIDAY FOR ASSISTANCE.
Model TC70010-1 | SKU# 270-2453
OWNERS MANUAL
11” 10-Amp Corded Electric Tiller / Cultivator
Copyright All Rights Reserved.

Questions and Answers

Yardworks TC70010-1 Specifications

General IconGeneral
BrandYardworks
ModelTC70010-1
CategoryTiller
LanguageEnglish

Summary

Product Specifications

Symbols

Important Safety Warnings

Hearing Protection

Wear appropriate personal hearing protection during use to prevent hearing loss from noise.

General Safety

Check for Damaged Parts

Check for alignment, binding, or breakage of parts; repair or replace damaged parts.

Dangerous Environments

Do not use in rainy, stormy, damp, wet, gaseous, or explosive locations.

Keep Children and Pets Away

Ensure children and pets stay at a safe distance from the work area.

Proper Dress

Avoid loose clothing/jewelry; wear protective hair covering and footwear.

Safety Glasses and Protection

Wear safety glasses with side shields or goggles; use face/dust mask if dusty.

Double Insulation

Explains the double insulation feature for electrical safety and protection.

Extension Cord Usage

Guidance on selecting and using extension cords, including gauge and type.

Secure Extension Cord

Method to tie extension cords together or to the power cord to prevent disconnection.

Cord Awareness

Guide the cord away from tines and be careful not to trip on it during operation.

Overheat Protection

Explains automatic motor shut-off due to overload and restart procedure.

GFCI Protection

Requirement for GFCI protection on the circuit or outlet used for the tiller.

Disconnect Power

Disconnect power supply when not in use, cleaning, or servicing. Do not leave unattended.

Cord Care

Avoid carrying product by cord or yanking it; keep cord from heat, oil, and sharp edges.

Use Correct Appliance

Use product only for its intended job to prevent misuse and potential injury.

Avoid Overreaching

Guide tiller at walking pace, maintain proper footing and balance at all times.

Adequate Lighting

Operate tiller/cultivator only in daylight or good artificial light conditions.

Indoor Storage

Store tiller/cultivator indoors in a dry area out of children's reach when not in use.

Unit Maintenance

Keep clean for performance and safety; inspect cord, keep handles dry and free from oil.

Polarized Plug

Explains polarized plug for reduced shock risk; ensure correct fit with extension cord.

Slope Operation

Do not operate on steep slopes; maintain footing and slow down when on inclines.

Pre-Start Check

Ensure tines are not touching any object and are free to move before starting.

Grip Handle Firmly

Grip the guide bar firmly with both hands; never operate with one hand.

Bounce Hazard

Tiller may bounce if tines strike hard soil, frozen ground, or buried obstacles.

Stay Alert

Stay alert, use common sense, and do not operate when tired or under the influence.

Electrical Cable Proximity

Avoid operating near underground electrical cables, telephone lines, pipes, or hoses.

Foreign Body Strike

Turn off immediately if striking foreign body; check for damage before restarting.

Abnormal Vibration

Turn off immediately if abnormal vibration occurs; check for the cause.

Risk of Cut

Wear gloves and use caution when cleaning or performing maintenance on tines.

Maintenance Safety

Always disconnect power and wait for tines to stop before maintenance or repairs.

Tine Stopping Time

Tines continue to rotate briefly after the tiller/cultivator is turned off.

Keep Clear of Tines

Keep hands, feet, body parts, and clothing away from rotating tines.

California Proposition 65 Warning

Product contains chemicals known to cause cancer, birth defects or reproductive harm.

Assembly

Wheel Assembly

Assemble wheels onto axle, install washers and screws, and seat hub caps.

Wheel Frame Adjustment

Lower wheel frame and secure with lock pin; ensure proper positioning.

Handle Assembly

Attach center and upper handle sections using J-bolts and wing nuts.

Cord Retainer and Clips

Slide cord retainer onto handle and secure cord with clips.

Adjustable Tine Assembly Instruction

Tine Identification

Tines are identified (A,B,C,D) with letters stamped into the Tine Hubs.

Change From Four to Two Tines

Remove Lock Pins and Tines A and D from the shaft.

Change From Two to Four Tines

Install Tines A and D, align holes, and secure with Lock Pins.

Alternative Tine Securing

Use M8x40 bolts and M8 Lock nuts to secure Tines A and D if Lock Pins are lost.

Operating

Starting the Tiller

Raise wheel frame, grip handle, push safety lock, and pull bail wire to start.

Extension Cord Management

Secure extension cord into retainer and plug into tiller power cord.

Pre-Operation Movement

Move tiller to work area before starting; do not start with obstructions in path.

Tilling Operation

Hold firmly, tines will pull forward; lower tines slowly into ground.

Stopping the Tiller

To stop, simply release the switch control bail wire.

Tilling Applications

Use for breaking sod, preparing seed beds, cultivating gardens, and digging holes.

Tilling Techniques

Allow tines to pull forward, pull back firmly for deep tilling; use caution when moving backward.

Tilling Patterns

Use two passes: Pattern A at right angle, Pattern B overlapping.

Area Preparation

Before use, remove any visible stones or foreign bodies from the area.

Moving Between Areas

Switch off motor and wait for tines to stop before moving the tiller.

Clearing Foreign Objects

Turn off, unplug, and remove lodged stones, roots, or wrapped grass/weeds from tines.

Maintenance

Pre-Use Checks

Check cord for damage, tighten connections, sharpen or replace dull tines.

Seasonal Maintenance

Lubricate tines and shaft annually; check for damage before storing.

Cleaning Procedures

Clean underside, housing, and vents; use brush/cloth with mild soap. Do not use water hose.

Tine Maintenance

Check, sharpen, or replace worn tines for optimal performance and motor health.

Replacement Parts

Use only original replacement parts for safety and proper fit.

Protective Devices

Ensure all protective devices are secure; repair or replace if necessary.

Lubrication

Add 2.4 oz. auto gear lube to transmission case after second season of use.

Tine Removal and Installation

Remove/install tines using lock pins and M8x40 bolts/nuts.

Storage

Storage Location

Store in a dry, clean area out of children's reach.

Corrosion Protection

Wipe metal surfaces with oiled cloth or spray with oil for protection.

Storage Preparation

Fold upper handle down and store tiller/cultivator in a suitable place.

Troubleshooting

Motor Does Not Start

Check power, cable, switch/plug; allow motor to cool if overheat protection activated.

Abnormal Noises

Switch off if blade is jammed; contact service if lubrication is low or parts are loose.

Abnormal Vibrations

Replace damaged or worn blades.

Poor Results

Adjust working depth or replace worn blades.

Parts and Service

Contact Information

Call 1-800-633-1501 or visit americanlawnmower.com for parts or service.

Model and Serial Number

Record model and serial number for inquiries; mention model when ordering parts.

Available Kits

Lists available kits: Tine Kit, Upper Handle Kit, Center Handle, Handle Hardware Kit.

Yardworks Warranty Policy

Warranty Duration

Two (2) year limited warranty on Yardworks outdoor power equipment.

Warranty Exclusions

Excludes commercial use, abuse, negligence, and failure to follow manual instructions.

Non-Covered Items

Excludes wear items, battery issues, environmental damage, and cosmetic wear.

Transferability

Warranty is non-transferable and applies only to new products from authorized retailers.

Limitations

Excludes incidental/consequential loss, installation, assembly, and normal adjustments.

Warranty Claims

Proof of purchase required; contact customer support for claims.

Related product manuals