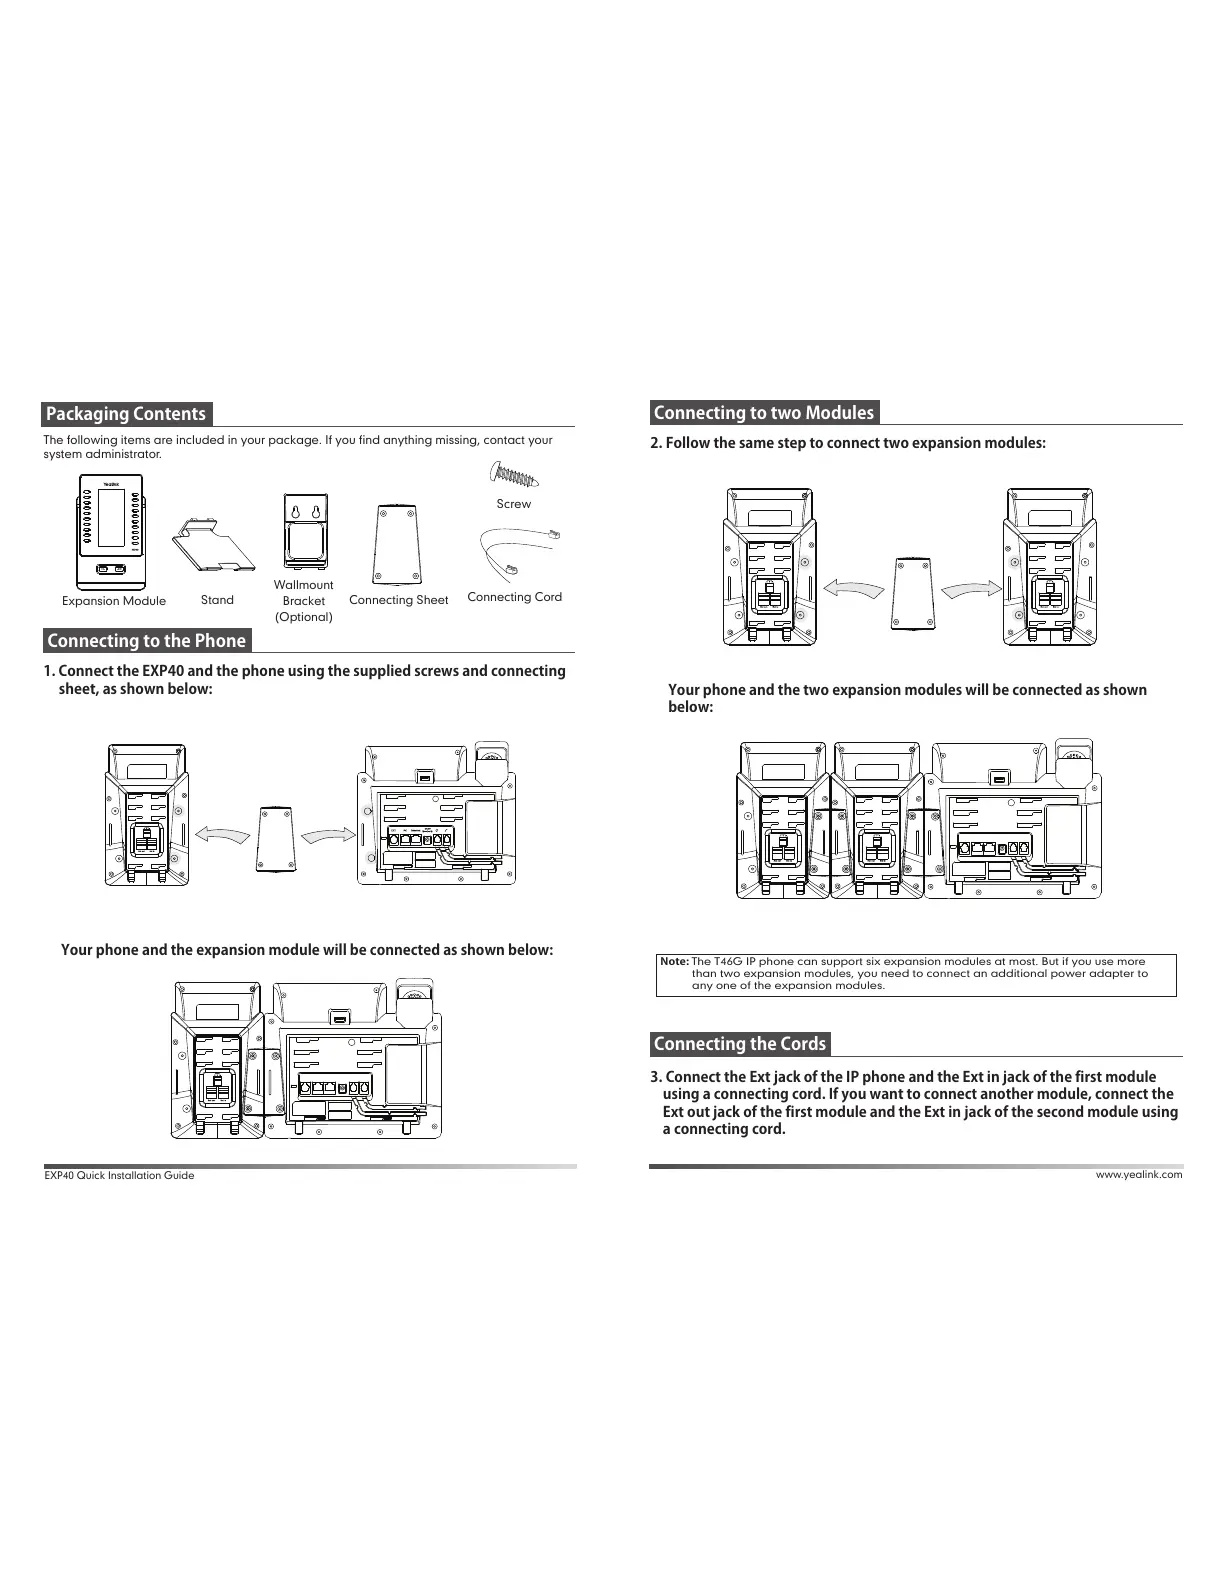
2. Follow the same step to connect two expansion modules:
Expansion Module
Stand Connecting Sheet
Connecting Cord
Screw
The following items are included in your package. If you find anything missing, contact your
system administrator.
Note: The T46G IP phone can support six expansion modules at most. But if you use more
than two expansion modules, you need to connect an additional power adapter to
any one of the expansion modules.
EXP40 Quick Installation Guide
www.yealink.com
Your phone and the expansion module will be connected as shown below:
1. Connect the EXP40 and the phone using the supplied screws and connecting
sheet, as shown below:
Your phone and the two expansion modules will be connected as shown
below:
3. Connect the Ext jack of the IP phone and the Ext in jack of the first module
using a connecting cord. If you want to connect another module, connect the
Ext out jack of the first module and the Ext in jack of the second module using
a connecting cord.
Packaging Contents
Connecting to the Phone
Connecting to two Modules
Connecting the Cords
Wallmount
Bracket
(Optional)
 Loading...