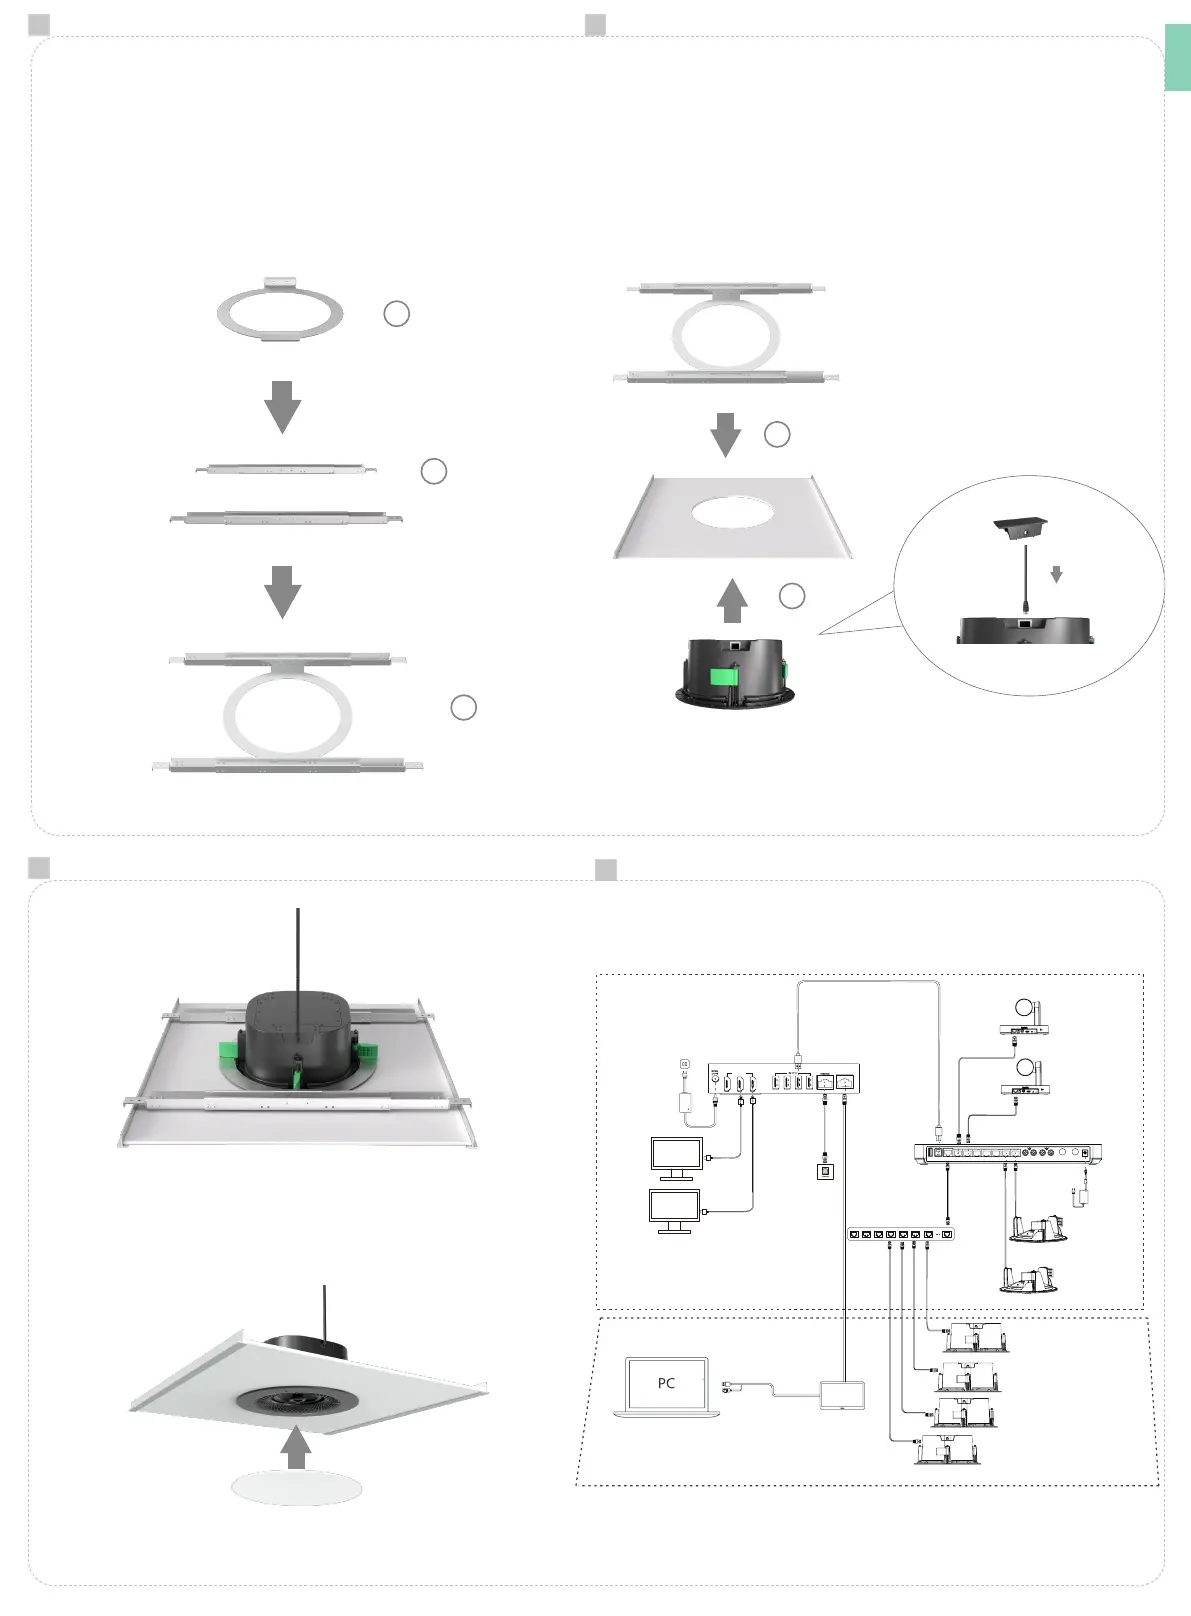
1. Use screws to assemble the bracing bridge.
2. Use screws to combine the assembly xing bracket and the bracing bridge.
3. Adjust the bracing bridge to the appropriate length according to the size of the
drop ceiling grid(compatible with spans of 400-438mm/600-638mm/2'), tighten the
xing screws to prevent further extension of the bracket.
Installation Method 2: Use the assembly fixing bracket +
bracing bridge.
(If your ceiling has a load-bearing capacity less than or equal
to 4.7KG, you can use the bracing bridge (optional) for additional support during
installation).
1
3
2
4.Place the bracing bridge onto the drop ceiling grid support (compatible with T-bar drop
ceiling grid and triangular drop ceiling grid).
5. Connect the ethernet cable and cover it with the dust cover.
6. Install CS10 along the opening circular of the drop ceiling grid, pushing it towards the
ceiling.
7. Hold the device by hand and securely tighten the four screws on its surface in a
clockwise direction. Adjust the lower surface of the CS10 to align it ush with the ceiling
tiles.
• Attach the mesh cover magnetically to the CS10.
• Installation completed
(
main body
)
.
4
Connection Sample
MTouch
3x HDMI out
MTouch Plus
SkySound CS10
CM20
UVC86
Mcore Pro
Display
PoE+Switch
AVHub
UVC86
CM20
SkySound CS10
5 6
7
8
1
2
E
N
 Loading...