1
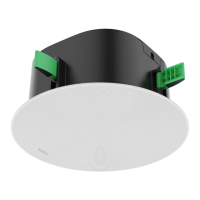
Package Contents
SkySound CS10 Assembly Fixing
Bracket
Quick Start Guide
Dust Cover
M3*4CMHOZN3
2
Hardware Introduction
White Mesh Cover
(Black Optional
)
RJ-45 Port
Reset (Long poke
for 5 seconds to
reset.)
Bracing Bridge*2
(
Optional
)
× 6
Deployment Instruction
Templete
Mic(Do not poke it )
φ
294*H3.4 D=268mm
Safety rope passes through here
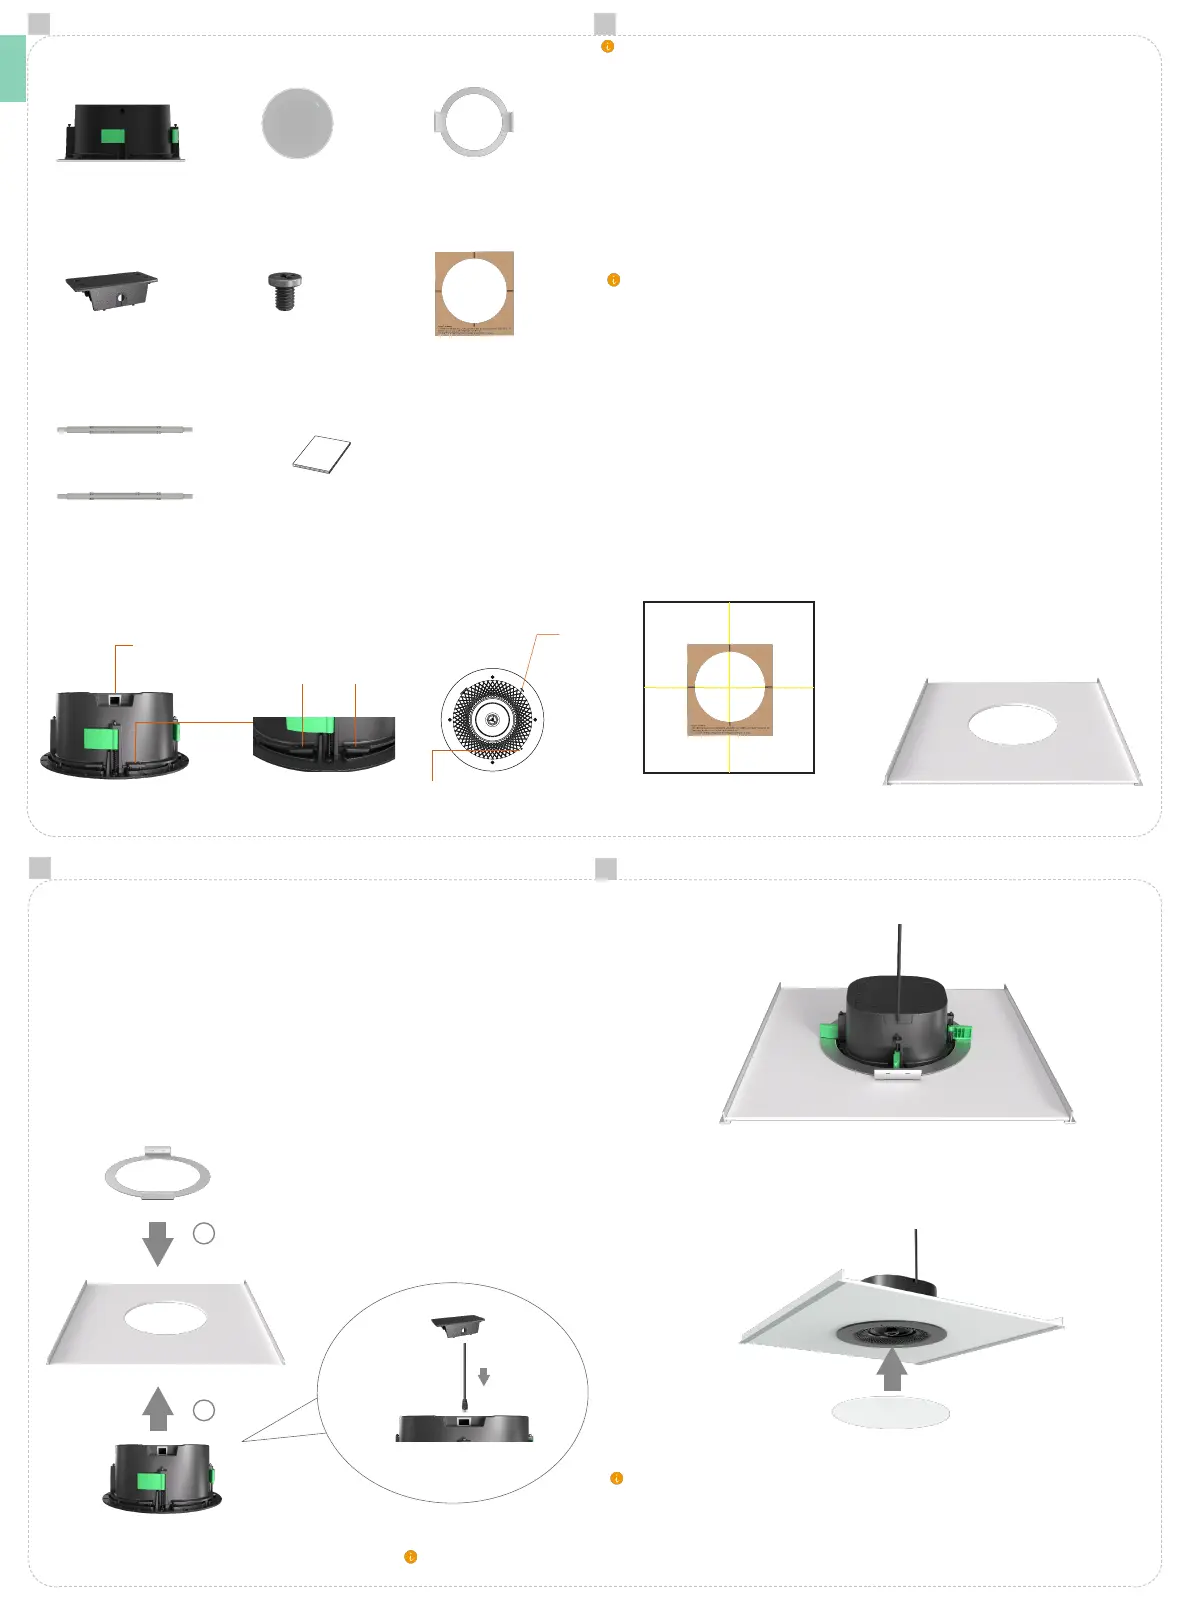
3
Installation
• Remove the ceiling and draw auxiliary lines at the midpoint of the length
and width on the back of the ceiling.
• Align the auxiliary lines with the deployment instruction templete's
guidelines and cut openings in the ceiling.
1. The installation of CS10 requires a certain level of professional expertise. We
strongly recommend entrusting this task to professional construction workers
whenever possible.
2.If you choose to install it yourself, please make sure to have someone assist you for
safety reasons.
The need for an auxiliary bracing bridge during the installation of the CS10 depends
mainly on the frame and the load-bearing capacity of the suspended ceiling tiles.
• Common suspended ceiling tiles materials include gypsum, metal, and PVC.
• If your suspended ceiling tiles has a load-bearing capacity lower than 4.7KG, it is
recommended to use a bracing bridge.
• The suspension bracket requires the load-bearing capacity of your ceiling frame to
be no less than 6.3KG.
• The adjustable range of the bracing bridge is 400-438mm/600-638mm/2'.
• The slot width compatibility of the ceiling grid (T-bar) includes: 22mm, 24mm, 32mm,
and 38mm.
• The slot width compatibility of the ceiling grid (triangle) includes: 25mm
,
30mm
,
35mm.
1. Place the assembly xing bracket onto the drop ceiling grid support (compatible with
T-bar drop ceiling grid and triangular drop ceiling grid).
2. Connect the ethernet cable and cover it with the dust cover.
3. Install CS10 along the opening circular of the drop ceiling grid, pushing it towards
the ceiling.
4.Hold the device by hand and securely tighten the four screws on its surface in a
clockwise direction. Adjust the lower surface of the CS10 to align it ush with the ceiling
tiles.
Installation Method 1
:
Use the assembly xing bracke
(If your ceiling
has a load-bearing capacity greater than 4.7KG, you may choose not to use the bracket
for additional support, but the assembly xing bracket is still necessary.)
1
2
Power supply: PoE+Switch
The following installation steps will demonstrate using the bracing bridge to secure
the CS10. If your ceiling has a load-bearing capacity greater than 4.7KG, you may
choose not to use the bracing bridge for additional support, but the assembly xing
bracket is still necessary.
• Installation completed
(
main body
)
.
• Attach the mesh cover magnetically to the CS10.
1
2
3
4
E
N
φ
294*H125.8mm
 Loading...