Tunics_Quick_Starting_Guide_2010-2510
Connect the optical patchcord to the Tunics:
Clean the optical patchcord connector ends and connect it between the output port
of the Tunics and the input port of your device under test. The Tunics must receive
the FC/APC end.
Note: when you control the cleanness of your connector ends take care that the laser is
disable or your optical patchcord not connected yet to the Tunics source.
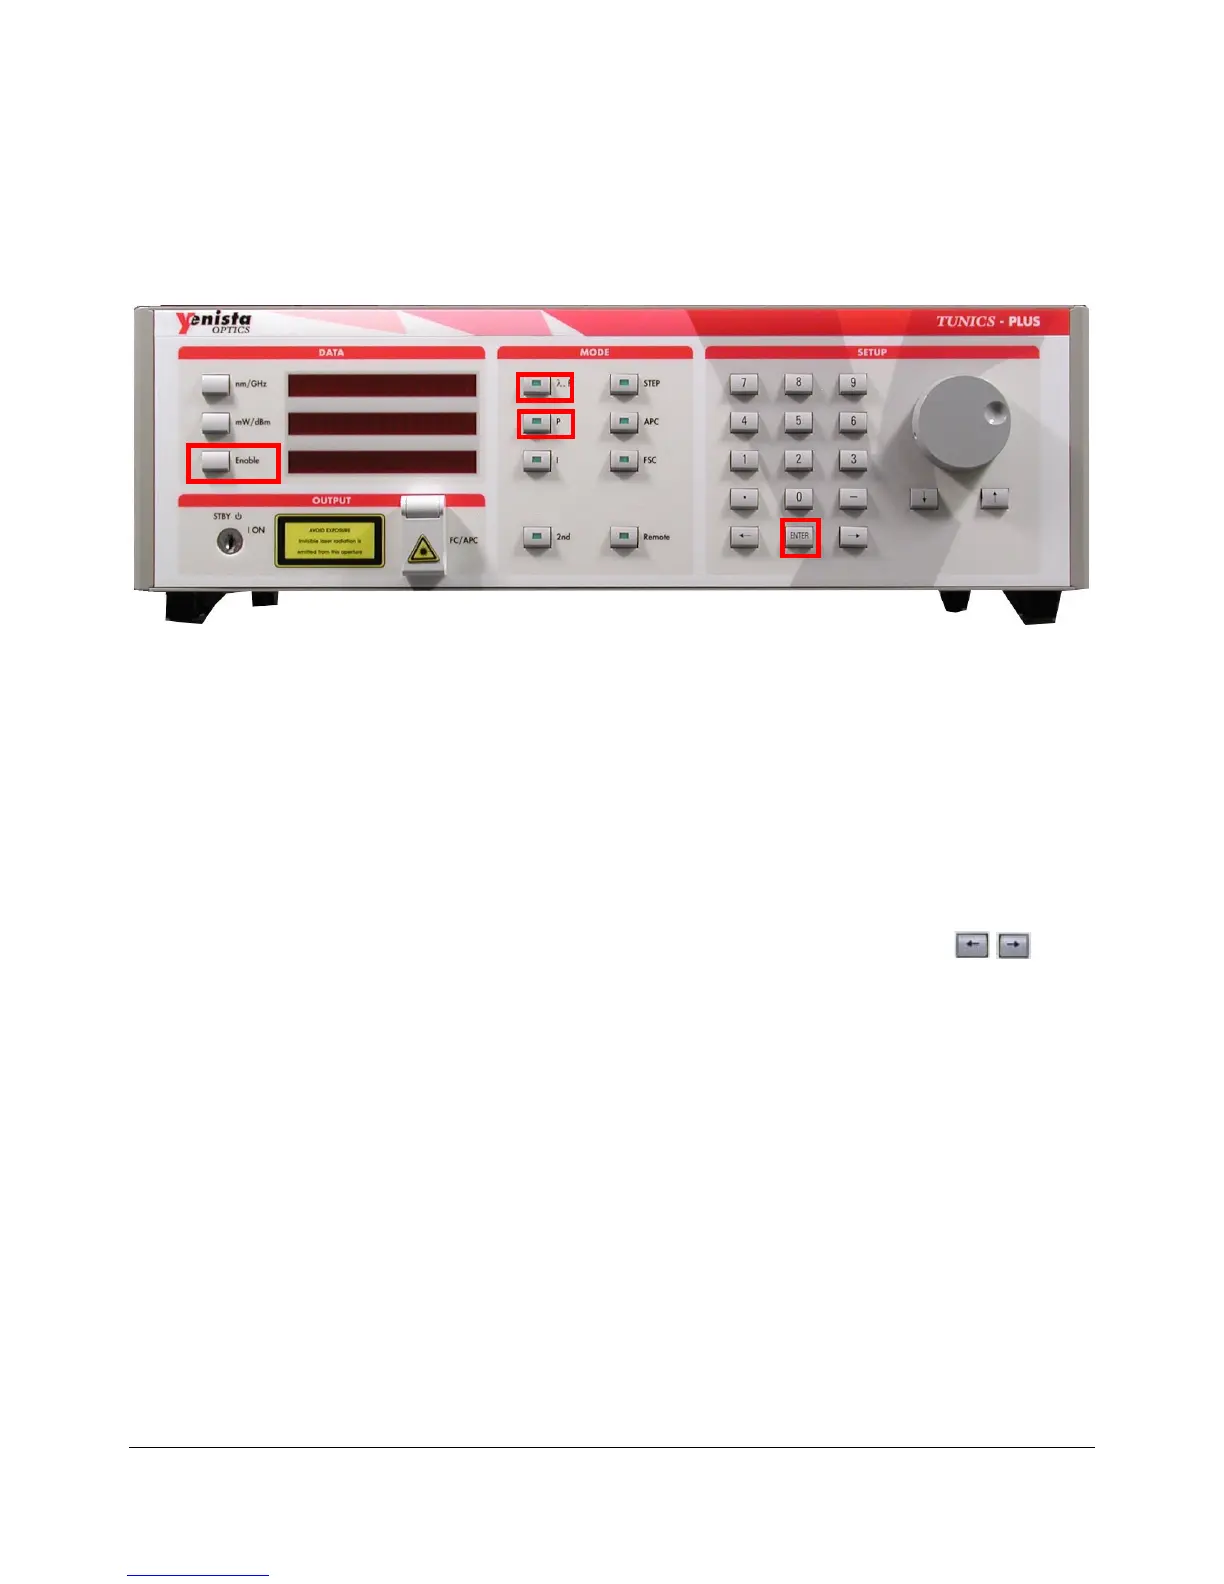
Figure 1: Tunics Front Panel
Set a Wavelength
Set the wavelength:
1. Press the , f function key in the MODE area (see Figure 1).
2. Enter the new value using the numeric keypad or modify knob.
3. Press the Enter key in the SETUP area (see Figure 1).
4. Press the Enable key in the DATA area to enables the optical output (see
Figure 1).
Note: You may also increase or decrease the wavelength by pressing the arrow
keys in the SETUP area, which has the same effect as rotating the modify knob.
Set an optical output Power
Set the optical output power:
1. Press the P function key in the MODE area (see Figure 1).
2. Enter the new value using the numeric keypad or modify knob:
10 mW for a Tunics Plus (possible range: 0.2 mW<P<10 mW)
2 mW for a Tunics Purity (possible range: 0.2 mW<P<2 mW)
Note: It is possible that the required output power cannot be reached even at the
maximum allowable current. If this occurs, Tunics automatically limits the current to its
maximum value and the message “Lim” appears at the right end of the displayed power.
3. Press the Enter key in the SETUP area (see Figure 1).
4. Press the Enable key in the DATA area to enables the optical output (see
Figure 1).