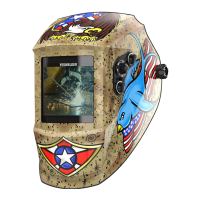
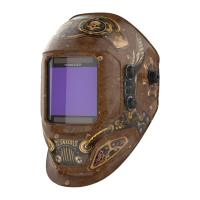
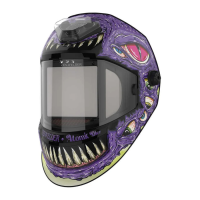
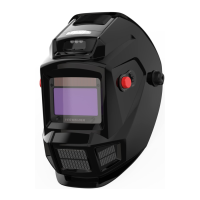
The YESWELDER Auto Darkening Welding Helmet is designed to protect the user's eyes and face during welding operations. It utilizes photoelectricity principles to automatically darken the LC (Liquid Crystal) valve in the helmet when welding starts, within 1/25000-1/30000 seconds. The helmet incorporates IR (Infra-Red) and UV (Ultra Violent) filters, consisting of reflective coated glass, a multi-layer valve, and a polarizer, to effectively block harmful rays even in its clear state. This design offers enhanced safety compared to conventional welding helmets, protecting the face and neck from electric arcs and improving overall safety conditions in the work area.
Function Description:
The helmet operates based on an electronic shutter module where the LC valve/shutter darkens or lightens upon voltage application. The bright light from an electric arc is converted into an electronic signal, which is then magnified and passed to an LC circuit control module. This module subsequently closes (darkens) the LC valve/shutter. The operating principle involves a welding filter and arc light detected by a sensor, which then goes through a magnify and controlling circuit, powered by a power supply circuit, to drive the LCD.
Important Technical Specifications:
- View Area (ADF): 101x94mm
- Clear State Shade: DIN 4
- Dark State Shade: DIN 5-9 (Stepless Adjustable), DIN 9-13 (Stepless Adjustable)
- Switching Time: 1/30000s
- Staying Time: 0.1~1.0s (Stepless Adjustable), External or Internal control
- Sensitivity Control: Low to high (Toggle adjustment), External or Internal control
- Weld/Grind: Adjustable
- UV/IR Protection: DIN 16
- Other Features: ADF Self-check, Low Volume Alarm
- Working Temperature Range: -10°C to 60°C
- Limited Storage Temperature Range: -20°C to 70°C
- Relative Humidity Range: 20% to 80%
The helmet is widely used in industries such as Oil & Gas, Shipbuilding, Architecture, and Steel Manufacturing. It provides protection for welding purposes only and is not suitable for laser welding processes. It does not protect against severe impact hazards, fragmenting grinding disks, explosive devices, or corrosive liquids.
Usage Features:
- ADF Controls:
- Delay: Fast-Slow adjustment.
- Weld/Grind: Selectable mode.
- Shade Grade: Adjustable from 5-9 or 9-13. Users should select the shade grade first, then adjust the specific number.
- Sensitivity: Adjustable from low to high.
- Headband Installation: The headband is installed by aligning and pressing the clips on the left and right sides into the helmet slots. It features dual top strap adjustments for increased stability and reduced pressure on the head. The pivoting top and back are self-adjusting to conform to different head shapes.
- Battery Replacement: The helmet uses a lithium battery. Users are instructed to replace the battery when the low-voltage indicator lights up. Used batteries should be disposed of according to local government regulations or handed over to professional organizations. A "TEST" button allows users to check the ADF's functionality; pressing it should cause the ADF to immediately switch from light to dark and then back to light, indicating normal operation.
- Distance Adjustment: Six settings allow users to adjust the distance between their face and the ADF for a better view. This is controlled by a knob that moves the helmet closer (MIN) or further (MAX) from the face.
- Headband Knob: A knob on the headband allows for adjustment to fit different head sizes, providing smooth ratcheting for precise tightening.
- Operating Instructions:
- Before use, check that the helmet is intact and undamaged, including the lithium battery.
- Do not use if the lens is cracked or dirty.
- Adjust the headband for a comfortable and secure fit, ensuring the helmet sits as low as possible and close to the face.
- Knobs on the sides loosen the grip for easy removal.
- The angle of the lens can be adjusted.
- Switch Sensitivity Adjustment: The operator can adjust the amount of light required for the lens to darken. Reduce sensitivity to avoid interference; high sensitivity is needed for small electric arcs (e.g., Argon arc).
- Dark to Clear Delay Adjustment: The operator can change the time for the filter to return to the clear state, depending on working conditions and comfort level. This adjustment can be made via a tumble switch, knob switch, or touch-tone switch (light goes off 2 seconds after switching off).
- Shade Range Adjustment: Variable shades from 9 to 13 can be selected using a shade knob. Refer to the Shade Guide Table (Annexure 2) for appropriate shade selection based on arc current and welding process.
- When working in cramped or crowded sites, switch on the anti-jamming device for the ADF to prevent accidental switch-off.
- Always wear approved Auto-Darkening Welding Helmet, respirator, and hearing protection during welding.
- Use only within the specified operating temperature range.
Maintenance Features:
- Lens and Helmet Maintenance:
- Replace the Front Lens Cover if it is damaged (cracked, scratched, soiled, or pitted).
- To replace the cover, gently pull up the central part of the lens. If there's a frame, lift the tab at the bottom to access the cover.
- Remove the protection film from both sides of a new lens (if applicable).
- Place the new lens by bending it slightly and sliding it between the tabs until it snaps into place.
- Ensure the lens is securely installed and the frame is snapped into place.
- Clean the Filter Lens with a clean, lint-free tissue or cotton cloth.
- Do not immerse the lens in water or any other liquid.
- Do not use abrasives, solvents, or oil-based cleaners.
- Do not remove or attempt to open the auto-darkening filter.
- If the helmet does not darken upon striking an arc, stop welding immediately and check for battery replacement. If the issue persists, have the helmet checked by an authorized service technician.
- The Auto Darkening Filter must never be placed on a hot surface.
- Daily Maintenance: A daily maintenance routine for the helmet and lens is required to ensure reliable protection.
- Filter Cleaning: Clean filter surfaces regularly. Protect the filter from contact with any liquid and dirt. Do not immerse the filter in water.
Warranty:
The manufacturer provides a 24-month warranty from the invoice date for all manufacturing defects. The warranty becomes void if the product is stored incorrectly, not operated according to the instruction manual, or if the helmet has been remodeled or modified.
Storage:
- Remove the battery when the helmet is not in use for a long period.
- Storage temperature range is -20°C to 70°C.