This document describes the SGW07 Dual Water Timer, a device designed for automatic watering.
Function Description
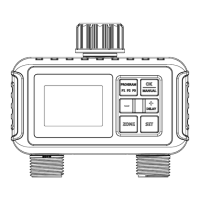
The SGW07 Dual Water Timer allows users to set up to three separate watering programs (P1, P2, P3) for two independent zones (Zone 1 and Zone 2). It features automatic watering program settings, manual watering capabilities, a rain delay function, and a children lock. The timer can be programmed to start watering at a specific time, for a set duration, and at a chosen frequency (either specific weekdays or every X days).
Important Technical Specifications
- Min/Max Operating Pressure: 0.5 Bar ~ 8 Bar (7.25 psi ~ 116 psi)
- Working Temperature: 4.5°C ~ 45°C (40.1°F ~ 113°F)
- Power: 4 x AA alkaline batteries (not included)
- Waterproof Rating: IP55
- Rain Delay Time: 1 day and up to 7 days
- Water Duration: 0 minutes ~ 5 hours 59 minutes
- Water Frequency: Every 1 to 7 days, or any day from Monday to Sunday
Usage Features
Battery Installation:
- Remove the battery cover from the back of the timer.
- Install 4 new AA (1.5V) alkaline batteries.
- Reinstall the cover firmly.
- Note: Close the battery cover tightly for water resistance. Remove old batteries at the end of the watering season. Replace batteries when the low battery indicator appears. Do not use rechargeable batteries. The timer has no programmable memory, so the schedule needs to be reset if power is turned off.
Timer Installation:
- Attach the timer to an outdoor hose faucet.
- Turn on the tap after programming the timer.
Automatic Watering Program Setting:
- 1. Set Time:
- Press the "SET" button; the arrow points to "Set Clock".
- Use "+" and "-" to set the current hour and minute. Press "OK" to confirm.
- Use "+" and "-" to set the current day of the week. Press "OK" to confirm.
- Press "SET" to save changes and move to "START TIME".
- 2. Set START TIME:
- Press the "SET" button; the arrow points to "Start Water".
- Use "+" and "-" to set the start hour and minute. Press "OK" to confirm.
- Press "Program" to switch between P1, P2, and P3.
- Press "ZONE" to switch between Zone 1 and Zone 2.
- Press "SET" to save and move to "HOW LONG".
- 3. Set HOW LONG:
- Press the "SET" button; the arrow points to "How Long".
- Use "+" and "-" to set the watering duration (hour and minute). Press "OK" to confirm.
- Press "Program" to switch between P1, P2, and P3.
- Press "ZONE" to switch between Zone 1 and Zone 2.
- Press "SET" to save and move to "HOW OFTEN".
- Note: If "HOW LONG" is set to 0 minutes, the scheduled task will not be executed. Watering duration can be set from 0 minutes to 5 hours 59 minutes.
- 4. Set HOW OFTEN:
- A: Weekday Mode (Monday to Sunday):
- Press the "SET" button; the arrow points to "How Often".
- Use "+" and "-" to select the watering day(s) of the week. Press "OK" to confirm. (e.g., "[SU]" means Sunday is selected). Press "OK" again to cancel a selection.
- Press "SET" to save and move to "AUTO".
- Note: If no day is selected, the schedule will not be executed.
- B: Every 1/2/3/4/5/6 Days Mode:
- Press "+" to switch from "SU" to "SA" (meaning "Every X Days").
- When "SA" is flashing, press "+" to enter the setting of the day.
- Use "+" to select the interval watering days (1/2/3/4/5/6/7 days).
- Press "SET" to save.
- 5. AUTO:
- Press the "SET" button; the arrow points to "Auto". The program will run as set.
- 6. OFF:
- Press the "SET" button; the arrow points to "OFF". The screen shows "OFF" and the battery level. All programs are saved, but the timer stops working.
Additional Features:
- Manual Watering:
- Ensure the timer is in "Auto Run" state.
- Press "OK" and then "+" or "-" to select watering duration (0 to 59 minutes).
- Press "ZONE" to switch between Zone 1 and Zone 2.
- Press "OK" to start watering.
- Press "OK" again to end manual watering; the timer will switch back to "Auto" mode.
- Note: For Zone 1 only, set Zone 2 to 0 minutes. For Zone 2 only, set Zone 1 to 0 minutes.
- Rain Delay:
- Ensure the timer is in "Auto Run" state.
- Hold and press "+" for 5 seconds until the rain cloud icon appears.
- Use "+" or "-" to set the delay duration (1 to 7 days).
- Press "OK" to save changes.
- To cancel, press "+" for 5 seconds again.
- Children Lock:
- Ensure the timer is in "Auto Run" state.
- Press and hold "-" for 5 seconds until the lock icon appears.
- To cancel, press "-" for 5 seconds again.
- Battery Status:
- The display shows a battery icon indicating "FULL" or "LOW BATTERY".
- Note: When the low battery indicator appears, the valve will close automatically to prevent leakage. Replace batteries promptly to avoid interrupting normal operation.
Maintenance Features
- Filter Cleaning: Clean the filter regularly and replace it when worn to extend the timer's working life.
- Winter Storage: Remove batteries during winter months. Drain the timer and store it indoors to avoid freezing.
- Installation: Do not use tools to install the timer; tighten by hand only to prevent damage.
- Leak Prevention: Ensure the timer is firmly attached to the tap and hose, using a rubber washer and thread sealing tape if necessary, to prevent leakage.
- General Care: Do not subject the product to extreme force or shock.
- Battery Type: Use brand new alkaline batteries. Rechargeable and carbon batteries have a short and unstable battery life.
- Water Output: If Zone 1 and Zone 2 are switched on at the same time, the water output will be different.
Troubleshooting
- The water inlet leaks:
- Possible reasons: No filter or filter not placed horizontally; tap not standard 3/4".
- Possible solutions: Add a filter and ensure horizontal placement; ensure tap is 3/4"; reinforce with raw rubber wrap; use tape.
- The water won't stop/flow out:
- Possible reasons: Valve blockage; low water pressure; incorrect installation.
- Possible solutions: Check water pressure; check timer installation; wash the rubber filter.
- Short battery life:
- Possible reasons: Mixed use of old and new batteries; use of carbon or rechargeable batteries.
- Possible solutions: Use brand new alkaline batteries. Rechargeable and carbon batteries have short, unstable life; use alkaline batteries instead.