5
Your bike has been largely pre-assembled and only requires a few additional
assembly steps before you’re ready to ride. In addition, its settings and functions
have been tested prior to shipping from our manufacturing facility.
1. Open the bike box from the top.
2. Locate and set aside the battery charger
box and the bundle of pedals (located on
top of saddle frame or behind the bike seat).
3. Remove/pull/slide the new bike away
through the top of the opened box and
then stand the bike frame upright with the
kickstand down.
4. Carefully remove all packaging materials
from around the bike, except the whole
handle bar stem (which is ok to leave it
hanging by its cables), taking care to avoid
scratching the frame with any sharp or
metal tools. Please follow the guidelines
below for correct assembly (Figure 1).
ASSEMBLY INSTRUCTIONS
5. Lift the handlebar stem and remove the
packing materials from the very bottom part
of the handle bar stem only, or very bottom
of the ‘T’ shape (not the upper portion).
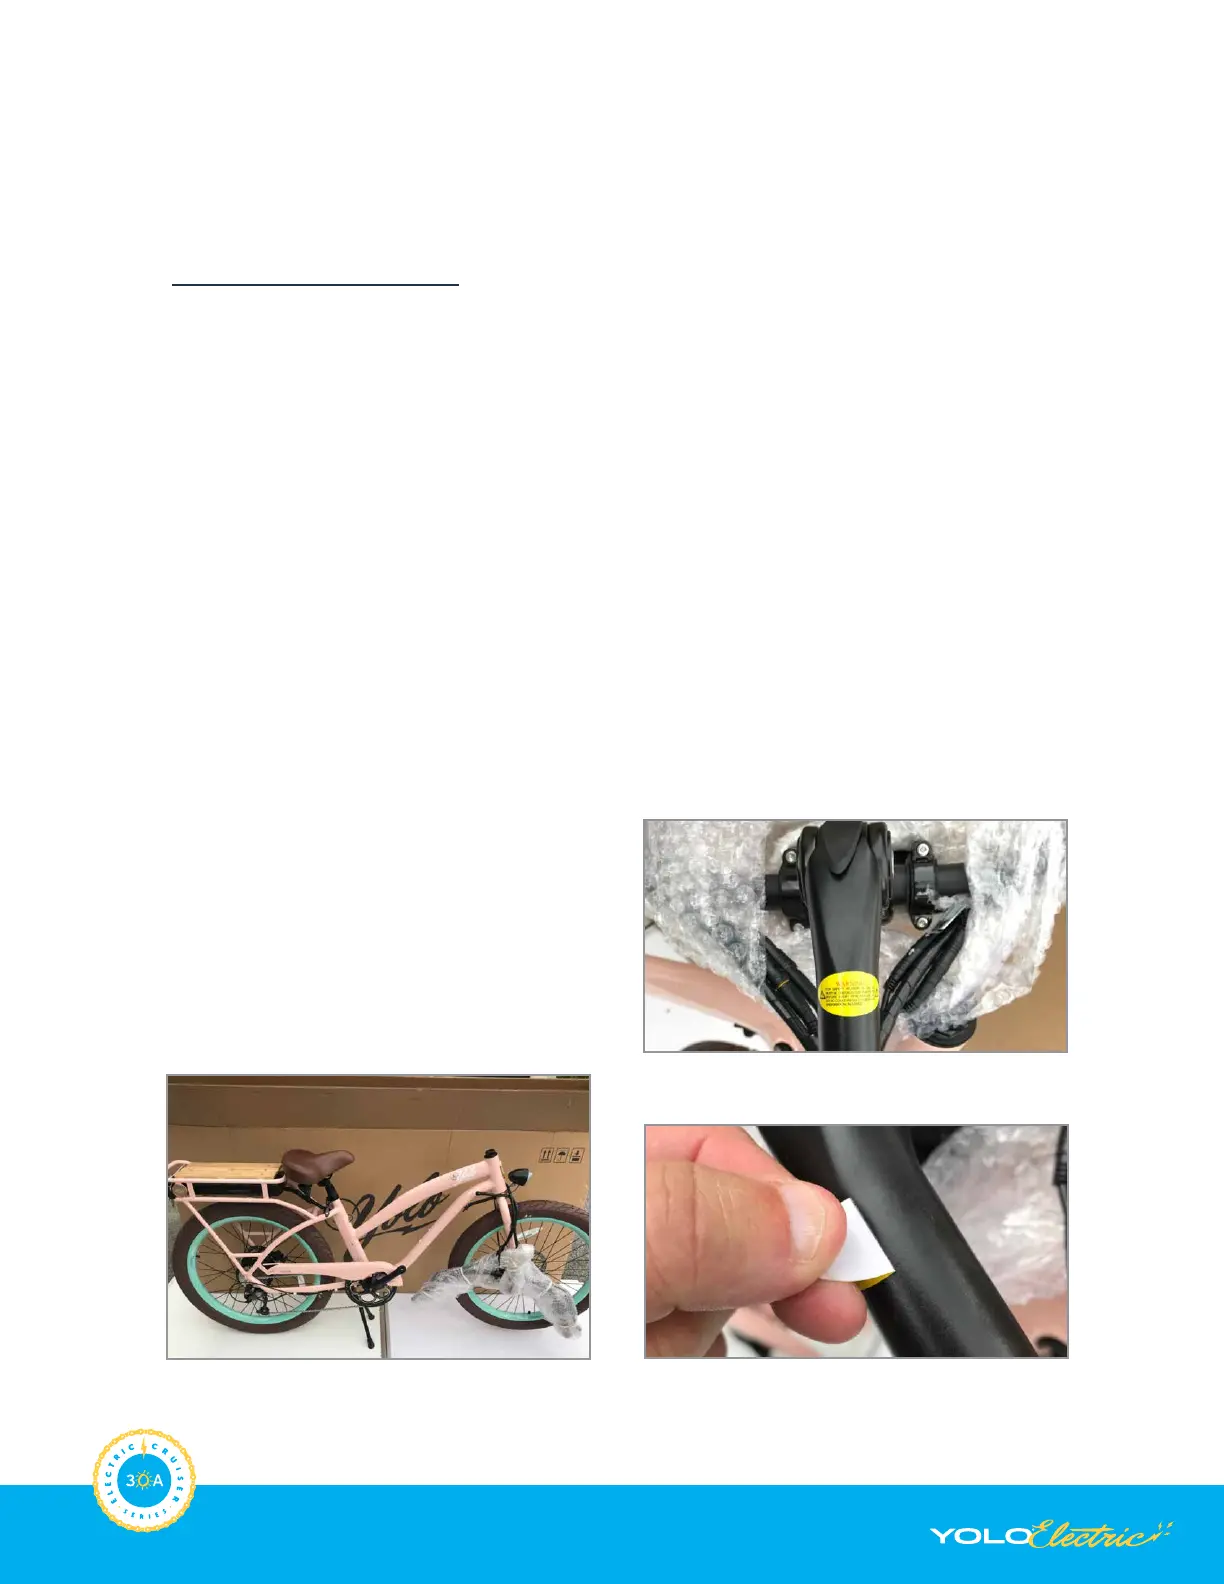
6. Carefully remove by slowly peeling away
the ‘Warning’ sticker only from the bottom
stem (Figure 2). Make sure no debris or
adhesive remains (Figure 3).
Figure 1
Figure 2
Figure 3
COMMENTS/QUESTIONS? VISIT YOLOBIKE.COM