1.3~1.6 meters
1
3meters
150
Horizontal angle
1
3
2
6
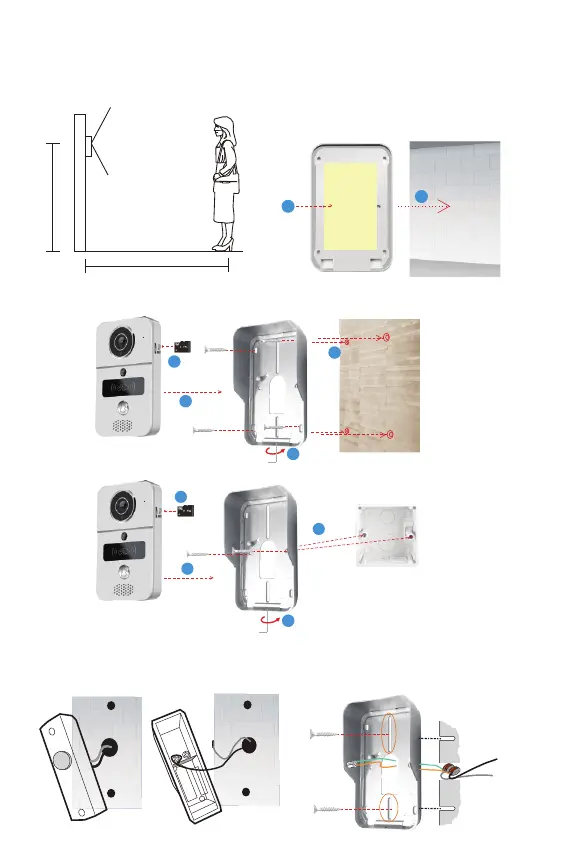
We recommend that you carefully consider the permanent location of your
Smart Doorbell, avoiding direct sunlight as well as wind and rain.
The doorbell is supplied with 4x screws and plugs, double sided tape and 2x
small tamper alarm screws.
8.1 Should you not be able to use screws
into walls or panels, double sided tape is
applied to the housing. See pic A
86 box
2
8 Installation of Smart Doorbell
8.3 Use the 2 screws to secure the housing into a an existing structure - see pic C
8.2 Use the 4 screws in the four corners of the housing to attach to wall,
arrow 4 for location of screw to attach doorbell to housing - see pic B.
A
B
C
3
1
4
2
Double faced
adhesive tape
4
8.4 Install on the existing doorbell location,connect the AC Transformer.
Before you start, you must turn off the circuit breaker for safety purposes.
Remove existing doorbell from location and disconnect the wires. - see pic C
°
D