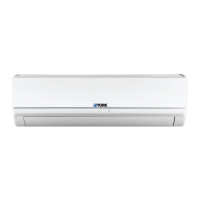
What to do if my York YWHJZH0012BAMKAFX shows F1 error?
- SStephen RichardsJul 29, 2025
Check if the indoor room temperature sensor is connected properly on your York Air Conditioner.

What to do if my York YWHJZH0012BAMKAFX shows F1 error?
Check if the indoor room temperature sensor is connected properly on your York Air Conditioner.
What to do if my York Air Conditioner shows F2 error?
Check if the evaporator temperature sensor is connected properly on your York Air Conditioner.
Why is my York YWHJZH0012BAMKAFX Air Conditioner indoor unit not blowing air?
If your York Air Conditioner is in HEAT mode and the indoor heat exchanger temperature is very low, or frost forms on the outdoor heat exchanger, the unit will automatically defrost. During this defrosting, the indoor unit will stop blowing air for 3-12 minutes. This is normal. Also, in DRY mode, the indoor fan will stop blowing air for 3-12 minutes to prevent condensed water from vaporizing again.
Why is my York YWHJZH0012BAMKAFX outdoor unit leaking water?
Water leakage from the outdoor unit of your York Air Conditioner can occur during cooling, defrosting, or heating operations. During cooling, water condensate may form around the pipes and connection joints. During defrosting, thaw water flows out. During heating, water on the heat exchanger may drip out.
What to do if my York Air Conditioner is not operating and is waiting?
If your York Air Conditioner is not operating and seems to be waiting, you should wait about 3 minutes.
Why is my York YWHJZH0012BAMKAFX indoor unit leaking water?
Water leakage from the indoor unit of your York Air Conditioner can be caused by high humidity, condensing water overflows, or a loose drain hose.
Why are the buttons on my York YWHJZH0012BAMKAFX cover unavailable?
Please check whether the cover is closed completely on your York Air Conditioner.
| Brand | York |
|---|---|
| Model | YWHJZH0012BAMKAFX |
| Category | Air Conditioner |
| Language | English |
Details the remote's layout, basic functions, and primary operational buttons like ON/OFF, MODE, FAN, TEMP.
Explains the functions of various buttons like X-FAN, timer, light, turbo, and quiet.
Details swing direction adjustments, timer settings, and I FEEL function.
Explains the different sleep modes and their operational parameters.
Provides guides for unit operation and explains special functions like X-FAN, AUTO RUN, and Turbo.
Provides instructions for changing remote control batteries and important operational notices.
Instructions for cleaning the front panel of the indoor unit.
Steps for removing, cleaning, and reinstalling the air filter.
Lists checks to perform before operating the unit.
Outlines maintenance tasks to perform after using the unit.
Addresses common operational problems like non-operation, odors, and unusual noises.
Explains mist emission during cooling and cracking noises due to temperature changes.
Provides solutions for startup failures and poor cooling or heating performance.
Addresses issues with remote control availability and water leakage from units.
Discusses sources of noise from the indoor unit, including refrigerant flow.
Solves problems related to airflow, moisture, sensor errors, and defrosting operations.
Addresses unresponsive buttons and critical faults requiring immediate attention and power cutoff.
Explains the basic principles of cooling and heating operations.
Details the defrosting process and the anti-cold air function in heating mode.
Describes the function of blowing out residual heat after heating operation stops.
Specifies the recommended operating temperature ranges for cooling and heating.
Offers advice for energy conservation and managing humidity issues.
Outlines essential cautions and general guidelines for proper installation.
Advises on suitable and unsuitable locations for unit installation.
Specific criteria for selecting the installation location for the indoor unit.
Specific criteria for selecting the installation location for the outdoor unit.
Details electrical safety precautions and requirements for installation.
Specifies air switch capacity and general wiring notes for installation.
Outlines essential earthing requirements for safe appliance operation.
Guides on how to install the mounting plate for the indoor unit.
Instructions for drilling the wall hole for piping and wiring.
Steps for connecting and routing the drain hose for condensate removal.
Details the process of connecting indoor and outdoor unit electrical wires.
Guides on routing piping and wiring from the indoor unit.
Instructions for connecting the refrigerant pipes using flare nuts and torque.
Details the electrical wiring connections for the outdoor unit.
Steps for purging air and performing a leakage test on the refrigerant system.
Instructions for installing condensate drainage for the outdoor unit, especially for heat pump units.
Lists essential checks to ensure correct installation before operation.
Step-by-step guide for performing the initial operation test.
Guides on how to install the healthy filter into the air filter.
Instructions for cleaning and maintaining the healthy filter.
Information on the expected service life of the healthy filter.
Details standard, minimum, and maximum lengths for connection pipes.
Explains how to calculate and add refrigerant oil and charge for extended pipe lengths.
Provides a table with recommended additional refrigerant charging amounts based on pipe diameter.