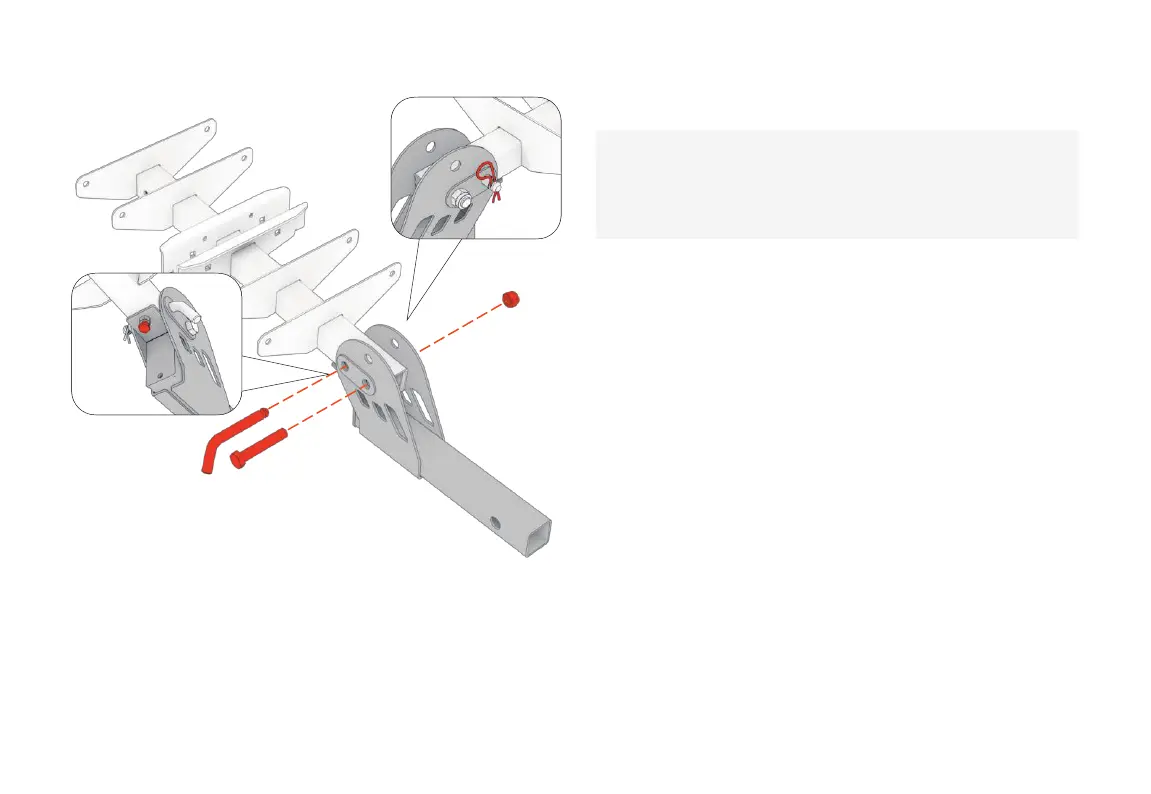
STEP1
Align the Bottom Fixing Bracket(2) with the hole of the Rotating
Group (1), insert the M16*85 Outer Hexagon Bolt (3), and then
screw on the M16 Lock Nut (4). Insert 16 Bent Pin(13) and φ3.8
Pin (15) at the same time, and use M10 Short Hexagon Bolts (14)
to screw into the Bottom Fixing Bracket (2) as shown in the
figure to eliminate the gap between the Bottom fixing bracket (2)
and the Rotating Group(1).
Note: Do not overtighten the bolts to prevent Bottom Fixing
Bracket (2) and Rotating Group (1) components from rotating
easily.