This document provides a manual for the YOUNG ELECTRIC Sole Hitch Bike Rack, a device designed for transporting bicycles on vehicles equipped with a 2-inch hitch receiver.
Function Description
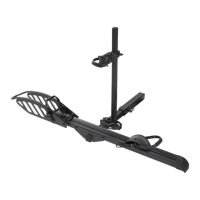
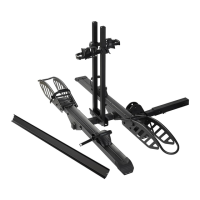
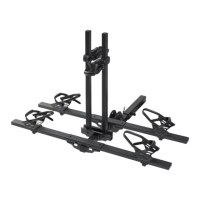
The Young Electric Sole Hitch Bike Rack is a robust carrier system designed to securely transport a single electric or regular bicycle. It attaches to a vehicle's 2-inch hitch receiver and features a beam assembly, front wheel mount, and an adjustable support assembly to stabilize the bicycle during transit. The rack utilizes ratchet wheel straps to fix the front wheel, rear wheel, and seat tube of the bicycle, ensuring stability and safety.
Important Technical Specifications
- Model Name: YOUNG ELECTRIC Sole
- Description: 2" Hitch 1-Bike Rack
- Material: Aluminum & Steel
- Maximum Weight Capacity: 100 lbs
- Maximum Bicycle Wheelbase: 50 inches
- Applicable Hitched Bike Types: Electric Bike/Regular Bike
- Applicable Vehicles: Vehicles with a 2-inch receiver
- Not Intended For Use With: Mopeds, motorcycles, or 3-wheel bikes
- Universal Sized: Accommodates tires up to 5 inches wide
- Dimensions:
- Length: 67 inches
- Height: 35.8 inches
- Width (at widest point): 27.5 inches
- Package Size: 55.9 x 13.9 x 8.3 inches
- Package Weight: 37.8 lbs
- Lock Beam Diameter (for optional lock): Should be less than 7mm (lock not included)
Usage Features
The bike rack is designed for straightforward assembly and use.
Assembly Steps:
- Step 1: Attach the Front Wheel Mount (3) to the Beam Assembly (1) using 4 M10 Outer Hexagon Bolts (2).
- Step 2: Insert the assembled components into the Bottom Fixing Bracket Assembly (6), aligning the holes. Secure with 2 M10 Long Outer Hexagon Bolts (4) and 2 M10 Lock Nuts (5).
- Step 3: Insert the Support Rod (7) into the Bottom Fixing Bracket (6). Align holes and install an M10 Low Square Neck Bolt (8) and an M10 Lock Nut (5), tightening until the support rod is secure (recommended torque 50Nm).
- Step 4: Insert the Adjustable Support Assembly (9) into the Support Rod (7) and tighten its knob to prevent sliding.
- Step 5: Connect the folding tube of the rack to the vehicle's 2-inch hitch receiver. Secure with an M16 Shockproof Bolt (10), a φ16 Spring Washer (11), a φ16 Flat Washer (12), and a φ3.8 Cotter Pin/Lock (13).
Bike Installation Instructions:
- Before placing the bicycle, ensure the support rod is upright.
- Snap the e-bike's front tire into the fixed frame.
- Place the rear tire in the beam.
- Use the provided ratchet wheel straps to secure the front wheel, rear wheel, and the bicycle's seat tube (or horizontal tube).
- The rear tire fixing seat should be positioned in front of the rear wheel.
Adjusting the Wheel Cradle:
- Pull the cam gear upwards.
- Turn the cam gear counterclockwise.
- Slide the wheel cradle to the desired position.
- Adjust until it is against the tire.
- Turn the cam gear clockwise to tighten.
- Press the cam gear down to lock it in place.
Maintenance Features and Warnings
- Weight Limit: Do not overload the bike rack beyond its 100 lbs weight capacity.
- Bike Capacity: Do not carry more than 1 bike on the carrier.
- Human/Animal Transport: The rack is not intended for transporting humans or animals.
- Bike Placement: If loading only one bike, place it in the position closest to the vehicle.
- Security: All bikes must be properly secured before operating the vehicle.
- Clearance: Ensure the front of the bike(s) is at or above the bottom of the bumper to prevent damage.
- Flammable Items: Do not carry flammable items on the bike rack.
- Electric Bikes: Remove batteries from electric bicycles before transport to reduce weight.
- Regular Checks: During long trips, frequently check straps and bike position, especially on rough terrain.
- No Alterations: Do not make alterations to the product, as this can create hazards.
- Pre-Use Inspection: Before each use, inspect the bike rack for signs of wear, corrosion, and fatigue.
- Damage Protocol: Do not use the rack if parts are bent, broken, deformed, or missing. Remove the rack from the vehicle if any such damage is found before operating the vehicle.
- Warranty: Young Electric provides a 2-year warranty covering non-artificial product defects from the date of purchase. This warranty does not cover normal wear and tear, weather damage, scratches, dents, rust, accidents, unlawful vehicle operation, misuse, abuse, neglect, theft, unauthorized modifications, or unauthorized repair. Improper fit, installation, or overloading also voids the warranty. The warranty terminates if the product is transferred to another person.
- Support: For defective products or any questions, contact Young Electric Team at 888-933-8899 or support@youngelectricbikes.com.
This manual emphasizes the importance of reading all warnings and cautions to ensure safety and proper operation of the bike rack. Regular maintenance and care are recommended to retain the original quality and safety of the product.