yt 0908 yt
EN
Please follow the
torque specifications of
the manufacturers:
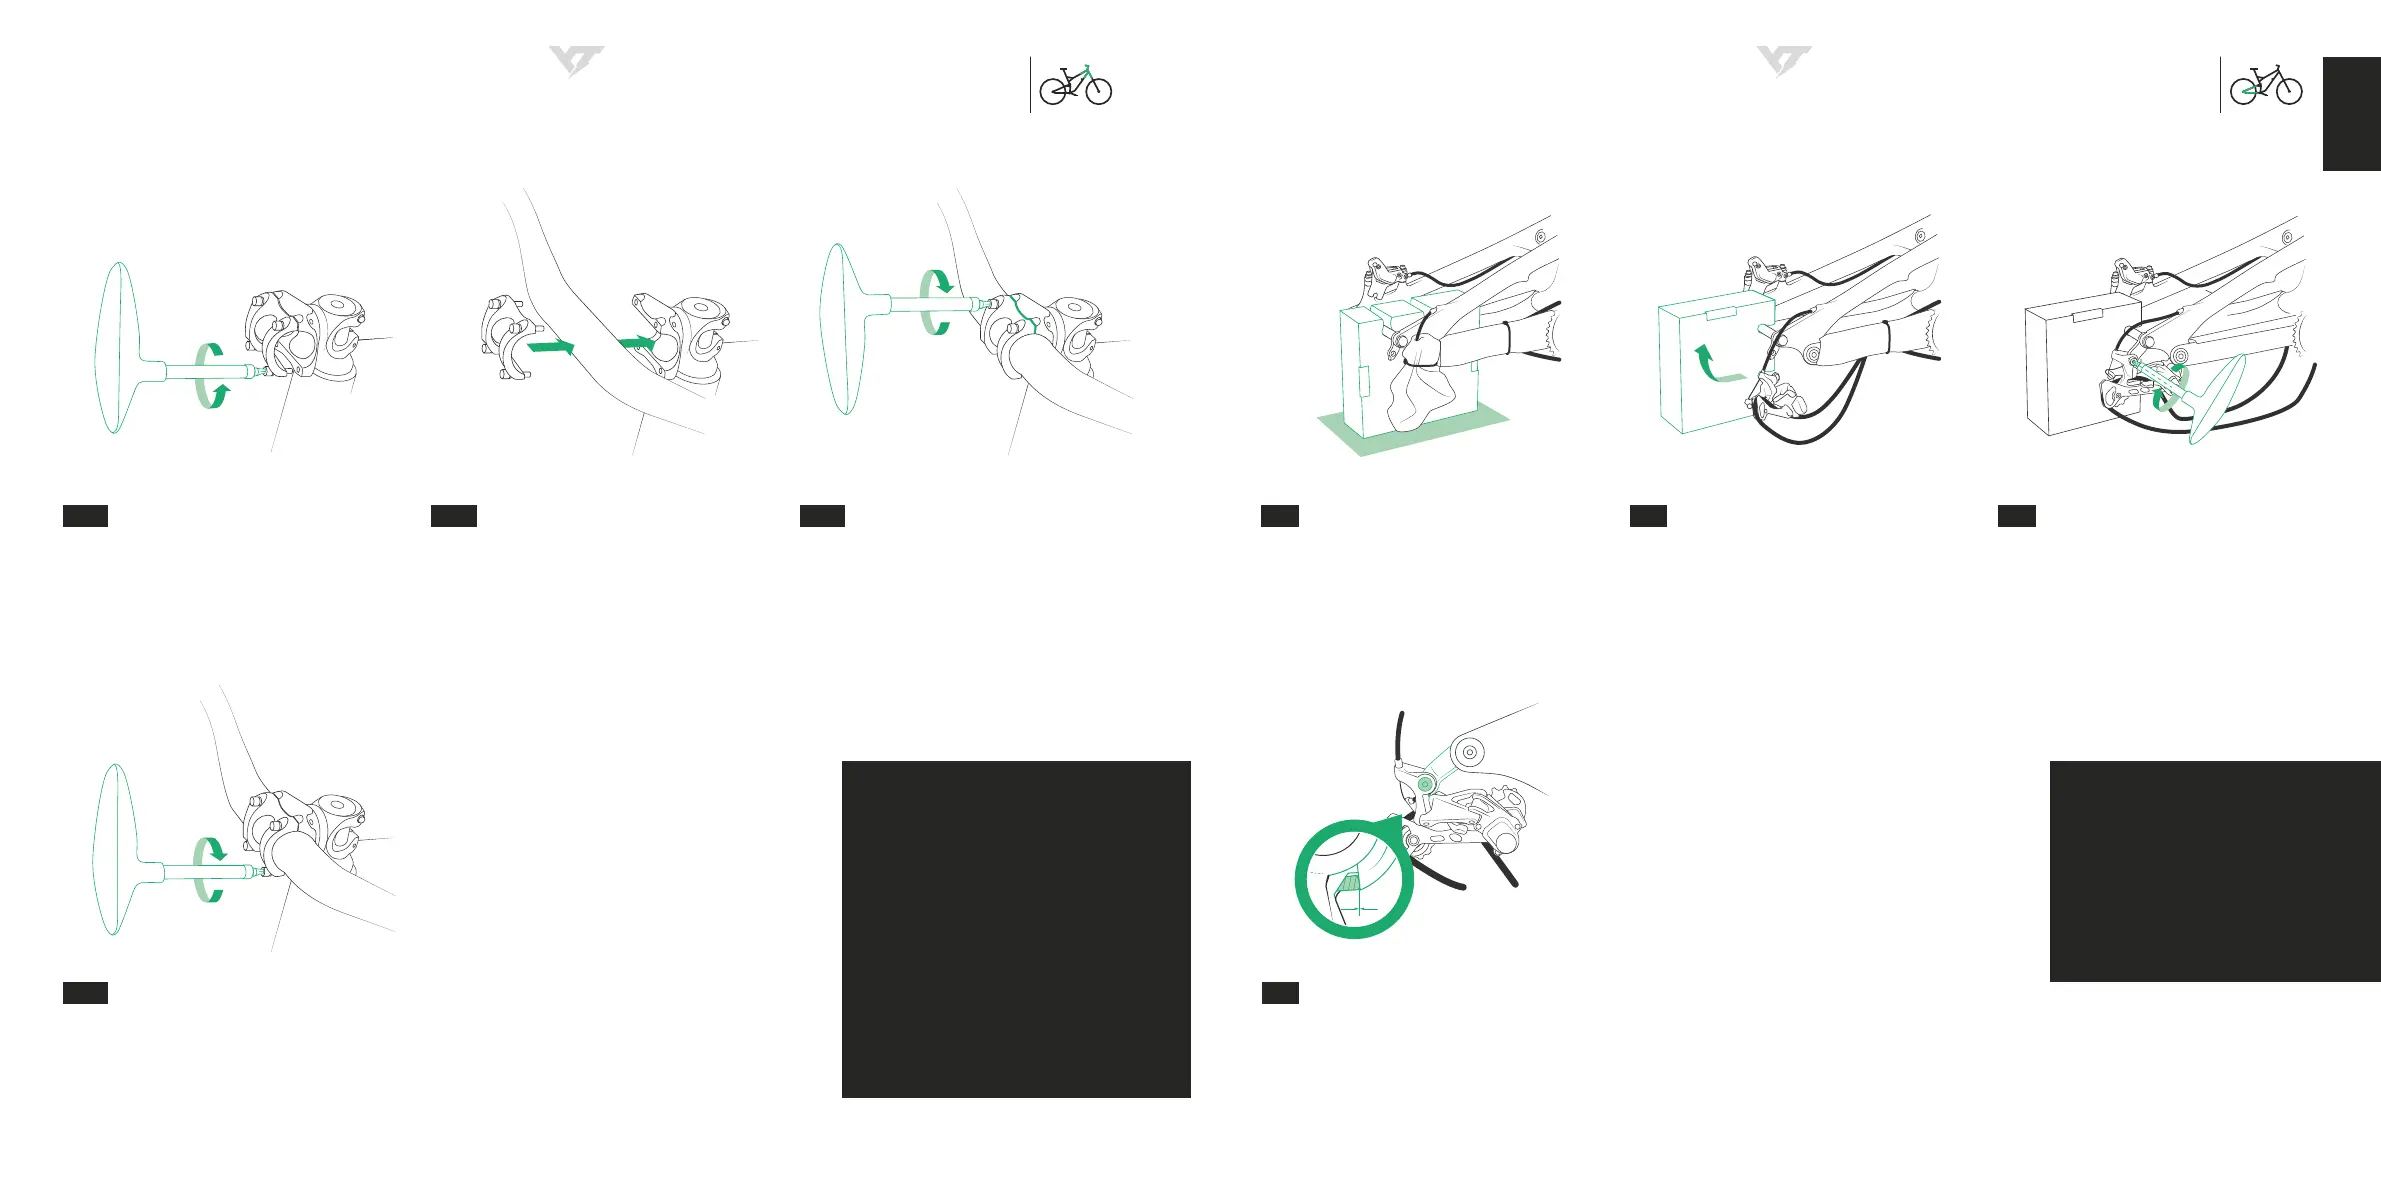
Make sure the bike is standing safely on the
rear axle stand.
Turn the rear axle stand on its side. Carefully
cut the cable tie using a wire cutter. Remove
the bubble wrap and the foam transport
protection from the chainstay.
Rear derailleur screw // 11 Nm
Screw the derailleur bolt in, but do not tighten
it yet in order to be able to align the derailleur
properly in the next step (5 mm Allen key).
Use a torque wrench to tighten the derailleur
bolt. Make sure that the derailleur tab sits
against the corresponding tab on the derail-
leur hanger. Hold the derailleur in place with
your second hand to avoid it rotating out of
position and leaving a gap between the tabs.
REAR DERAILLEUR ASSEMBLY
3.4
3.1 3.2 3.3
HANDLEBAR ASSEMBLY
Remove the handlebar clamp on the stem by
removing all screws (Allen key 4 mm ).
Install the handlebar. Mount the handlebar to
the stem (Allen wrench 4 mm).
Start with the uppermost bolts, torqueing
down the top part of the stem clamps ac-
cording to the manufacturer’s specications.
Take care not to leave a gap here (zero gap).
Only then should you secure the handlebar
with the lower bolts as well.
Make sure that the clamp gaps under the low-
er stem bolts are even, and that the handlebar
is correctly centered and aligned in the stem
– there are markings to assist you with this.
Torque all bolts precisely to the spec indicated
by the stem and/or handlebar manufacturer.
Please follow the
torque specifications of
the manufacturers:
RaceFace Turbine:
Steerer tube screws // 5 Nm
Handlebar clamp screws // 5 Nm
RaceFace Aeffect:
Steerer tube screws // 8 Nm
Handlebar clamp screws // 6 Nm
2.1.1 2.1.2 2.1.3
2.1.4
PRO RACE // PRO // COMP
RACEFACE NEXT/ TURBINE/AEFFECT
 Loading...