Page 7For technical questions, please call 1-888-866-5797.Item 58832
SAFETYOPERATIONMAINTENANCE SETUP
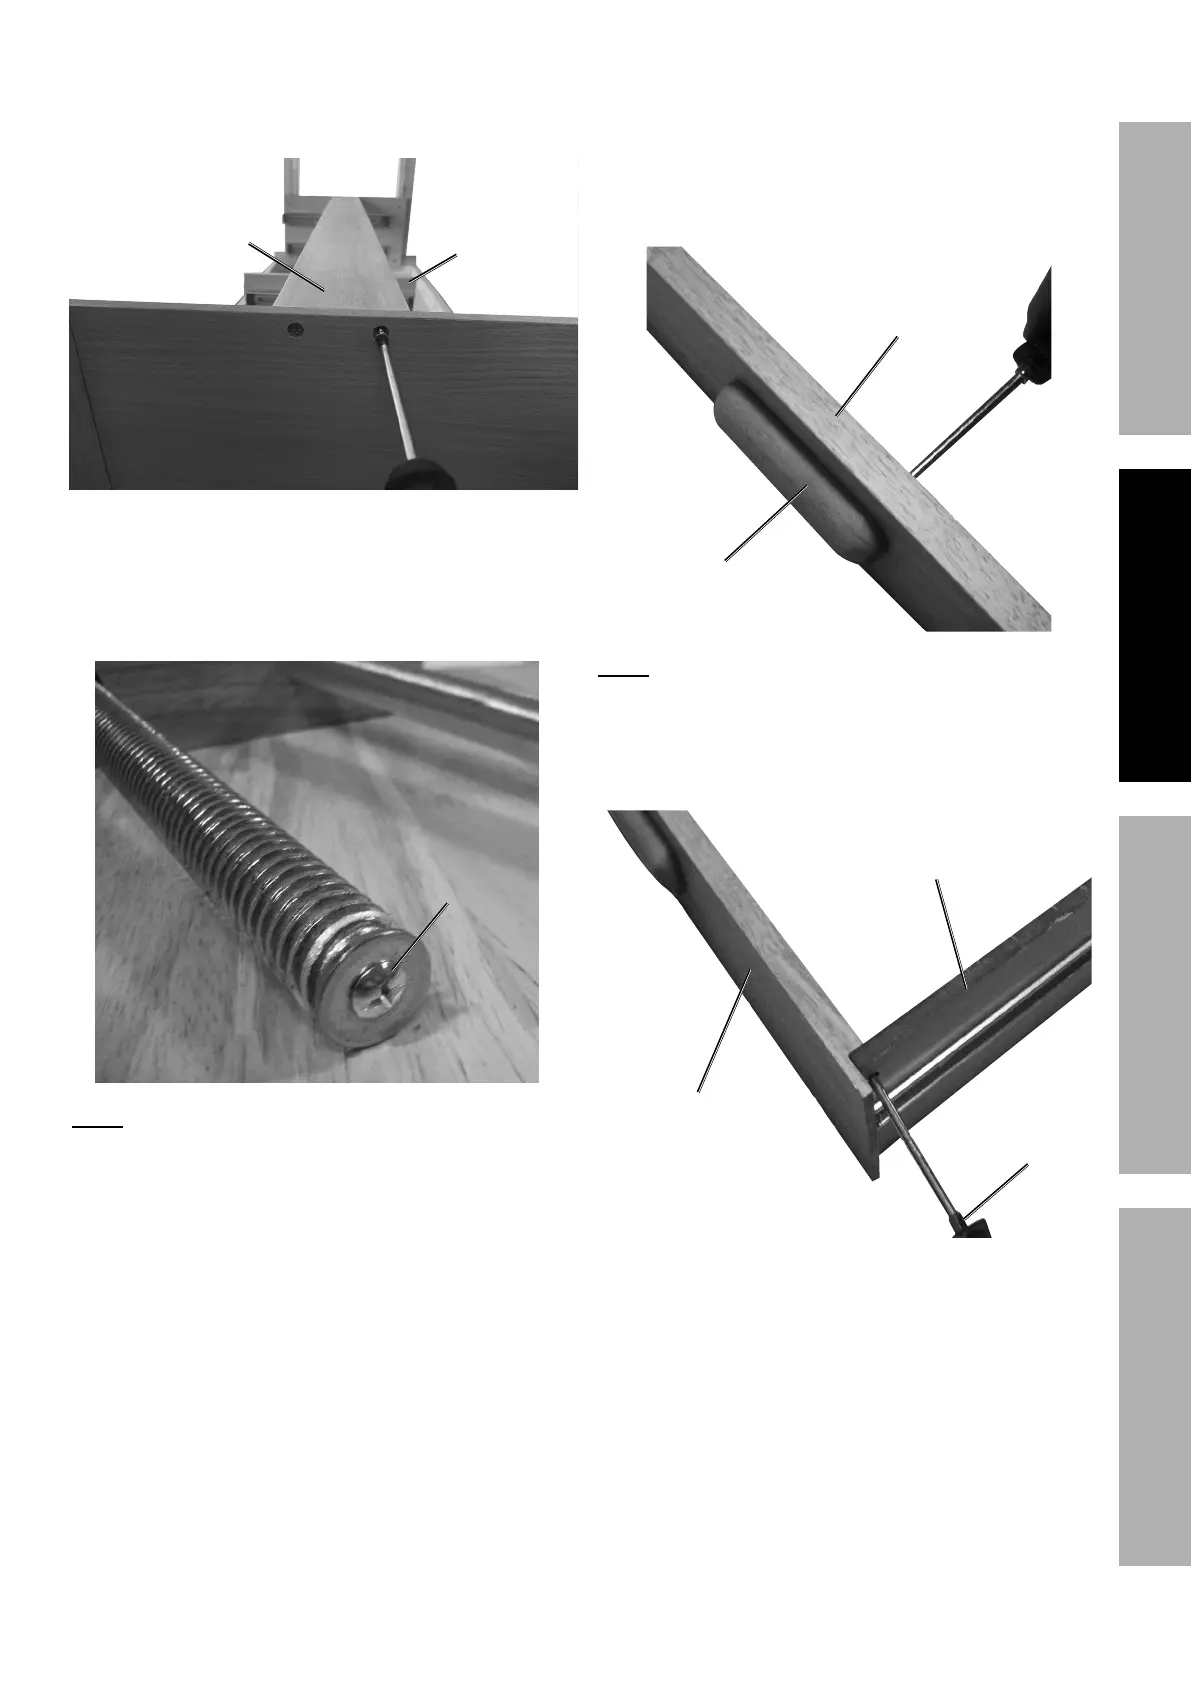
13. Attach the Middle Cross Brace (7) to
the Legs (1,3) above Sliding Partition
with 4 x 25 mm Wood Screws (22).
Middle Cross Middle Cross
Brace (7) Brace (7)
Leg Leg
(1,3)(1,3)
Sliding Sliding
Partition (8) Partition (8)
14. With assistance, set the assembled
frame right-side up where desired.
15. Remove the Vise Screw/Washer (21) from
the middle threaded rod of the Vise (4).
Vise (4)Vise (4)
Vise Vise
Screw/Washer Screw/Washer
(21) (21)
Note: Install Vise with slots facing up.
16. With the Vise Screw/Washer removed, slide the Vise
into the three holes on the side of the Workbench.
17. Use the Vise handle to thread in the Vise all the
way and re-install the Vise Screw/Washer. This will
keep the Vise locked in place on the side of the
Workbench.
18. Use the 4 x 30 mm Drawer Bolts (23) to fasten the
Drawer Handles (14) to the Drawer Front Panels (9).
Drawer Drawer
Handle (14) Handle (14)
Drawer Front Drawer Front
Panel (9) Panel (9)
Note: Each Drawer piece should have a sticker
designating what it is. Use the Parts List on page 10
as a reference. This will help insure correct assembly.
19. Fasten a Left Drawer Slot Panel (11) and a Right
Drawer Slot Panel (12) to a Drawer Front Panel (9).
Drawer Front Drawer Front
Panel (9) Panel (9)
Drawer Slot Drawer Slot
Panel (11,12) Panel (11,12)
ScrewdriverScrewdriver
 Loading...