EasyManua.ls Logo

YUNPAI GoChek - User Manual

YUNPAI GoChek
19 pages
Print Icon
To Next Page IconTo Next Page
Loading...
Document͹1010-LBL-00021
Revision͹V01
Issued͹2017/10/20
Address: No.9 Haishu Road,Yuhang District
Hangzhou, Zhejiang 311121 China
Phone: +86-571-88566372
Website: http://www.microtechmd.com
EC REP
Lotus Global Co., Ltd.
1 Four Seasons Terrace
West Drayton, Middlesex
London, UB7 9GG, United Kingdom
BLOOD GLUCOSE MONITORING SYSTEM
Instruction
Manual
Question and Answer IconNeed help?

Do you have a question about the YUNPAI GoChek and is the answer not in the manual?

Overview

This document describes the Yunpai GoChek blood glucose monitoring system, a device designed for professional use in medical institutions or for self-testing by diabetics to measure blood glucose levels. The system provides accurate results from fresh capillary or venous whole blood samples.

Function Description

The Yunpai GoChek blood glucose meter is an integral part of treating diabetes, helping users manage their condition and live a healthy and active life. It measures blood glucose concentration using test strips and displays the results in mmol/L or mg/dL. The device stores test results with date and time stamps, and can automatically shut down after 2 minutes of inactivity. It also features a meal marker function to mark results as before or after meals, and a test reminder alarm to help users regularly perform blood glucose tests. The system includes a lancing device for obtaining blood samples and control solutions for quality control checks.

Important Technical Specifications

  • Product Name: GoChek / GoChek Connect / GoChek Connect+
  • Size: 83.5 mm (L) × 54 mm (W) × 19 mm (Thickness)
  • Glucose Test Range: 1.1-33.3 mmol/L (20-600 mg/dL)
  • Results Display: Plasma equivalent
  • Minimum Sample Volume: 0.5µL
  • Test Time: 5 seconds
  • Battery: 1x CR 2032 3.0V coin cell battery
  • Battery Life: >1,000 readings (wireless functions disabled)
  • Glucose Concentration Units: mmol/L or mg/dL depending on the standard of your country
  • Memory Storage: 500 test results with date and time stamp
  • Auto Shutdown: Automatic shutdown after 2 minutes
  • Display Size: 40mm × 42mm
  • Weight: About 50 grams (including battery)
  • Operating Temperature: 5-45°C (41-113°F)
  • Operating Humidity: 20-90% (non-condensing)
  • Hematocrit Range: 20-70%

Note: Blood containing high levels of vitamin C or other reducing agents can lead to inaccurate test results. Triglycerides above 3,000 mg/dL and cholesterol above 500 mg/dL will lead to inaccurate test results.

Usage Features

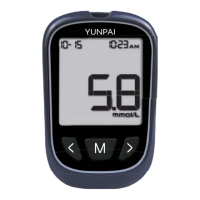
Display: The meter features a clear display showing the date, time, AM/PM, day average, pound sign (#), memory, control solution, code, hypo icon, blood glucose, and Bluetooth icon. It also indicates before/after meal icons, readings icon, low battery icon, mute, test reminder alarm, hyper icon, and test result display area.

Test Strips: The GoChek blood glucose test strips contain chemical reagents. After the test strip is placed into the test strip port and a blood sample is applied, the blood automatically wicks into the test window. A transient electrical current is generated, and this current is measured to determine the correct blood glucose level reading. Each test strip package is marked with a batch number (LOT), expiration date, and a control solution range.

Control Solution: The control solution is a glucose solution of known concentration that is used to confirm that your meter and test strips are working properly. It is important to run a quality control test regularly to make sure that you are getting accurate results. Control solution should be shaken before use. Do not let the control solution bottle touch the test strip.

Meter Setup:

  • Battery Installation: The meter uses a CR2032 3.0V coin cell battery. To install, turn the meter to the back side, press to open the battery door, insert the battery with the positive side (+) facing up, and replace the battery door.
  • System Settings: The meter allows setting the date, time, year, and 12/24 hour display mode. Press the "M" button to save settings.
  • Audio Settings: Users can turn the meter's sound on and off.
  • High and Low Blood Glucose Alarm Settings: The meter has High (Hyper) and Low (Hypo) blood sugar warning alerts. Users can set the maximum hypo value and minimum hyper value.
  • Meal Marker Settings: The meter has a meal marker function that allows users to mark test results as before or after a meal.
  • Test Reminder Alarm Settings: Users can set up to 10 different test reminder alarms to regularly perform blood glucose tests.

Quality Control Tests: Quality control testing is done to verify that the blood glucose meter and test strips are working correctly. It is recommended to perform a quality control test when:

  • You suspect that the meter or test strips are not working properly.
  • You suspect that your test results are inaccurate, or if they are inconsistent with what you feel.
  • You suspect the meter is damaged.

Testing Your Blood:

  • Meter Setup Before Use: Insert the code chip into the meter.
  • Blood Sampling:
    1. Fingertip Testing: Adjust the depth penetration to reduce discomfort. Remove the lancing device cap, insert the lancet into the lancing device, and twist off the safety cap. Pull back the cocking barrel until you hear a click. Hold the lancing device firmly against the side of the fingertip, press the release button, and then pull down the lancing device. Massage the blood slowly from the base of your finger to the tip to increase the sample size.
    2. Forearm or Palm Testing: Collecting blood samples from your palm or forearm may be less painful than your fingertips because there are less nerve endings. However, blood changes more rapidly from fingertips.
  • Testing Blood Glucose: Insert the test strip into the test strip port. The meter will turn on automatically. Apply blood to the sample area of the test strip. The meter will beep, telling you that enough blood has been applied. The display will count down 5 seconds during the measurement process. If the audio is on, the meter will end with a beep.

Understanding Test Results:

  • Suggested Test Times and Target Goals: The manual provides a table of suggested target ranges for blood glucose levels (empty stomach, 2 hours after a meal) and recommended test frequency.
  • "HI" and "LO" Messages: "HI" indicates a blood glucose concentration above 33.3 mmol/L (600 mg/dL). "LO" indicates a blood glucose concentration below 1.1 mmol/L (20 mg/dL).
  • "HYPO" and "HYPER" Messages: "HYPO" indicates a blood glucose level below the hypoglycemia limit. "HYPER" indicates a blood glucose level above the hyperglycemia limit.
  • Blood Ketone Test Reminder: If "KETONE?" is displayed, this indicates a blood ketone test is necessary because your blood glucose test results are higher than 16.7 mmol/L (300 mg/dL).

Maintenance Features

Cleaning: Under normal circumstances, no special cleaning is required. If cleaning is needed, wear gloves before applying a mild detergent and water with a soft damp cloth to carefully wipe away blood, dirt, or control solution inside of the meter. Store the meter in the carrying case after use. The lancing device can be cleaned with a soft damp cloth moistened with soap and hot water.

Storage:

  • Keep the test strip port clean.
  • Keep the meter dry. Do not allow liquids to enter the housings. Avoid extreme temperatures and humidity.
  • Do not leave the meter in your car.
  • Avoid dropping the meter.
  • Keep the meter and components away from children and pets.
  • Do not disassemble the meter. Disassembly will void the warranty.
  • Please follow the local regulations to dispose of the meter and battery properly.

Replacing the Battery: The meter uses 1 CR 2032 3.0V coin cell battery. When the meter displays the battery symbol, this indicates that the battery is low and you should replace the battery as soon as possible. To replace, make sure the meter is off, open the battery door on the back of the meter, remove the old battery, and replace with a new CR 2032 3.0V coin cell battery, making sure that the positive (+) side is facing up. Replace the battery door. After replacing the battery, you may need to re-enter some settings in the settings menu.

Troubleshooting: The manual provides a table of common error messages (E-1, E-2, E-3, E-4, E-5, E-6, HI, LO) with their causes and solutions.

Memory Data Transfer: GoChek meters are capable of transferring memory data to a personal computer. Please refer to the software instructions for correct usage and the proper equipment to connect to your computer. GoChek Connect and GoChek Connect+ meters can transmit data wirelessly to other devices such as mobile phones.

YUNPAI GoChek Specifications

General IconGeneral
BrandYUNPAI
ModelGoChek
CategoryBlood Glucose Meter
LanguageEnglish