Check for parts online at www.yutrax.com or call 800-345-6007 M-F 8-5 CST
Page 3
Owner's Manual
TX158 ATV Trailer
FIGURE 2
16
19
26
4
24
FIGURE 3
7
5
21
18
15
10
20
12
11
22
FIGURE 4
6
4
5
25
19
3. Attach the top of the two axle mounting plates (4) to the
trailer frame assembly with four M6x40mm bolts (26),
M6 steel washers (16) and M6 locknuts (19). Then, secure
the bottoms of the two axle mounting plates (4) using
four M6x50mm bolts (24), M6 steel washers (16) and M6
locknuts (19). SEE FIGURE 2
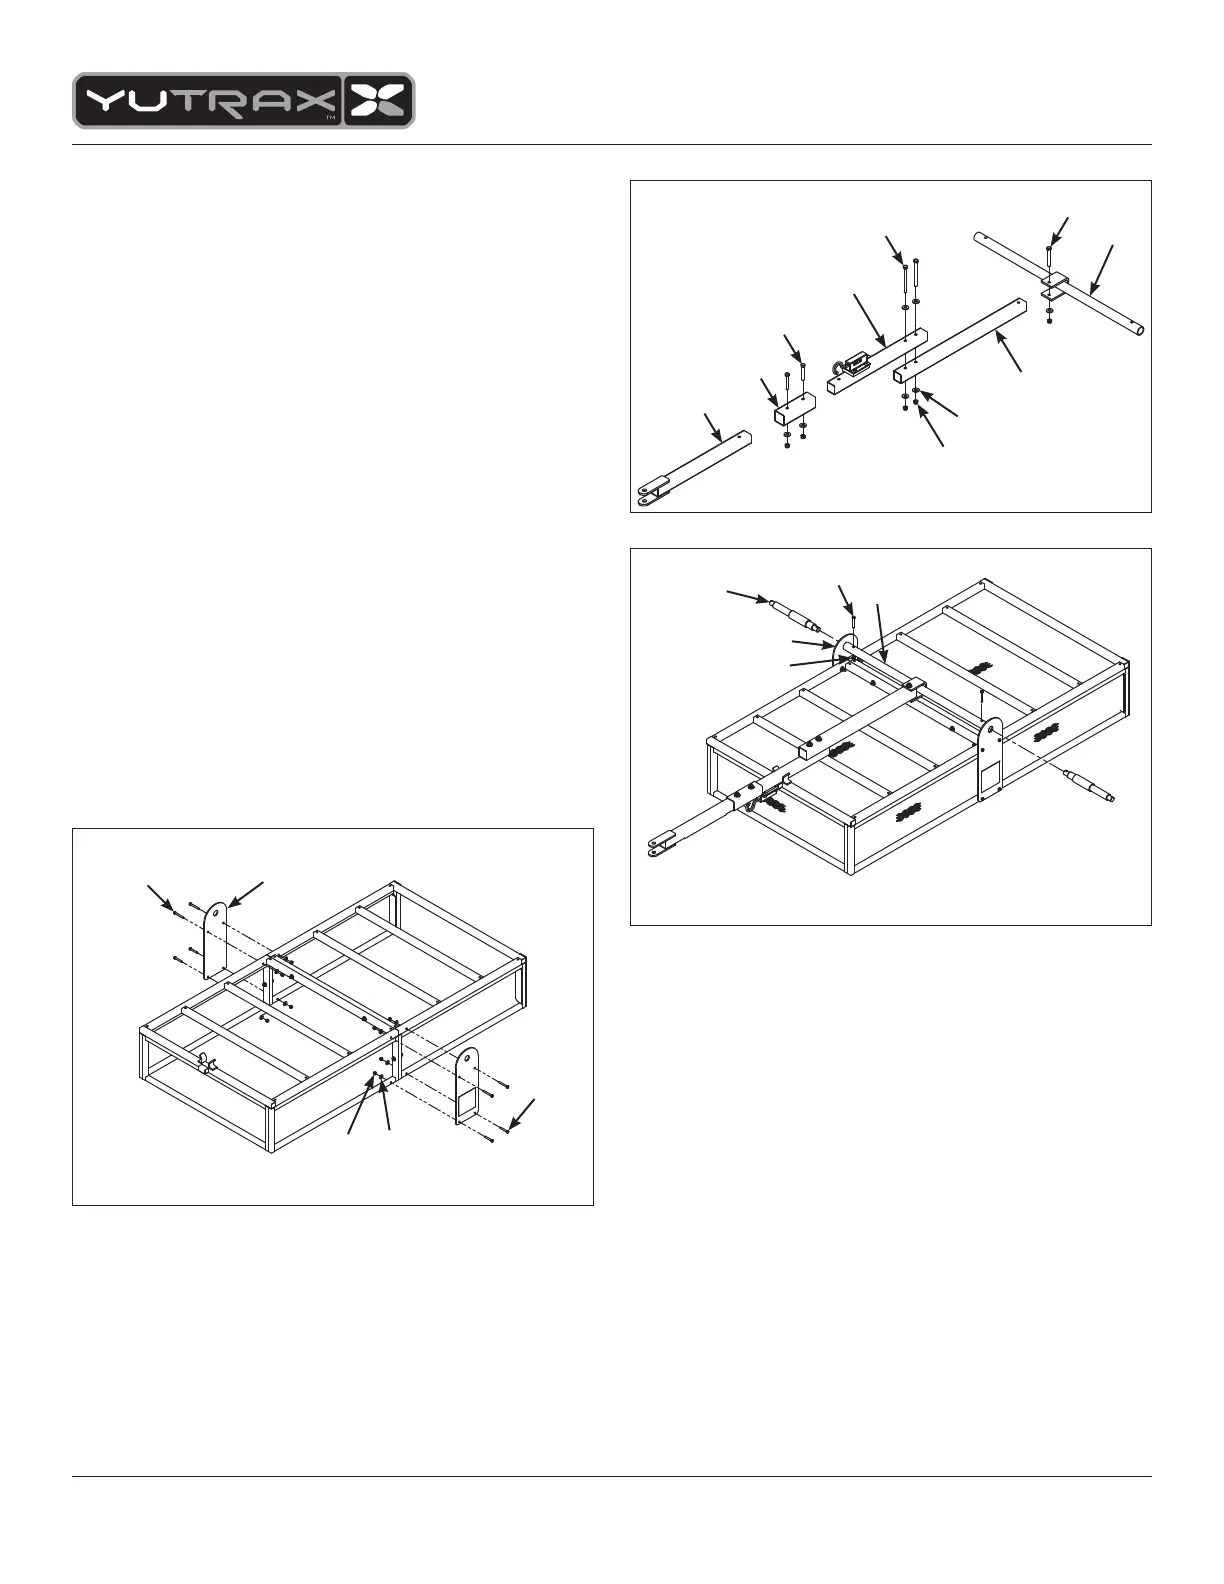
4. Insert rear tongue tube (7) into the "u-bracket" on the axle
tube (5) and secure with one M8x70mm bolt (21), M8 steel
washer (15) and M8 locknut (18). SEE FIGURE 3
5. Secure the latch tube assembly (10) to the top of the rear
tongue tube (7) with two M8x100mm bolts (20), M8 steel
washers (15) and M8 locknuts (18). SEE FIGURE 3
6. Insert the latch tube assembly (10) and the front tongue
tube (12) into the connector pocket (11) and secure with
two M8x60mm bolts (22), M8 steel washers (15) and M8
locknuts (18). SEE FIGURE 3
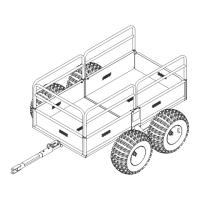
7. Attach the tongue assembly to the frame assembly by in-
serting the short end of the two axle spindles (6) through
the axle mounting plates (4) and threading into the axle
tube (5). Thread axle spindles until snug and then loosen
until holes in the axle tube and spindles are aligned.
Secure the two axle spindles to the axle tube using two
M6x45mm bolts (25) and M6 locknuts (19). SEE FIGURE 4