Do you have a question about the Yutrax TX158 and is the answer not in the manual?
Follow all assembly, inspection, maintenance, and use instructions to prevent serious injury or death.
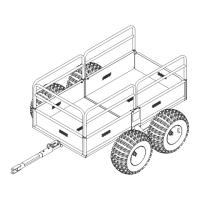
Guidance on initial assembly steps, including finger-tightening and orienting parts upside down for ease.
Connect front and rear trailer frame sides using M6x50mm bolts, M6 washers, and M6 locknuts.
Attach the bottom of the front and rear trailer frames using M6x65mm bolts, M6 washers, and M6 locknuts.
Secure axle mounting plates to the trailer frame using M6 bolts, washers, and locknuts at top and bottom.
Insert and secure the rear tongue tube into the axle tube's u-bracket with an M8 bolt, washer, and locknut.
Attach the latch tube assembly to the top of the rear tongue tube using M8 bolts, washers, and locknuts.
Insert front tongue tube and latch tube assembly into the connector pocket and secure with M8 bolts, washers, and locknuts.
Attach tongue assembly by threading axle spindles through axle mounting plates into the axle tube, aligning holes.
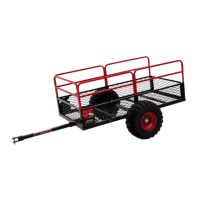
Mount wheels onto axle spindles, securing with castle nuts and washers, ensuring free movement.
Insert cotter pins through axle spindles and castle nuts, bending prongs to prevent loosening.
Tighten all nut and bolt assemblies securely, avoiding over-tightening or crushing tubing.
Grease wheel bearings thoroughly and check levels frequently to prevent seizing and wear.
Slide tailgate and containment racks into their respective frame channels and tubes.
Ensure secure attachment, proper tire pressure, and regular inspection for damage or loose hardware.
Avoid excessive speed, overloading, unsafe terrain, impaired operation, and carrying passengers.
| Brand | Yutrax |
|---|---|
| Model | TX158 |
| Category | Utility Vehicle |
| Language | English |