Do you have a question about the Zanussi ZOB442X and is the answer not in the manual?
This document is a user manual for a Zanussi ZOB442X oven, providing comprehensive instructions for its installation, safe use, maintenance, and energy efficiency.
The manual emphasizes safety throughout, starting with general safety guidelines for installation and use. It warns against incorrect installation or usage, which can lead to injuries or damage. Instructions must be kept in a safe and accessible location for future reference.
Children and Vulnerable People Safety: The appliance can be used by children aged 8 and above, as well as persons with reduced physical, sensory, or mental capabilities, or lack of experience and knowledge, provided they receive supervision and instruction on safe use and understand the associated hazards. Children under 8 and those with very extensive disabilities must be continuously supervised. Children should not play with the appliance, and all packaging should be kept away from them and disposed of appropriately. The manual warns that accessible parts become hot during use, and children and pets should be kept away during operation and cooling. If a child safety device is present, it should be activated. Cleaning and user maintenance should not be performed by children without supervision.
General Safety: Only qualified personnel should install the appliance and replace the cable. The appliance and its accessible parts become hot during use, so care must be taken to avoid touching heating elements. Oven gloves should always be used when handling accessories or ovenware. Before maintenance, the appliance must be disconnected from the power supply. The appliance must be switched off before replacing the lamp to avoid electric shock. The oven should not be used before it is installed in the built-in structure. Steam cleaners, harsh abrasive cleaners, or sharp metal scrapers should not be used to clean the glass door, as these can scratch the surface and lead to shattering. If the mains power supply cable is damaged, it must be replaced by the manufacturer, an Authorized Service Centre, or similarly qualified persons to avoid electrical hazards. To remove shelf supports, pull the front and then the rear end away from the side walls; installation is the reverse sequence.
The installation section provides detailed instructions and diagrams for building the oven into a cabinet. It includes minimum height, width, and depth requirements for the cabinet, as well as dimensions for the appliance itself.
Electrical Connection: The manual stresses the risk of fire and electric shock. All electrical connections must be made by a qualified electrician, and the appliance must be earthed. Users must ensure that the parameters on the rating plate are compatible with the mains power supply. A correctly installed shockproof socket should always be used, and multi-plug adapters or extension cables are prohibited. Care must be taken not to damage the mains plug or cable. If the mains cable needs replacement, an Authorized Service Centre must perform this. Mains cables should not touch the appliance door or the niche below the appliance, especially when the oven is hot. Shock protection for live and insulated parts must be secured to prevent removal without tools. The mains plug should only be connected at the end of installation, ensuring accessibility. If the mains socket is loose, the plug should not be connected. The appliance should always be disconnected by pulling the mains plug, not the cable. Only correct isolation devices (line protecting cut-outs, fuses, earth leakage trips, and contactors) should be used. The electrical installation must include an isolation device that can disconnect the appliance from the mains at all poles, with a minimum contact opening width of 3 mm. The appliance is supplied with a main cable.
General Use Warnings: The manual warns of injury, burns, electric shock, or explosion risks. The appliance is for household use only, and its specifications should not be altered. Ventilation openings must not be blocked, and the appliance should not be left unattended during operation. Caution is advised when opening the door during operation due to hot air release. The appliance should not be operated with wet hands or when in contact with water. Pressure should not be applied to the open door, and it should not be used as a work or storage surface. The door should be opened carefully, as ingredients with alcohol can create a flammable mixture of alcohol and air. Sparks or open flames should not come into contact with the appliance when the door is open.
Damage to the Appliance: Flammable products or items wet with flammable products should not be placed in, near, or on the appliance. To prevent damage or discoloration to the enamel, ovenware or other objects should not be placed directly on the bottom of the oven, nor should aluminum foil. Water should not be poured directly into the hot appliance. Moist dishes and food should not be left in the appliance after cooking. Care must be taken when removing or installing accessories. Discoloration of enamel or stainless steel does not affect performance. A deep pan should be used for moist cakes, as fruit juices can cause permanent stains. The appliance is for cooking purposes only and should not be used for other purposes, such as room heating. The oven door should always be closed during cooking. If the appliance is installed behind a furniture panel, the panel must never be closed when the appliance is operating, as heat and moisture can build up and cause damage. The furniture panel should not be closed until the appliance has cooled completely.
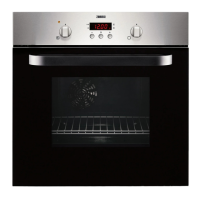
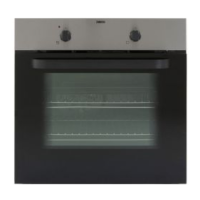
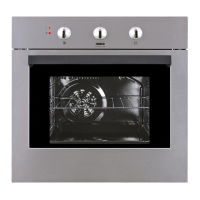
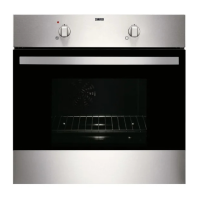
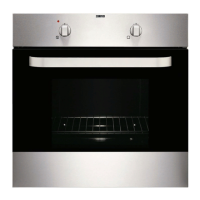
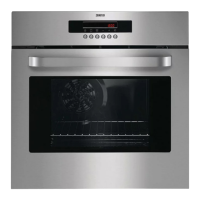
The oven features a control panel with a power lamp/symbol, a knob for heating functions, a display, a control knob for temperature, and a temperature indicator/symbol. Internal components include air vents for the cooling fan, heating elements, a lamp, a fan, removable shelf supports, and multiple shelf positions.
Accessories: The oven comes with a wire shelf for cookware, cake tins, and roasts, and a baking tray for cakes and biscuits.
Control Panel: The knobs are retractable; pressing them makes them pop out for use. Sensor fields/buttons are used to set the time and clock functions. The display shows clock functions and a timer.
Before initial use, the oven may emit an odor and smoke during preheating, so the room should be ventilated.
Steps for First Use:
Setting Heating Functions:
Oven Functions:
Setting Time of Day: The clock symbol flashes when the oven is first connected, after a power cut, or if the timer is not set. Use the plus and minus buttons to set the time. The display will show the time after approximately 5 seconds.
Changing Time of Day: Press the clock symbol repeatedly until it flashes. Use the plus and minus buttons to set the new time. The display will show the new time after approximately 5 seconds.
Duration: This function sets how long the oven will operate.
Minute Minder: This function sets a countdown and does not affect oven operation. It can be set at any time, even when the oven is off.
Canceling Clock Functions: Press the clock symbol repeatedly until the clock function symbol flashes. Press and hold the minus button; the clock function will turn off after a few seconds.
Inserting Accessories: A small indentation at the top of accessories increases safety and acts as an anti-tip device. The high rim around the shelf prevents cookware from slipping.
Cooling Fan: The cooling fan turns on automatically during oven operation to keep surfaces cool. It may continue to operate after the oven is turned off until the oven cools down.
Safety Thermostat: In case of incorrect operation or defective components causing overheating, the oven's safety thermostat will interrupt the power supply. The oven will automatically turn on again once the temperature drops.
Cooking Recommendations: The oven has four shelf positions, counted from the bottom. Cooking times and results may vary from previous ovens. Users are encouraged to monitor performance initially to find optimal settings for their cookware, recipes, and quantities.
Baking Cakes: The oven door should not be opened before 3/4 of the set cooking time has elapsed. If using two baking trays simultaneously, an empty level should be kept between them.
Cooking Meat and Fish: Meat should be left for approximately 15 minutes before carving to prevent juices from seeping out. To prevent excessive smoke during roasting, water can be added to the deep pan and refilled as it dries.
Cooking Times: Cooking times depend on food type, consistency, and volume. Initial monitoring helps determine the best settings.
General Cleaning Warnings: The appliance must be deactivated and disconnected from the mains before maintenance. The appliance must be cold before cleaning to avoid the risk of glass panels breaking. Damaged door glass panels must be replaced immediately by an Authorized Service Centre. Caution is advised when removing the door, as it is heavy. The appliance should be cleaned regularly with a moist soft cloth and neutral detergents to prevent surface material deterioration. Abrasive products, abrasive cleaning pads, solvents, or metal objects should not be used. If using an oven spray, follow the safety instructions on its packaging.
Notes on Cleaning:
Removing Shelf Supports:
Removing and Installing the Door: The oven door has two glass panels that can be removed for cleaning. The entire "Removing and installing door" instruction should be read before removing the glass panels.
Replacing the Lamp: Warning: Risk of electric shock. The lamp can be hot.
What to Do If... For issues not listed, contact an Authorized Service Centre.
Service Data: If a solution cannot be found, contact a dealer or Authorized Service Centre. Necessary service data is on the rating plate, located on the front frame of the oven cavity. The rating plate should not be removed.
Energy Saving: The oven has features to help save energy during everyday cooking.
Residual Heat: For cooking durations longer than 30 minutes, reduce the oven temperature to a minimum 3-10 minutes before the end of cooking. Residual heat will continue to cook the food. Use residual heat to warm other dishes.
Keep Food Warm: Choose the lowest possible temperature setting to use residual heat and keep a meal warm.
Moist Fan Baking: This function is specifically designed to save energy during cooking.
| Type | Built-in |
|---|---|
| Energy Efficiency Class | A |
| Number of Functions | 8 |
| Oven Type | Electric |
| Oven size | Medium |
| Number of ovens | 1 |
| Oven power | 2500 W |
| Colour | Stainless Steel |
| Cleaning System | Catalytic |
| Door | Double Glazed |
| Control Type | Rotary |