This document is a user manual for a Zanussi oven, specifically models ZOHNX3K1, ZOHNX3W1, and ZOHNX3X1. It provides comprehensive instructions for installation, safe use, operation, maintenance, and troubleshooting.
Function Description
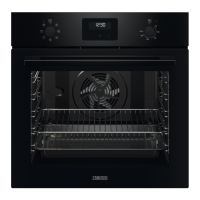
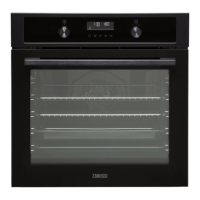
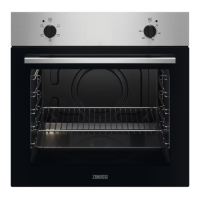
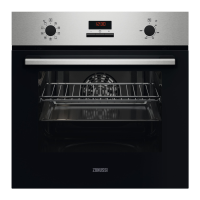
The Zanussi oven is designed for household cooking purposes, offering various heating functions to prepare a wide range of dishes. It features a control panel with knobs for selecting heating functions and temperature, a display, and indicator lights. The oven includes a cooling system that operates during and after use to keep external surfaces cool.
Heating Functions:
- Off position: Turns the oven off.
- Light: Turns on the oven lamp.
- True Fan Cooking: Ideal for baking on up to three shelf positions simultaneously and for drying food.
- Moist Fan Baking: An energy-saving function for cooking, where the cavity temperature may differ from the set temperature and heating power is reduced. This function is designed to comply with energy efficiency and ecodesign requirements.
- Defrost: Used to defrost food such as vegetables and fruit. The defrosting time depends on the amount and size of the frozen food.
- Grill: Suitable for grilling thin pieces of food and toasting bread.
- Fast Grilling: For grilling large quantities of thin food pieces and toasting bread.
- Turbo Grilling: Recommended for roasting large meat joints or poultry with bones on one shelf position, as well as for making gratins and browning dishes.
Clock Functions:
The oven also incorporates several clock functions:
- Time of Day: To set, change, or check the current time.
- Duration: To set how long the oven will operate for a specific cooking task.
- Minute Minder: A countdown timer that does not affect the oven's operation and can be set at any time, even when the oven is off.
Usage Features
The oven is designed for ease of use with a straightforward control panel and clear display.
Before First Use:
- Users are instructed to set the clock.
- The oven and its accessories must be cleaned before first use. This involves removing all accessories and shelf supports, cleaning them and the oven cavity with a soft cloth, warm water, and a mild detergent.
- The oven should be preheated empty at maximum temperature for 1 hour using the Moist Fan Baking function, and then for 15 minutes using the Grill function, to burn off any manufacturing residues and odors.
Daily Use:
- To start cooking, users select a heating function using the corresponding knob, then set the desired temperature with the temperature control knob.
- When cooking is complete, both knobs should be turned to the off position.
Accessories:
The oven comes with several accessories to enhance cooking versatility:
- Wire shelf: Used for cookware, cake tins, and roasts. It has a small indentation at the top and a high rim to prevent items from slipping.
- Grill- / Roasting pan: For baking, roasting, or collecting fat.
- Trivet: Used exclusively with the grill- / roasting pan for roasting and grilling.
Instructions are provided for inserting accessories correctly:
- Wire shelf: Push between the guide bars of the shelf support with feet pointing down.
- Deep pan: Push between the guide bars of the shelf support.
- Wire shelf, Deep pan: Push the deep pan between the guide bars of the shelf support and the wire shelf on the guide bars above.
- Trivet and Grill- / Roasting pan: The trivet is placed into the deep pan, and the deep pan is then placed on the recommended shelf position. For roasting larger pieces of meat or poultry, the wire shelf supports should point up. For grilling and toasting thin pieces of food, the supports should point down.
Cooking Recommendations:
- The oven has five shelf positions, counted from the bottom.
- Cooking times vary based on food type, consistency, and volume. Users are advised to monitor performance initially to find optimal settings.
- When baking cakes, the oven door should not be opened before 3/4 of the set cooking time has elapsed.
- For very fatty foods, a deep pan should be used to prevent permanent stains.
- Adding water to the deep pan during roasting can prevent excessive smoke.
- Always cook with the oven door closed.
- If the oven is installed behind a furniture panel, ensure the panel is never closed during operation to prevent heat and moisture buildup.
Energy Saving:
The manual highlights features to save energy:
- Keeping the oven door closed during operation and ensuring the door gasket is clean and properly fixed.
- Using metal cookware.
- Avoiding preheating the oven when possible.
- Minimizing breaks between baking multiple dishes.
- Using fan-assisted cooking functions.
- Utilizing residual heat by turning off the oven 3-10 minutes before the end of cooking, especially for durations longer than 30 minutes.
- Keeping food warm using the lowest possible temperature setting.
- The Moist Fan Baking function is specifically designed for energy-efficient cooking.
Maintenance Features
Regular maintenance is crucial for the appliance's longevity and performance.
General Safety for Maintenance:
- Always disconnect the appliance from the power supply before any maintenance.
- If the mains power supply cable is damaged, it must be replaced by a qualified person.
- Ensure the appliance is switched off before replacing the lamp to avoid electric shock.
- Accessible parts become hot during use, so care must be taken.
Cleaning:
- General Cleaning: The front of the oven should be cleaned with a soft cloth, warm water, and a mild detergent. The door gasket should also be checked and cleaned.
- Metal Surfaces: Use a cleaning solution for metal surfaces.
- Stains: Mild detergent can be used for stains.
- Cavity Cleaning: The oven cavity should be cleaned after each use to prevent fat accumulation, which can cause fire.
- Condensation: To reduce condensation, the oven can be run for 10 minutes before cooking. Food should not be stored in the oven for more than 20 minutes. The cavity should be dried with a soft cloth after each use.
- Accessories: All accessories should be cleaned and dried after each use. They can be cleaned with a soft cloth, warm water, and a mild detergent but should not be cleaned in a dishwasher. Abrasive cleaners or sharp-edged objects should not be used on non-stick accessories.
- Steam Cleaners: Do not use a steam cleaner.
- Abrasive Cleaners: Avoid harsh abrasive cleaners or sharp metal scrapers on the glass door to prevent scratching and shattering.
Removing and Installing Shelf Supports:
- Turn off the oven and wait until it is cold.
- Pull the front of the shelf support away from the side wall, then pull the rear end away and remove.
- Install in the opposite sequence.
Removing and Installing the Door:
The oven door has two glass panels that can be removed for cleaning.
- Open the door fully and hold both hinges.
- Lift and turn the levers fully on both hinges.
- Close the door halfway to the first opening position, then lift and pull it forward to remove it from its seat.
- Place the door on a soft cloth on a stable surface.
- Hold the door trim (B) on the top edge at both sides and push inwards to release the clip seal.
- Pull the door trim to the front to remove it.
- Hold the door glass panel by its top edge and carefully pull it out, ensuring it slides completely out of the supports.
- Clean the glass panels with water and soap, then dry them carefully. Do not clean them in a dishwasher.
- After cleaning, install the glass panel and the oven door, ensuring the screen-printing zone faces the inner side of the door and the door trim clicks correctly.
Replacing the Lamp:
- Turn off the oven and wait until it is cold.
- Disconnect the oven from the mains.
- Place a cloth on the bottom of the cavity.
- Turn the glass cover to remove it, clean it, and replace the lamp with a suitable 300 °C heat-resistant lamp.
- Install the glass cover.
- Always hold the halogen lamp with a cloth to prevent grease residue from burning on it.
Troubleshooting:
The manual provides a basic troubleshooting guide for common issues like the oven not heating up (check if the fuse is blown) or the lamp not working (check if the lamp is burnt out). For other issues, users are advised to contact an Authorised Service Centre.