Do you have a question about the Zanussi ZU63 TR and is the answer not in the manual?
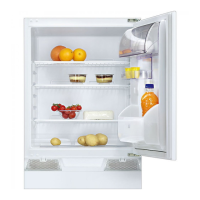
This document provides instructions for the use and care of Zanussi refrigerators, specifically models Z1163 TR, ZR 54/3, Z1165 TR, and ZR 56/L. It is crucial to retain this instruction book for future reference, especially if the appliance is sold, transferred, or if you move house and leave the appliance behind, to ensure the new owner is aware of its functioning and relevant warnings.
These Zanussi refrigerators are designed for the storage of edible foodstuffs. They are intended for operation by adults, and children should not be allowed to tamper with controls or play with the product. The appliances operate on a 220/240 V, 50 Hz supply, and it's essential to ensure the electricity supply voltage is within the range specified on the nameplate inside the cabinet. For safety, the appliance must be earthed. If the fitted plug is unsuitable for your socket outlet, it must be cut off and an appropriate 13 Amp BS 1362 plug, with ASTA approved fuses, should be fitted. The cut-off plug should be disposed of to prevent electric shock hazards.
The refrigerators include a temperature regulation system. To start the appliance, the plug is inserted into the wall socket, and the thermostat knob, located on the upper right side of the inner liner, is turned clockwise beyond the "stop" position. Temperature adjustment is achieved by turning the thermostat knob to the desired setting, with a medium setting generally being the most suitable. The optimal setting depends on the internal temperature, which is influenced by ambient temperature, door opening frequency, food quantity, and appliance location. Turning the knob clockwise to higher numbers results in a lower temperature, while turning it anticlockwise leads to a less cold temperature.
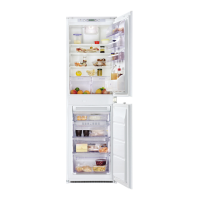
Models ZR 54/3 and Z1163TR feature a storage compartment marked with a 3-star symbol (***), indicating suitability for long-term storage of frozen foods (e.g., 3 months) due to a low temperature of -18 °C. It's important not to exceed the storage limits specified on frozen food packets.
For models incorporating a drinks dispenser, a container for cooling drinks is located on the inner door or on the ceiling of the fridge compartment. This container can be easily removed for filling. To dispense a drink, press a glass upwards against the tap arms; the tap will turn itself off when the glass is removed.
Defrosting in the refrigerator compartment is automatic, occurring each time the motor compressor stops. The defrost water drains into a trough and evaporates from a special container at the back of the appliance. However, the 3-star storage compartment in models Z1163TR - ZR 54/3 will progressively accumulate frost.
Before initial use, all securing tapes should be removed. The interior of the appliance should be washed with lukewarm water and a small amount of bicarbonate of soda (one teaspoonful per quart of water), then thoroughly dried. Soap or detergent should be avoided as their smell might linger.
For optimal performance, warm food or evaporating liquids should not be stored in the refrigerator. Food, especially strong-flavored items, should be covered or wrapped. Shelves should not be covered with protective materials like paper, cardboard, or plastic, as this can obstruct air circulation.
Specific food storage recommendations include:
Do not place carbonated or fizzy drinks in the 3-star compartment, as this can create pressure and potentially cause the container to explode, damaging the appliance. Water ices consumed immediately after removal from the freezer can cause low-temperature skin burns. In case of a power failure, avoid opening the freezer door. If the freezer is fully loaded and the power cut is short, frozen food should remain unaffected, though a temperature increase may shorten its storage life. For longer power cuts, it's advisable to consume the food quickly.
The appliance should be left for 2 hours after installation before being turned on to allow the refrigerant to settle.
Before any maintenance, the appliance must be unplugged from the wall socket for safety.
The interior should be cleaned periodically with lukewarm water and bicarbonate of soda. The cabinet exterior can be cleaned with a Silicon wax spray. The condenser and motor compressor should be cleaned with a brush or a vacuum cleaner.
The drain hole for defrost water needs regular cleaning to ensure it is not obstructed, allowing water to flow freely.
For models with a 3-star compartment, frost should be removed with the provided plastic scraper when its thickness exceeds 1/4". It's not necessary to switch off the power or remove foodstuffs during this operation. However, if the ice becomes very thick, a complete defrosting is required. This is best done when the appliance is empty. To perform a complete defrost:
For models with a drinks chiller, the container can be cleaned by rinsing it several times with hot water after allowing the water to cool inside. Adding a spoonful of baking soda to the rinsing water can aid thorough cleaning. Turning the dispenser tap on and off multiple times helps dissolve sugar deposits from soft drinks or sweet wines. After cleaning, empty the container and rinse with clean water.
During periods when the appliance is not in use, the following precautions should be taken:
If service is required, contact your local Zanussi Service Agent. Before calling for service, perform these simple checks:
For models with an interior light, if the light does not come on when the door is opened, check that the bulb is correctly screwed in. If it still doesn't light up, replace the bulb. The factory-assembled lamp is rated 10 W; replace it with a lamp of the same rating if necessary.
The appliance door can be reversed. Before starting, unplug the mains plug from the wall socket. The steps involve removing the bottom hinge, door, unscrewing and refitting the pin from the top hinge to the opposite side, unscrewing and refitting part 7 to the opposite side, refitting the door and bottom hinge, and removing and refitting handle 4 to the opposite side.
For models with a moulded plastic worktop (Fig. 3), the worktop alignment can be changed by removing two screws (A) securing plate (1) at the rear, shifting it to the desired position, and refitting the screws.
For models with a laminated plastic worktop (Fig. 4), alignment involves removing two screws (A), removing wall spacer (9), sliding out panel (1), removing screws fixing frame (8) to the cabinet, selecting a new position, refitting the frame and screws, refitting panel (1) and wall spacer (9), and refitting the two fixing screws (A).
The storage compartment door (Fig. 5) can also be reversed. This involves using a screwdriver to slide out peg (1), removing the door, removing and refitting closing catch (3) to the opposite side, taking off pin (2) and placing it in the new seat on the opposite side, and then refitting the compartment door by fitting the top peg into the new seat and securing the bottom with peg (1).
These warnings are provided in the interest of safety. Read them carefully before installing or using the appliance.
| Door Hinge | Right |
|---|---|
| Noise Level | 39 dB |
| Number of Shelves | 3 |
| Number of Door Bins | 3 |
| Width | 60 cm |
| Climate Class | SN, N, ST |
| Defrost System | Manual |