EasyManua.ls Logo

Zaor ET114E-N User Manual

Zaor ET114E-N
3 pages
To Next Page IconTo Next Page
Page #1 background imageLoading...
Page #1 background image
A
x8
C
5x5
x4
B
1
2
3
C
A
5
4x4
C
2.5x2.5
D
2
3
2
1
3
4
5
6
7
9
8
10
1
C
A
x12
C
x1
E
x1
B
x4
D
x15
F
x4
x1
G
M6
5x5
2.5x2.5
M8
ST4.2
M4
4x4
5x5
4
11
1 2 3
4 5 6
7 8 9
2
1
1
1
2
1 2
1 1
10
4
11
1
12
1
13
1
14
1
14
13
2
C
4
B
3
2
1
2
D
ET114E-N
70KG
25mm/s
100-240V
710mm
1210mm
1000-1600mm
0~40°C
2
500-800mm
10%(Pause 18 minutes for each continuous
2-minute operation)
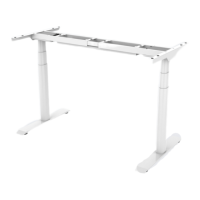
Left Column Right ColumnPedestal
Transmission rod Supporting plateSupporting beam
Bae
Power cableAdapter
Adaptor holder HandsetCable tie
Control BoxSwitch cord
Assemble (1)&(2)(3) together, use the 5x5 allen key (C) to tighten
the screws(A).
Install Supporting beam(4)
Stretch
Loose
Unscrew the screws on supporting beam(4) with
the 4x4 allen key (C), then stretch it (4).
Install supporting beam(4) on the columns(2)(3),
tighten the screw (B) with the 5x5 allen key (C).
Do not rotate the angle exceed one
third of the circle.
Connect transmission rod (5) with columns (2)(3), and
use the 2.5x2.5 allen key(D) to tighten it.
12

Questions and Answers:

Zaor ET114E-N Specifications

General IconGeneral
BrandZaor
ModelET114E-N
CategoryIndoor Furnishing
LanguageEnglish

Summary

Technical Data

Accessory List

Installation Instruction

STEP1 Install Pedestal

Assembles pedestal parts (1), (2), and (3) using the 5x5 allen key (C) to tighten screws (A).

STEP2 Install Supporting beam

Unscrews supporting beam (4) with 4x4 allen key (C), then stretches it before installing on columns (2) and (3).

STEP3 Install transmission rod

Connects transmission rod (5) with columns (2) and (3), tightening with the 2.5x2.5 allen key (D).

STEP4 Install supporting plate

Connects supporting plate (6) with columns (2) and (3) using the 5x5 allen key (C) to tighten screws (A).

STEP5 Install the power adaptor

Installs adaptor holder (11) and connects tabletop, control box (14), and handset (12) with screws (F).

STEP6-1 Tighten supporting beam and transmission rod

Tightens supporting beam (4) screws with 4x4 allen key (C) and transmission rod (5) nut with wrench (G).

STEP6-2 Install baffle and power adaptor

Installs baffle (8) to supporting beam (4) using screws (E) and tightens with 2.5x2.5 allen key (D).

STEP7 Connect all cables to the adaptor

Connects all cables to the adaptor (7) and uses cable ties (10) to manage and tidy cables.

Common Fault Treatment

How to Use Handswitch

Button Introduction

Explains the function of 'Up' (A) and 'Down' (V) buttons for desk adjustment.

Reset Function

Details how to enter reset mode by pressing the 'Down' button for 5 seconds.

Lifting Function

Describes manual lifting and optional automatic lifting mode with button press durations.

Troubleshooting

Advises resting for 18 minutes if the desk shows no response after a period of use.

Waste Disposal